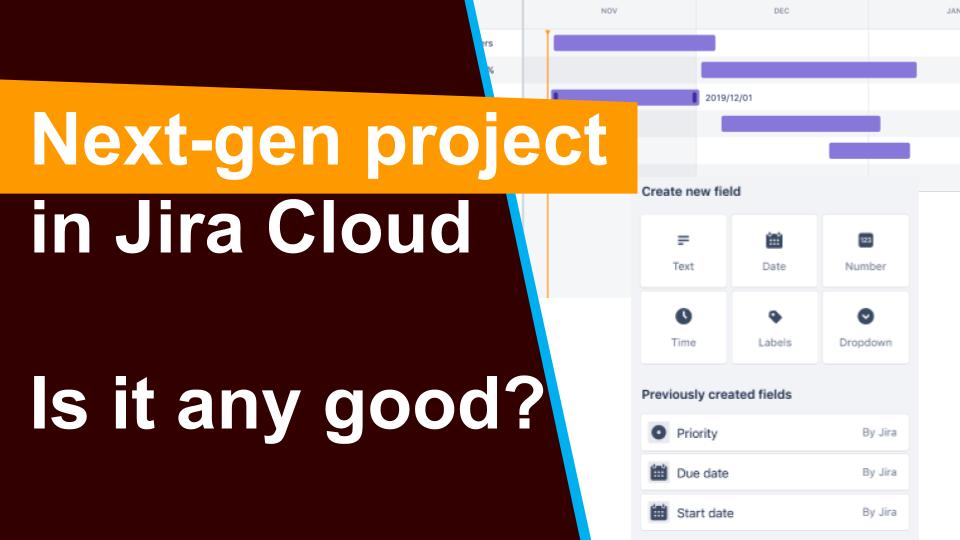
What are the next gen. projects in the Jira cloud?

Hi, my loving friends. Welcome to this course. In this article, I will explain to you about the next-gen project. This is the new feature of Jira and atlas Sian introduced it in the year 2018 so, let’s have a look at the agenda of this content. In this, we will learn what are the next-gen projects, how to create next-gen projects? How can we create issues and add issue types in next-gen projects and how to configure the board? So. Let’ start.

What are the next-gen projects?

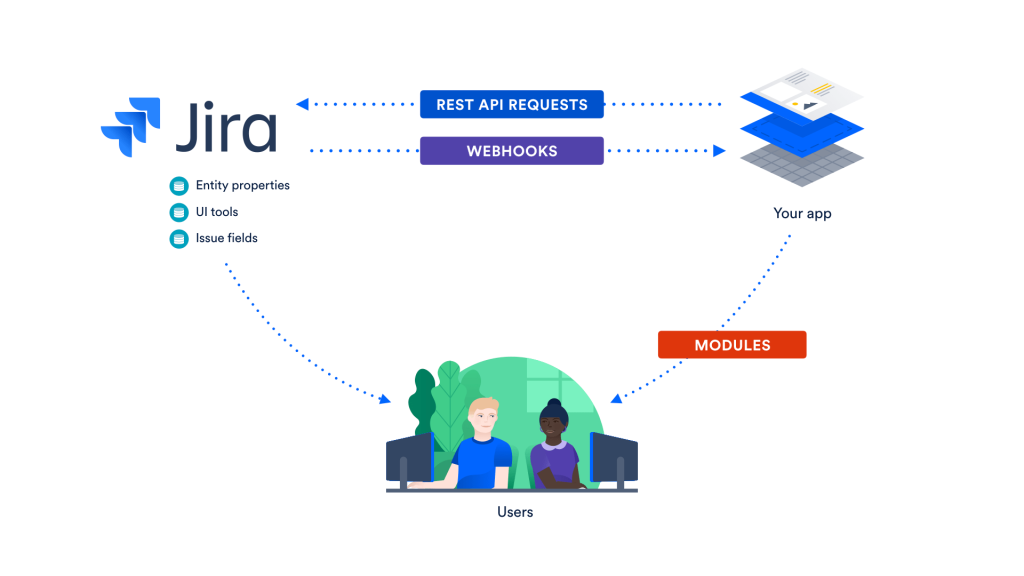
Next-gen projects are the newest projects in Jira software and it is only available on the cloud platform to the server one. If you are using a server the server platform and you wouldn’t be able to sit. The third one is configured by project team members. Any team member with the project’s admin role can modify the setting of their next-gen projects. There is no need to take the help of the Jira administrator to add the issue types and to add some fields to your screen. The Fourth one is it is easier and faster to configure than classic projects. You can easily configure setting like issue types and fields with drag-and-drop editing and reordering all in a single place because the best part of next-gen projects is the ability to enable and disable the features and it allows you to scale your projects as your team grows and tailor your projects to your team changing needs so, this is the best thing in the next-gen projects. And before going forward, I would like to tell you one more thing like atlas Sian is building the next-gen Jira software from the ground up.

How to create next-gen projects?

So, it doesn’t yet have all the features that classic projects have. And they are a lot of differences between the next-gen and the classic projects like if I’m talking about the configurations then in the classic projects. We are able to share the configurations from one project to another. But in the next gen, you can’t share it. If you did some configurations for the particular projects in the next-gen, you wouldn’t be able to share that configuration with another project. And there are many more like estimations in the classic projects, you have the options, you can give the estimations in story point in your basis but in the next-gen, there is only one option is available and that is a story point. If you will go to the next-gen cloud instance and see how can you create the next-gen projects and configure them? There will be your cloud instance and you will create the next-gen projects from there. You will see that there will be two options are available one is classic and the other is next-gen. if that particular option is created out for you then this is the permission issue so, before creating the next-gen project. I would like to tell you about the permission so, once you will click on the Jira setting and go to the global permissions, there will be your global permission schema, and create next-gen project option will be there. At the time, you will have permission to create the next-gen project. You will click on the next-gen project and you will see the interface is similar to the classic.

You can simply change the template from there but you will see only two templates are available one is scrum and another one is Kanban. If you will go with Kanban and name the project, you will see the access option (open, limited, private) and project key as a classic one. If you want to change the project key then you can do it there. You will go forward to clicking the create button then the next-gen project board will appear which would be similar to the classic one but what is the difference and how can you identify that this is the next-gen project but what will happen? If you will haven’t created it yet you didn’t create it. Maybe, you are using the project which is created by another one. You will see in the bottom line that you are in the next-gen project. You can find out and identify that you are using the next-gen project. You will see there are the options which are roadmap, board, pages, add an item, and project setting. A Roadmap is a good option which is given by the next-gen project. I will discuss this later in the course. I hope this will give you exact direction in the way of your Jira learning and about its next-gen project. So, you will stay tuned with this course for further next information regarding Jira next-gen project.
Related Video:

Tagged : / / / / / / / / /

How to set up a Jira cloud instance?

Hi dears, welcome to the course study of Jira. Today, through this article, I will explain to you how you will set up a Jira instance so that you can start to use Jira software for your projects. I have miscellaneous agenda for you. On which topics you will learn is types of Jira instance, what is the difference between server and Cloud instance? And how to create a cloud instance of Jira? So, let’s move forward to learn more about Jira concepts

Jira instance

Basically, there are two types of Jira instances, the first one is cloud and the second one is server. I will tell you what is the difference between the cloud and server instances and which one you should use if you are a beginner to learn about the Jira software. So, let’s move forward to learn about the cloud and the server instances.

Cloud vs server instance

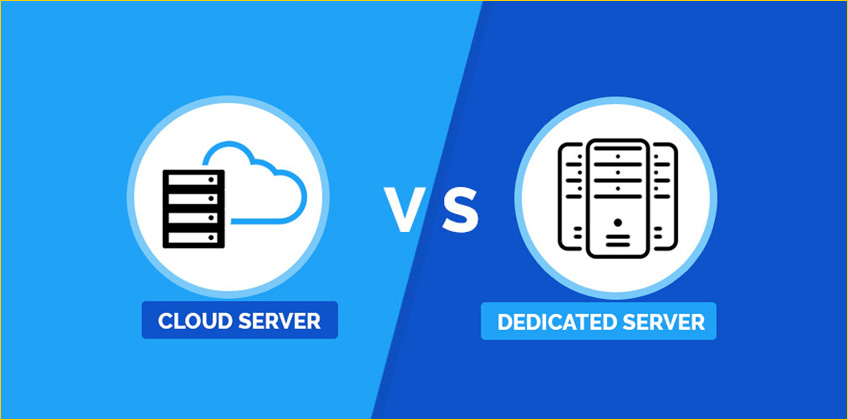
Here I will discuss the cloud instance first. So, what is a cloud instance? In the cloud instance rather than installing and maintaining, your product on your own server Atlas Sian host and set up your Jira application on the cloud for you so, this is the cloud instance and according to me, this is the best instance for the beginner, who want to learn from the very beginning. It is very fast because it’s easy to set up and get started in minutes as soon as you sign up. You may start working and inviting the team members and the second one is reduced costs because it helps to save money on the physical hardware maintenance installation support and any other hidden administration cost as well. This is a cloud instance so, everything is on the cloud and there is no need to bear the cost of your own hardware. The third one is no need to upgrade because on the cloud you get immediate access to the latest version on Jira so, there is no need to upgrade the cloud instance. The fourth one is security, it is very secure because atlas Sian takes the responsibility to maintain the security and compliances of your data and organization so, I describe the benefits of the cloud instances but I want to tell you one more thing about you don’t have direct access to change the database structure, file system, or other server infrastructure because you have a cloud instance and atlas Sian already set up your cloud instance. So, they will not give you administrator access. Let’s learn more about the server instance. What is a server instance? In the server instance, basically, you install, host, and run the Atlas Sian’s product on your own hosting environment. So, basically, those teams will prefer that want to manage all the details on their own and are able to handle the complexity of setting up and hosting the product on their own server. So, if your organization is very big and you have a department of administrators. They can manage the administrator task of the Jira or the server so, you can go with the server version but you are working in a startup and you want to learn your own then go with a cloud one.

In this complete course, I will also use the cloud instance because as I already told you, it is very easy to set up and everyone can access it from anywhere but in the server instance may be the organization installed it on the internal environment so, you would not be able to access it from outside the organization but in the cloud instance, you may access anywhere as I told you I will explain the cloud version in this course so may be the people who are using the server one they will see some differences in the UI because the cloud and the server UI is different in the server we have the navigation on the top but in the cloud we have the navigation in the left hand side and many more other differences in the UI so as I told you the difference between the cloud and the server instances so let’s move forward and see how can you create the cloud instance of Jira so for creating the cloud instance of JIRA so, you will go to the atlas Sian website, there is an atlas Sian official website www.atlassian.com once you will click on the product tab then you can see the complete list of the atlas Sian the product but there you will go with the Jira software so, you will click on Jira software.  It will take you on that page you may try it free then you can see the three plans and there will be cloud one. You may see try the product in the cloud and that is a free 7 days trail period you can go with any of the packages so, you will go there with any of the packages and you will go there with that one so, you will click on try it free, you will say that is a 7 day free cloud trial and it will give you the full access to all features, you can add the unlimited users and access to sales and technical support so, you will create the account there so you will use your ID and you will click on agree and sign up once you will end with the sign up process then you will see the screen where they will ask you to check your inbox and confirm your email ID so, you will go to your email so to verify that email you will click yes verify and it will redirect to you to the page if you want to select what type of team with do you work in then you can but for that you will skip and see the URL there that is a JIRA all sort of gentle that you have mentioned at the time of creating the account and you can invite your team with the help of the email address if you will enter the email address there and send the invitation then the people will get the email will get the invite and they can accept and use this environment and that JIRA instance for now you will skip that  and there they will ask are you new to Jira or are you already experienced with Jira then you can find out for now. That will be the next page where you can see there are the two types of templates are available first one is the classic template and the second one is a next-generation template. You can see there the Kanban is scrum and the bug tracking three templates are available and these three templates come under the software category so if you will go and will select all types you can see there are many more templates are available which are related to business. In this course, that’s it for today this is a process where you can create the cloud instance.

Related video:


Tagged : / / / / / / / / /

Enforce the JIRA issue id in a GIT commit message

Enforce the JIRA issue id in a GIT commit message

This can be done by using git hooks file location at .git/hooks/commit-msg. Following are the 2 way in whcih each Developers can set the Hooks in their developement envioronment.

Method – 1

# commit-msg.sh
#!/bin/sh
# This hook will make sure that the commit message contains a JIRA issue.
#
# To enable this hook, rename this file to ".git/hooks/commit-msg".
# Make sure to add execution permissions to the file.

export MESSAGE=$(<$1)
export JIRA_ISSUE_TAG='ISSUETAG-([0-9]*)'

if [[ $MESSAGE =~ $JIRA_ISSUE_TAG ]]; then
echo -e "\e[32mGreat, your commit message contains a JIRA issue!\e[0m"
exit 0;
fi

echo -e "\e[31mOh hamburgers ... You forgot to add a JIRA issue number!\e[0m";
exit 1;

Method 2 – This is another very good example to implement to force jira id in each commit message. http://nsbogan.com/tools/2015/06/04/jira-id-in-git-commit-messages

Tagged : / / / /

Jira Installation Issues and troubleshooting

rajeshkumar created the topic: Jira Installation Issues and troubleshooting

Error creating project, 401This resource requires WebSudo.

Regards,
Rajesh Kumar
Twitt me @ twitter.com/RajeshKumarIn

Tagged :

Top 10 Bug/Issue Tracking Tools | List of Best Bug/Issue Tracking Tools

top-10-bug-issue-tracking-tool
Just imagine a situation when you put so much efforts to build a software or application and release it and after that users get error or issues in it on the very first use. That’ it, all your efforts will be useless. So, testing is an important aspect which you can not miss in your “Software Development Life-cycle” (SDLC). But, for that you need some tools or I would say good tools, so that you can make sure you are going to give an error or bug free experience to your application or software end users.
But, there is one big challenge that you will face, How to choose or select best bug tracking tools? Don’t worry, I am going to make this task easy for you. I have done some research and make a list of top ten bug tracking tools which I am going share.
So, without any further delay, let’s check out

1. Bugzilla


 Bugzilla

Bugzilla is one of the most popular and trustable bug tracking software serving since 18 long years. It’s belongs to Mozilla Foundation and was released in the year 1998 and written in Perl. Bugzilla is open sourced and free to use.
Key Features
  • Basic and advance search features with save & share options
  • Notifications by Email
  • Scheduled Reports by Email
  • Advanced reporting system
  • Auto Detection of Similar Bugs
  • Patch Viewer which makes code review much easier
  • Excellent Security
  • Localization
  • Move Bugs Between Installations without any manual work
  • Request System where you can ask other users to do something with a particular bug or attachment
  • Optimized database structure for increased performance and scalability

2. Mantis Bug Tracker

Mantis Bug Tracker


Mantis or Mantis BT is also an open source bug tracking tool. It’s is written in PHP and serving since 2000 almost for 17 years. It was first developed by “Kenzaburo Ito” and later by few others as a team project.
Key Features
  • Easy to Install & Use
  • No limit on the number of users, issues, or projects
  • Email notifications
  • Functionality can be extended by plugins
  • Flexibility to customize issue fields, notifications and workflow
  • Per project different access level for users
  • Source Control Integration
  • Easy collaboration with team members & clients
  • Built-in Reporting
  • Available in 68 localizations
3. Jira
Jira
Jira is a bug/issue tracking and project management tool which was developed by Atlassian, Inc. almost 15 years ago in the year 2002. It is written in Java. It’s available under commercial license but in few scenarios like official non-profit organizations, charities, academic or religious organizations you can use it for free.
Key Features
  • Code Integration – automatically updating issues when they check in code
  • Keep history of issues from either customers or bugs
  • Multiple Workflows
  • Easy to assign and prioritise the bug issue as per the importance and urgency
  • Comprehensive Issue Reports
  • Customizable Dashboard
  • Bugs can be imported from a CSV file
  • Trigger notifications allow auto informing to the next reviewer
  • Addons availability like Capture for JIRA which allows backlog to release


4. Redmine

Redmine

Redmine is an open source bug tracking tool which was developed by Jean Philippe Lang in the year 2006 (almost 10 yrs ago) and it is written in Ruby on rails.
Key Features
  • Define you own statuses and issue types
  • Workflow transitions can be set up for each issue type and role
  • Feeds & email notifications
  • Issue creation via email
  • Multi Language support
  • User self-registration support
  • Time tracking functionality
5. Trac
Trac
Trac is also an bug tracking tool written in python and developed by Edgewall Software 13 years ago in the year 2004. It’s available as open source and as a BSD license product.
Key Features
  • Resolve issues through multiple workflows
  • Ticket Tracking
  • Email notification
  • Plugins support for standard functionality
  • Customizable workflow
  • Unicode Supported
  • Code Integration
  • Custom Fields
  • Integrated wiki
  • Collaboration – Create teams and groups
6. The Bug Genie

The Bug Genie

The bug Genie is an open source bug tracking tools which is developed by Daniel Andre Eikeland and later by there team in the year 2003. This bug tracking software is written in PHP and supports cross platforms. It is said that it is one of the most beautiful tool to use and having a great interface.
Key Features
  • Easy to use
  • Finding issues is simple and fast
  • Customise search results
  • Custom issue fields
  • RSS support
  • Issue-related actions are available with a click
  • Integrated quick search
  • Customizable workflow
7. Fossil

Fossil

Fossil was first released 11 years ago in the year 2006. This is written in C, SQL and developed by D. Richard Hipp. It’s available under BSD license. Fossil also supports cross platforms
Key Features
  • User friendly web interface
  • Auto sync mode
  • Custom Fields
  • SUpports Multiple Projects
  • RSS Notification interface
  • Easy collaboration
  • Ticket Change Artifacts
8. eTraxis

eTraxis

eTraxis is written in PHP and supports multi-database and multi languages. It is an open source bug tracking tool. Let’s check out eTraxis key features
Key Features
Complete customization of the workflow
Extensive permissions management
Allow Commenting
Email notifications
Flexible to set up your own filters & views
Supports attachments in reported issue
You can check out complete history of all events, actions, and changes
9. WebIssues

WebIssues

WebIssues is a multi platform open source issue tracking tool. It is written in PHP and works with MySQL database. It is amongst easy to use issue tracking softwares with some good features.
Key Features
  • Tracking new and modified issues
  • Filtering and searching issues
  • Easy installation and setup
  • Reports can be exported as HTML and PDF documents
  • Issues can also be exported in CSV format
  • Email notifications
  • Periodic reports can be sent
  • Security and rights management
  • supports team collaboration
  • Easy to Customize
10. HP ALM/ Quality Center

HP ALM/ Quality Center

HP Quality center is written in .NET & Java which is developed by Hewlett-Packard (formerly Mercury Interactive). It was first released in the year 1995. It is a quality management tool with integrated bug tracking system. It’s available under commercial license but you can use free trial for few days.
Key features
  • Test Planning integration
  • Customizable workflow
  • Custom Fields
  • Plug Ins Availability
  • Supports Multiple Projects
  • Web, GUI & Rest input interface
  • Email Notifications
  • Reporting and graphing
  • Collaboration – supports working in common integrated development environments

So, That’s it. These are most popular bug tracking tools used in software industry these days. Hope my efforts will help while choosing the bug/issue tracking tool. But, now it’s your turn. If you think any other tool should be listed here instead of this than please share with us in the comment section below.

Tagged : / / / / / / / / / / / / / / / / / / / / / / / /

How to install Atlassian Jira using Docker?

install-atlassian-jira-using-docker
Install Atlassian Jira using Docker
Download and Run the jira latest:
docker run –detach –publish 8080:8080 cptactionhank/atlassian-jira:latest
Then simply navigate your preferred browser to http://[dockerhost]:8080 and finish the configuration.
Notes:
JIRA Home location: /var/atlassian/jira
JIRA Installation location: /opt/atlassian/jira
Reference:
Tagged : / / / / / / / / / /

Top 5 IT Management Tools | IT Management Software

it-management-tools

IT Management Software | Top 5 IT Management Tools

  • Servicenow
  • BMC Remedy
  • Jira
  • Salesforce
  • Sharepoint
Tagged : / / / / / / / / / / / / / / / / /

How to Install and Configure Jira in Linux | Jira Tutorial

jira-installation-and-configuration-in-linux

Download JIRA package from 

https://www.atlassian.com/software/jira/download?b=j

Linux Installation:

wget https://www.atlassian.com/software/jira/downloads/binary/atlassian-jira-6.4.12-x64.bin

chmod atlassian-jira-6.4.12-x64.bin

Execute the ‘.bin’ file to start the console wizard

stop iptables

service jira start/stop

http://uvo1kievugg76unbcj9.vm.cld.sr:8080/

& follow the instructions

Reference

https://confluence.atlassian.com/jira/installing-jira-on-linux-191501165.html

Tagged : / / / / / / / / / / / / /

JIRA Training | Jira Course | Jira Expert Trainers | India

jira-training

scmGalaxy is a community initiatives based on Software configuration management that helps community members to optimize their software development process, Software Development Life Cycle optimization, Agile Methodologies and improve productivity across all aspects of Java development, including Build Scripts, Testing, Issue Tracking, Continuous Integration, Code Quality and more. scmGalaxy group that helps organisations optimize their software development process. We provide consulting, training and mentoring services in Agile Development Practices such as Version Management, Continuous Integration, Build Management, Test-Driven Development, Acceptance-Test Driven Development, Build Automation, Code Quality Practices and Automated Testing.

We provide job oriented training in the area of Configuration management, Build and Release Engineering. Candidates with engineering or software background and looking to either start or change their career to Build and Release Engineering, would benefit most from this training. Instructor-led training course offered in India, Bangalore, Delhi, Pune, Mumbai and Hydrabad. Instructor is an expert in Software configuration management, Build and release engineering with more than 15 years industry experience in india.The Goal of the course make the training attendants equip with all the concepts of build and release engineering.

Contact us at info@scmGalaxy.com

JIRA Training

In this course, attendees learn how JIRA is organized and gain hands-on experience working with the JIRA application by performing the most common tasks. Attendees will learn how to harness JIRA Agile to help create, plan, and manage work from inception to completion Attendees work through real-life scenarios using a preconfigured instance of JIRA. The JIRA in the Enterprise workshop provides students with strategies, tools, and techniques for managing JIRA in the enterprise. The highly interactive and participative course helps attendees develop a strategy to better understand and deal with the unique challenges associated with installing, configuring, and managing JIRA in the enterprise. Attendees will gain a solid foundation for all of the configurable components involved in setting up and managing JIRA projects By logging in to JIRA as users with various job roles and JIRA roles, attendees gain an understanding of who typically performs which tasks and why. After attending this course, attendees will learn the basics of managing and tracking team issues and projects. They will return to their jobs with increased confidence and a better command of often-used JIRA’s features.

  • JIRA Essentials
  • JIRA Agile in Practice
  • JIRA Application Administration – Part 1
  • JIRA Application Administration – Part 2
  • Customizing JIRA Workflows
  • JIRA in the Enterprise
Chapter 1: Working with Projects
Create a New JIRA Project
Create a New Issue in JIRA
Understand the Project Browser
Add Project Components and Versions
Import Issues into JIRA
Chapter 2: Working with Issues
Understand Issue in JIRA
Operate and Work with Issues
Use Subtasks to Better Manage and Structure Your Issues
Link Issues to Other Resources
Create and Manage Issue Types
Chapter 3; Working with Screens and Fields
Manage and Configure Screens in JIRA
Create New Screens
Create New Custom Fields
Controlling Field Behaviors
Apply Field Configuration to Specific Issue Types and Projects
Chapter 4: Workflows
Create New Workflow Steps and Transitions
Add the Workflow Conditions
Add the Workflow Validators
Add Workflow Post Functions
Apply Multiple Workflows to One Project
Chapter 5: Security and Permissions
Manage the User and Group Membership
Control Access to JIRA with Global Permissions
Control Project and Issue Operation Access with Permission Scheme
Restrict Access to an Issue with Issue Security Scheme
Connect JIRA to LDAP
Chapter 6: Notifications
Enable JIRA to Send Outgoing e-mail Notifications
Manage Notification Recipients for Updates in JIRA
Create Custom Events and e-mail Templates
Create a mail handler to create issues/comments in JIRA from e-mails
Chapter 7: Searching and Reporting
Search for Issues in JIRA in the Basic Search Mode
Search for Issues in JIRA in the Advanced Search Mode
Search for Your Searches as Filters
Create Your Own Dashboard
Chapter 8: Advanced Features
Extend JIRA with Custom Add-ons
Integrate JIRA with Other Atlassian Applications
Navigate between JIRA and Other Applications
Use JIRA As a Feedback Collecting System

Course Objectives
To bring your team up to speed with agile development, We can also run the from Continuous Integration to Continuous Delivery with autoamted course within your premises.

Course Schedule
This course is an intensive 1-day & 2-day workshop with a mixture of teaching and lab exercises. Currently, this course is offered exclusively as an on-site course. Please contact us for more details.

Audience
This is a hands-on, practical course designed to teach specialised skills for real-world development situations. It is thus primarily aimed at a SCM Engineer, Build/Release Engineer and developer audience.

Approach
The course is modular and flexible – depending on specific student needs and requests. Through our trainings, you benefit from the wide experience and architectural expertise of our team. We bring that experience to you in an highly interactive, intensely hands-on setting.

Tagged : / / / / / / / / / / / / / / / / / / / /