What are the next gen. projects in the Jira cloud?

Hi, my loving friends. Welcome to this course. In this article, I will explain to you about the next-gen project. This is the new feature of Jira and atlas Sian introduced it in the year 2018 so, let’s have a look at the agenda of this content. In this, we will learn what are the next-gen projects, how to create next-gen projects? How can we create issues and add issue types in next-gen projects and how to configure the board? So. Let’ start.

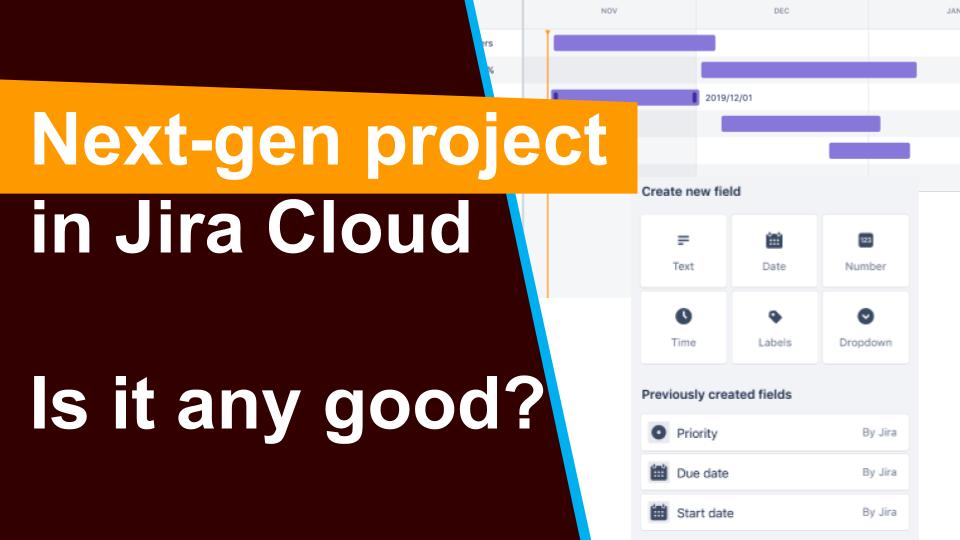
What are the next-gen projects?

Next-gen projects are the newest projects in Jira software and it is only available on the cloud platform to the server one. If you are using a server the server platform and you wouldn’t be able to sit. The third one is configured by project team members. Any team member with the project’s admin role can modify the setting of their next-gen projects. There is no need to take the help of the Jira administrator to add the issue types and to add some fields to your screen. The Fourth one is it is easier and faster to configure than classic projects. You can easily configure setting like issue types and fields with drag-and-drop editing and reordering all in a single place because the best part of next-gen projects is the ability to enable and disable the features and it allows you to scale your projects as your team grows and tailor your projects to your team changing needs so, this is the best thing in the next-gen projects. And before going forward, I would like to tell you one more thing like atlas Sian is building the next-gen Jira software from the ground up.

How to create next-gen projects?

So, it doesn’t yet have all the features that classic projects have. And they are a lot of differences between the next-gen and the classic projects like if I’m talking about the configurations then in the classic projects. We are able to share the configurations from one project to another. But in the next gen, you can’t share it. If you did some configurations for the particular projects in the next-gen, you wouldn’t be able to share that configuration with another project. And there are many more like estimations in the classic projects, you have the options, you can give the estimations in story point in your basis but in the next-gen, there is only one option is available and that is a story point. If you will go to the next-gen cloud instance and see how can you create the next-gen projects and configure them? There will be your cloud instance and you will create the next-gen projects from there. You will see that there will be two options are available one is classic and the other is next-gen. if that particular option is created out for you then this is the permission issue so, before creating the next-gen project. I would like to tell you about the permission so, once you will click on the Jira setting and go to the global permissions, there will be your global permission schema, and create next-gen project option will be there. At the time, you will have permission to create the next-gen project. You will click on the next-gen project and you will see the interface is similar to the classic.

You can simply change the template from there but you will see only two templates are available one is scrum and another one is Kanban. If you will go with Kanban and name the project, you will see the access option (open, limited, private) and project key as a classic one. If you want to change the project key then you can do it there. You will go forward to clicking the create button then the next-gen project board will appear which would be similar to the classic one but what is the difference and how can you identify that this is the next-gen project but what will happen? If you will haven’t created it yet you didn’t create it. Maybe, you are using the project which is created by another one. You will see in the bottom line that you are in the next-gen project. You can find out and identify that you are using the next-gen project. You will see there are the options which are roadmap, board, pages, add an item, and project setting. A Roadmap is a good option which is given by the next-gen project. I will discuss this later in the course. I hope this will give you exact direction in the way of your Jira learning and about its next-gen project. So, you will stay tuned with this course for further next information regarding Jira next-gen project.

Related Video:

Tagged : / / / / / / / / /

What is composer.JSON? How do I use it?

A file is generated from the composer tool. Which is the main file of the whole project which we call the composer file. The extension file is composer.json. It is the main composer.json that defines your project requirements.

How to setup a new or existing package

You can also say how to create a composer.json file in a Project to make it a package.

  • Ussing composer init Command
  • Manually Creating composer.json file

Ussing composer init Command

composer init – It is used to set up a new or existing package. The init command creates a basic composer.json file in the current directory.
Every project is a package.
As soon as you a composer.json in a directory, that directory is a package.

composer.json

Package name – in order to make that package installable you need to give it a name. It consists of vendor name and project name, separated by/. The name can contain any character, including white spaces, names are case insensitive, the convention is all lowercase and dashes for word separation. It is required for published packages(libraries).

Syntax:- vendorname/packagename

Ex:- devopsschool/dev

Description- A short description of the package. Usually, this is one line long. It is required for published packages(libraries).

Authors – The authors of the package. This is an array of objects.

Each author object can have the following properties:

  • name: The author’s name. Usually their real name.
  • email: The author’s email aaddress.
  • homepage: An URL to the author’s website.
  • role: The author’s role in the prject (e.g. developer or translator)

Minimum Stability – Composer accepts these flags as minimum-stability settings. The defualt setting for minimun-stability if not provided is assumed to be stable, but you sould define any of the flags down the hierarchy.

  • stable (most stable)
  • re
  • beta
  • alpha
  • dev (least stable)

Package Type – Package types are used for custom installation logic. If you have a package that needs some special logic, you can define a custom type. It default to library.

  • Library
  • Project
  • Metaapackage
  • Composer-plugin

License – The license of the package. This can be either a string or an array of strings.

Ex:- MIT

Tagged : / / / /

Pointer for Excellent Essays

Strategy

Planning is necessary to prospering in practically any sort of venture that you undertake. Spend some time to plan on exactly how to tackle your writing. Consider the primary theme of your essay, the info that will require and also how you are getting it. It’s additionally below where you analyze your visitors as well as guess on just what their assumptions could be reviews of essay writing services help.

Brainstorm

Think regarding your essay, just how you would like it to move. Envision on just what you would certainly like your essay to be like when you are done writing.

Study Thoroughly

A persuasive essay is interesting. It consists of the element that the visitor can delight in as well as take in. The only way that at you can achieve this in your essay is by making certain that do detailed research on the subject of your composition before you begin composing. This will not only make your essay insightful however also qualified.

Select an Appropriate

Subject It is essential that your visitors locate you to be relevant. Your composition should certainly be in touch with fact as well as attached to the topic, and it should, in no means, show up to be irrelevant to the visitor

Thesis Declaration

This is a declaration that will tell your visitors just what your essay is everything about. It ought to be simple yet precise, not be prolonged neither plain. Make it produce interest in the visitor.

Overview

Created an organized overview of just how your ideas will certainly move. This will help you organize your suggestions in a attractive and rational way. It will also be crucial to conserving you time as you create.

Now Create

Adhering to the overview that you have prepared, took down the information that was acquired in your research. As you do this, it is critical to make use of a language that is suitable to your viewers and also stay concentrated on the topic.

Oneness and Coherence

Your writing ought to be meaningful. The viewers needs to follow exactly what you have actually created without much struggle. Your concepts should connect to your thesis statement. Your points should connected to each other as well as additionally circulation in a reasonable fashion.

Follow The Requirements offered

You’ll be offered requirements to adhere to in your writing; stay with these guidelines. Falling short to adhere to such requirements might make your composition be taken into consideration nullified.

Proofread

You have to give your essay the perfect surface. This will certainly be done as you check your work.

Tagged : / / / / / / / / / /

Questionnaire: Access your SCM Process in Project

TABLE OF CONTENTS

1…… General Assessment Questions. 2

1.1     Questions to analyze the development process description.. 2

1.2     Questions to characterize the project application.. 2

1.3     Questions to identify the supporting tools. 2

2…… Assessment on Configuration and Change Management   2

2.1     Project/Development Managers. 2

2.2     Developers. 3

2.3     Testers. 3

2.4     Configuration Manager. 3

3…… Assessment on Build and Release Management.. 3

3.1     Build Engineer. 3

3.2     Release Engineer. 4


1           General Assessment Questions

1.1      Questions to analyze the development process description


Which of the following do you get from your existing process?

·         Examples

·         Guidelines

·         Artifact templates

·         Activity descriptions

·         Artifact descriptions


1.2      Questions to characterize the project application


  • What is the size of each project (duration, persons, person years,  LOC)

·         What type (maintenance / enhancement / new development / prototype /

§  feasibility)

  • What type of development model is being used?
  • Are we using any process models like UCM, RUP or any other?
  • Any industry/domain specific standards (like CMMI, ITIL etc.) to be followed?


1.3      Questions to identify the supporting tools


·         What are the tools that you currently use in your work?

·         How is the integration among the above tools?

·         Are we using the tool features the way they are designed or intended?


2           Assessment on Configuration and Change Management

2.1         Project/Development Managers


·         How do you maintain all the artifacts together and version them?

·         Where are the people working on the project located?

·         What’s the difference between Developer CM and Release CM?

·         How do you assess, and track the impact of a proposed change?

·         How do you manage system integration of modules developed by individual developers?

·         How many product versions are you supporting at this moment?

·         Who is the designated Configuration Manager?


2.2         Developers


·         How do you baseline project artifacts?

·         Can you build your system reliably and repeatedly?

·         Explain your labeling scheme?

·         Can you show me what versions went into a certain release?

·         What does the version tree for this file look like?

·         How many product versions are you supporting at the moment?

·         What is the version control tool being used? Is it user friendly?

·         What is the bug tracking/change management tool being used? Is it user friendly?


2.3         Testers

·         Do you know what files/documents should be delivered?

·         How do you assess, and track the impact of a proposed change?

·         Can you show me what artifact versions went into a certain release?

·         How comfortable are you working with Bug/Change management tool?


2.4         Configuration Manager

·         Do you know what files/documents should be delivered?

·         How do you track who changed what, when, where, and why?

·         How long does a build or release take?

·         Is there a Configuration Management Plan document?

·         Is there a tight integration between Version control tool and Bug/Change tracking tool?

·         How the parallel (if any) development is enabled? Any limitations with the current branching strategy?

·         Is this project development spanned across multiple sites? If so, what is your multi-site strategy?


3          Assessment on Build and Release Management

3.1         Build Engineer


  • What is the build process adopted (automated/manual)?
  • Are there nightly builds?
  • Is there continuous integration?
  • Are there smoke and sanity tests at the end of the build?
  • What is the build acceptance criterion (BAT)?
  • What is the build duration? Is it optimal?
  • How are pre-conditions to the build verified?
  • Are there any build environment integrated automated unit test-cases?
  • Is there any enforcement tool on coding standards?
  • Is there any code coverage tool being used?
  • Are the post build activities automated?
  • Any additional practices (like checksum generation, signing the build artifacts) in place as part of the build?
  • Are there any scripting technologies used in automating build process?
  • Is Labeling strategy well-defined?
  • If any third party tool is being used for packaging, is that package creation process automated?


3.2         Release Engineer


  • How many major, minor releases a year per project?
  • How many customers per release per project?
  • How do you deliver the releases to the customers? – Is it physical media distribution or Push/Pull mechanism from web or any other process?
  • Is the distribution CD/DVD creation process automated?
  • What is the size of the release deliverable?
  • What are the contents of a release?
  • How is the release bundle tested?
  • How many platforms are certified? How different are the release packages?
  • Is there any release check-list for cross-check?
  • Is any part of the release process automated?
  • Is there a need for i18n? If yes, is the i18n release handled separately?
  • In case of installers, is there installer testing? Is it automated?
  • Is the release schedule well-planned?
  • Are you delivering patches in well constructed and cost effective way?
  • Is there any release audit process in place?
  • How are you tracking your releases?
  • Is there any legal compliance in place while shipping the release to the customers?
Tagged : / / / /

Types of Builds: Developers and Project

I like to say that there are really only two types of builds: ones that work and ones that don’t. Seriously, though, when you’re shipping a product, you should consider these two different types of builds:

  • Developers’ (local machine builds)— These types of builds often happen within an editor such as Visual Studio, Emaqs, Slick, or VI. Usually, this is a fast compile/link of code that the developer is currently working on.
  • Project (central build process)— This type of build typically involves several components of an application, product, or a large project, such as Windows, or in some cases several projects included in a product, such as Microsoft Office.

The developer’s build process should be optimized for speed, but the project build process should be optimized for debugging and releases. I am talking about optimizing the process, not compiler or linker optimization switches. Although speed and debugging are important to everyone who is writing code, you must design a project build process to track build breaks and the offender(s) as quickly as possible because numerous people are waiting for a build to be released. For a developer, what seems to be most important is clicking some type of Build and Run button to make sure the code compiles without errors and then checking it in. For the build team, building without errors and having the ability to track down the person who broke the build is the most important thing.


Reference: The Build Master: Microsoft’s Software Configuration Management Best Practices

Tagged : / / /

BuildForge – Exporting projects using bfexport | BuildForge Guide

buildforge-exporting-project-bfexport

Location:

BuildForge Home Dir – Platform

To display command syntax, use bfexport with no options.

 $ ./bfexport

 Usage: bfexport -l

 or:

 bfexport [-c comment] [-f filename] [-g] [-s] [-L] [-n] <Project name or UUID> <Version name>

 Options :

 -l: Lists all projects in the system and their project UUID.

-c : Add a comment to the output XML.

-f : File to write the output to.

-g : Include group users.

-s : Include all servers.

-C : Include servers collectors (requires -s).

-L : Include LDAP configuration.

-n : Include template notifications.

Project must be a valid project name or project UUID.

Example

To list the project names and project IDs that are stored in the Build Forge database, use

 > bfexport -l

To send project data to an XML file,

> bfexport -f <file_name>. You must specify the -f <file_name> option to generate a file that can be used to import project data.

To write output to a file, use the -f <file_name> option. In the following example, helloworld is the output file name and the project ID is used instead of the project name.

> bfexport -c “Saving a copy of project before making changes” -f helloworld 675B57CC-8366-11DD-B2E0-043C04E44E1A

To export the default project snapshot only, use the <project_name>.

> bfexport -f helloworld test_project

To export one snapshot of a project, use the <project_name> <snapshot_name>.

> bfexport -f helloworld test_project snapshot_1

If the parent project snapshot is not the default project, you must specify the <project_name> followed by the parent keyword to export the parent project snapshot.

 > bfexport -f helloworld test_project parent Document

 ./bfexport -c “Saving a copy of project before making changes” -C -s -f Citius-Coverity-Full-parent 6d66e5050c5a1000bcd5cd010bc00bc0

Tagged : / / / / / / / / / / / / /

Project Object Model – What is POM?

pom

What is POM
A Project Object Model or POM is the fundamental unit of work in Maven. It is an XML file that contains information about the project and configuration details used by Maven to build the project. It contains default values for most projects. Examples for this are the build directory, which is target; the source directory, which is src/main/java; the test source directory, which is src/main/test; and so on.
The POM was renamed from project.xml in Maven 1 to pom.xml in Maven 2. When executing a task or goal, Maven looks for the POM in the current directory. It reads the POM, gets the needed configuration information, then executes the goal.
Some of the configuration that can be specified in the POM are the project dependencies, the plugins or goals that can be executed, the build profiles, and so on. Other information such as the project version, description, developers, mailing lists and such can also be specified.

Super POM
The Super POM is Maven’s default POM. All POMs extend the Super POM unless explicitly set, meaning the configuration specified in the Super POM is inherited by the POMs you created for your projects. The snippet below is the Super POM for Maven 2.0.x.
The snippet below is the Super POM for Maven 2.0.x.
4.0.0
Maven Default Project

central
Maven Repository Switchboard
default
http://repo1.maven.org/maven2

false

central
Maven Plugin Repository
http://repo1.maven.org/maven2
default

false

never

target
target/classes
${artifactId}-${version}
target/test-classes
src/main/java
src/main/scripts
src/test/java

src/main/resources

src/test/resources

target/site
release-profile

performRelease

true
org.apache.maven.plugins
maven-source-plugin

attach-sources

jar

true
org.apache.maven.plugins
maven-javadoc-plugin

attach-javadocs

jar

true
org.apache.maven.plugins
maven-deploy-plugin

true


Minimal POM
The minimum requirement for a POM are the following:

  • project root
  • modelVersion – should be set to 4.0.0
  • groupId – the id of the project’s group.
  • artifactId – the id of the artifact (project)
  • version – the version of the artifact under the specified group

Here’s an example:


  4.0.0
  com.mycompany.app
  my-app
  1

A POM requires that its groupId, artifactId, and version be configured. These three values form the project’s fully qualified artifact name. This is in the form of ::. As for the example above, its fully qualified artifact name is “com.mycompany.app:my-app:1”.
Every Maven project has a packaging type. If it is not specified in the POM, then the default value “jar” would be used.
Project inheritance
Elements in the POM that are merged are the following:

  • dependencies
  • developers and contributors
  • plugin lists (including reports)
  • plugin executions with matching ids
  • plugin configuration
  • resources

The Super POM is one example of project inheritance, however you can also introduce your own parent POMs by specifying the parent element in the POM, as demonstrated in the following examples.

Tagged : / / / / / / / / / / / /

Ant : Ant-Contrib – Introduction and Installation Process/Guide

ant-ant-contrib

What is Ant-Contrib Tasks?

The Ant-Contrib project provides a collection of tasks and types that extend Ant to work as a scripting language as well as a build tool.

Many developers want more from Ant than the ability to define dependencies. Ant-Contrib adds extra functionality to let Ant act more like a programming lanuage. Most tasks require Ant 1.5 or higher to work properly.

“Ant-Contrib Tasks” is an “independent third party” library of useful additional procedural and utility ApacheAnt Tasks.


Pre-Requisite:

First you must install Apache Ant itself, most of the Ant-Contrib tasks require Ant 1.5 or higher to work properly. You can download Ant from Apache.

Download Link: http://sourceforge.net/project/showfiles.php?group_id=36177

“Ant-Contrib Tasks” is also TWO independent ant task libraries:

Installation

See the cc tasks for installation instructions for cpptasks. To install ant-contrib:

  1. Copy ant-contrib-0.3.jar to the lib directory of your Ant installation. If you want to use one of the tasks in your own project, add the lines
2.  <taskdef resource="net/sf/antcontrib/antcontrib.properties"/>

to your build file.

  1. Keep ant-contrib-0.3.jar in a separate location. You now have to tell Ant explicitly where to find it (say in /usr/share/java/lib):
4.  <taskdef resource="net/sf/antcontrib/antcontrib.properties">
5.    <classpath>
6.      <pathelement location="/usr/share/java/lib/ant-contrib-0.3.jar"/>
7.    </classpath>
8.  </taskdef>
 
 
Manual and weblinks:
http://ant-contrib.sourceforge.net/ant-contrib/manual/tasks/index.html
http://sourceforge.net/projects/ant-contrib
http://sourceforge.net/project/showfiles.php?group_id=36177
 
Tagged : / / / / / / / / / / / / / /