How to Setup Puppet Learning VM – Complete Process/Guide

setup-a-puppet-learning-vm
Download the VM(Zip File here)


Minimum requirements

  • Internet-enabled Windows, OS X, or Linux computer with 10GB free space and a VT-x/AMD-V enabled processor.
  • Up to date virtualization software. See the setup instructions below for details.

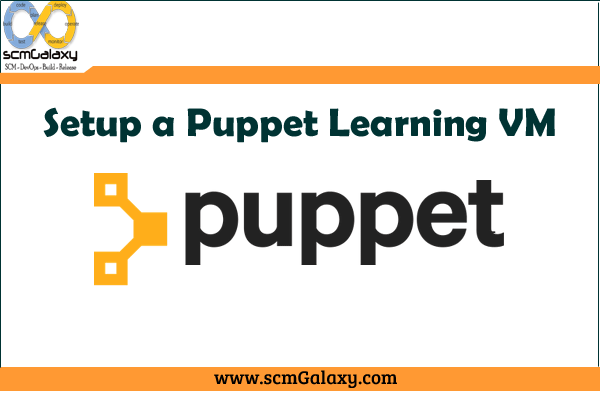
Setting up the Learning VM

  1. Before beginning, you may want to use the MD5 sum provided at the VM download page to verify your download. On Mac OS X and *nix systems, you can use the command md5 learning_puppet_vm.zip and compare the output to the text contents of thelearning_puppet_vm.zip.md5 file provided on the download page. On Windows systems, you will need to download and use a tool such as the Microsoft File Checksum Integrity Verifier.

  2. Get an up-to-date version of your virtualization software. We suggest using either VirtualBox or a VMware application appropriate for your platform. VirtualBox is free and available for Linux, OS X, and Windows. VMware has several desktop virtualization applications, including VMWare Fusion for Mac and VMware Workstation for Windows.

  3. The Learning VM’s Open Virtualization Archive format must be imported rather than opened directly. Launch your virtualization software and find an option for Import or Import Appliance. (This will usually be in a File menu. If you cannot locate an Import option, please refer to your virtualization software’s documentation.)

  4. Before starting the VM for the first time, you will need to adjust its settings. We recommend allocating 4GB of memory for the best performance. If you don’t have enough memory on your host machine, you may leave the allocation at 3GB or lower it to 2GB, though you may encounter stability and performance issues. Set the Network Adapter to Bridged. Use an Autodetect setting if available, or accept the default Network Adapter name. (If you started the VM before making these changes, you may need to restart the VM before the settings will be applied correctly.) If you are unable to use a bridged network, we suggest using the port-forwarding instructions provided in the troubleshooting guide.

  5. Start the VM. When it is started, make a note of the IP address and password displayed on the splash page. Rather than logging in directly, we highly recommend using SSH. On OS X, you can use the default Terminal application or a third-party application like iTerm. For Windows, we suggest the free SSH client PuTTY. Connect to the Learning VM with the login root and password you noted from the splash page. (e.g. ssh root@<IPADDRESS>) Be aware that it might take several minutes for the services in the PE stack to fully start after the VM boots. Once you’re connected to the VM, we suggest updating the clock with ntpdate pool.ntp.org.

  6. You can access this Quest Guide via a webserver running on the Learning VM itself. Open a web broswer on your host and enter the Learning VM’s IP address in the address bar. (Be sure to use http://<ADDRESS> for the Quest Guide, as https://<ADDRESS> will take you to the PE console.


Troubleshooting

For the most up-to-date version of this troubleshooting information, check the GitHub repository. If nothing here resolves your issue, feel free to email us at learningvm@puppetlabs.com and we’ll do our best to address your issue.

For issues with Puppet Enterprise that are not specific to the Learning VM, see the Puppet Enterprise Known Issues page.

The cowsay package won’t install

The Learning VM version 2.29 has an error in the instructions for this quest. The cowsay package declaration should includeprovider => 'gem', rather than ensure => 'gem'.

If you continue to get puppet run failures related to the gem, you can install the cached version manually: gem install /var/cache/rubygems/gems/cowsay-0.2.0.gem

I completed a task, but the quest tool doesn’t show it as complete

The quest tool uses a series of Serverspec tests for each quest to track task progress. Certain tasks simply check your bash history for an entered command. In some cases, the /root/.bash_history won’t be properly initialized, causing these tests to fail. Exiting the VM and logging in again will fix this issue.

It is also possible that we have written the test for a task in a way that is too restrictive and doesn’t correctly capture a valid syntactical variation in your Puppet code or another relevant file. You can check the specific matchers by looking at a quest’s spec file in the ~/.testing/spec/localhost/ directory. If you find an issue here, please let us know by sending an email tolearningvm@puppetlabs.com.

Password Required for the Quest Guide

The Learning VM’s Quest Guide is accessible at http://<VM's IP Address>. Note that this is http and not https which is reserved for the PE console. The PE console will prompt you for a password, while no password is required for the Quest Guide. (The Quest Guide includes a password for the PE console in the Power of Puppet quest: admin/puppetlabs)

I can’t find the VM password

The password to log in to the VM is generated randomly and will be displayed on the splash page displayed on the terminal of your virtualization software when you start the VM.

If you are already logged in via your virtualization software’s terminal, you can use the following command to view the password: cat /var/local/password.

Does the Learning VM work on vSphere, ESXi, etc.?

Possibly, but we don’t currently have the resources to test or support the Learning VM on these platforms.

My puppet run fails and/or I cannot connect to the PE console

It may take some time after the VM is started before all the Puppet services are fully started. If you recently started or restarted the VM, please wait a few minutes and try to access the console or trigger your puppet run again.

Also, because the Learning VM’s puppet services are configured to run in an environment with restricted resources, they are more prone to crashes than a default installation with dedicated resources.

You can check the status of puppet services with the following command:

systemctl --all | grep pe- 

If you notice any stopped puppet-related services (e.g. pe-puppetdb), double check that you have sufficient memory allocated to the VM and available on your host before you try starting them (e.g. service pe-puppetdb start).

If you get an error along the lines of Error 400 on SERVER: Unknown function union... it is likely because the puppetlabs-stdlib module has not been installed. This module is a dependency for many modules, and provides a set of common functions. If you are running the Learning VM offline, you cannot rely on the Puppet Forge’s dependency resolution. We have this module and all other modules required for the Learning VM cached, with instructions to install them in the Power of Puppet quest. If that installation fails, you may try adding the --force flag after the --ignore-dependencies flag.

I can’t import the OVA

First, ensure that you have an up-to-date version of your virtualization software installed. Note that the “check for updates” feature of VirtualBox may not always work as expected, so check the website for the most recent version.

The Learning VM has no IP address or the IP address will not respond.

If your network connection has changed since you loaded the VM, it’s possible that your IP address is different from that displayed on the Learning VM splash screen. Log in to the VM via the virtualization directly (rather than SSH) and use thefacter ipaddress command the check the current address.

Some network configurations may still prevent you from accessing the Learning VM. If this is the case, you can still access the Learning VM by configuring port forwarding.

Change your VM’s network adapter to NAT, and configure port forwarding as follows:

Name   -   Protocol - HostIP -   HostPort - GuestIP - GuestPort SSH        TCP        127.0.0.1  2222                 22 HTTP       TCP        127.0.0.1  8080                 80 HTTPS      TCP        127.0.0.1  8443                 443 GRAPHITE   TCP        127.0.0.1  8090                 90 

Once you have set up port forwarding, you can use those ports to access the VM via ssh (ssh -p 2222 root@localhost) and access the Quest Guide and PE console by entering http://localhost:8080 and https://localhost:8443 in your browser address bar.

I can’t scroll up in my terminal

The Learning VM uses a tool called tmux to allow us to display the quest status. You can scroll in tmux by first hitting control-b, then [ (left bracket). You will then be able to use the arrow keys to scroll. Press q to exit scrolling.

Running the VM in VirtualBox, I encounter a series of “Rejecting I/O input from offline devices”

Reduce the VM’s processors to 1 and disable the “I/O APIC” option in the system section of the settings menu.

Still need help?

If your puppet runs still fail after trying the steps above, feel free to contact us at learningvm@puppetlabs.com or check the Puppet Enterprise Known Issues page.

Tagged : / / / / / / / / / /

Puppet Training | Puppet Course | Agenda | scmGalaxy

puppet-training

The basic course program is outlined here

The Basics
  • Introduction To Configuration Management
  • About The Author
  • Why Puppet?
  • How To Access Your Working Files
The Puppet Infrastructure
  • uppet Agents
  • Puppet Masters
  • MCollective And Systems Orchestration
  • Cross Platform Puppet
The Puppet Run Cycle
  • Introduction To Puppet Run Cycle
  • Gathering System Facts
  • Node Matching And Catalogue Compilation
The Puppet Language – A Basic Primer
  • Puppet Resources – How To Define System Resources
  • Applying A Simple Puppet Manifest
  • Puppet Types
  • The Package File Service Patter
  • Applying Conditional Logic In Puppe
  • Fact Conditionals – Choosing A Course Of Action
Organizing A Puppet Environment
  • Defining Nodes
  • Puppet Modules – Reusable Code
  • Forge Modules – Where To Find Reusable Code
  • Provisioning A Web Server
  • Class Parameters – Applying Variables
  • Hiera Parameters – Defining Variables
  • Executing Modules Against A Puppet Master With An Agent
  • Reporting With Puppet
MCollective
  • MCollective And Live Management
  • MCollective With Puppet
  • Using MCollective To Interact With Services
  • Using MCollective To Interact With Puppet
Additional Tools
  • Managing Modules With Librarian-Puppet
  • Managing Directory Environments And Modules With R10K
  • External Node Classifiers And Reporting With Puppet Dashboard – Part 1
  • External Node Classifiers And Reporting With Puppet Dashboard – Part 2
Conclusion
  • Wrap-Up And Further Resources

Tagged : / / / / / / / / / / / /

Top 5 Configuration Management Tools

top-5-configuration-management-tools

Top 5 Configuration Management Tools

Puppet

In computing, Puppet is an open-source configuration management utility. It runs on many Unix-like systems as well as on Microsoft Windows, and includes its own declarative language to describe system configuration.

Puppet is produced by Puppet Labs, founded by Luke Kanies in 2005. It is written in Ruby and released as free software under the GNU General Public License (GPL) until version 2.7.0 and the Apache License 2.0 after that.

What started out as a popular DevOps tool has quickly become a movement. Written in Ruby, like Chef, Puppet also comes in both an open source and enterprise version. However, where Chef has a healthy offering of features across both open source and enterprise versions, Puppet has placed the majority of its feature set into enterprise status. Features that the open source version comes with include provisioning (Amazon EC2, Google Compute Engine), configuration management (operating systems and applications) plus 2,000+ pre-built configurations on Puppet Forge. Considerably more features are available for the enterprise version, including the open source features plus graphical user interface, event inspector (visualize infrastructure changes), supported modules, and provisioning (VMware VMs). Configuration management (discovery, user accounts), orchestration, task automation, role-based access control (with external authentication support) are also included. Puppet enterprise has a unified cross-platform installer of all components and support.

Chef

Offered as both an open source and enterprise product, Chef is a powerful tool for full IT infrastructure configuration management. With open source Chef at the heart of both offerings, shared features include a flexible and scalable automation platform, access to 800+ reusable cookbooks and integration with leading cloud providers. Chef also offers enterprise platform support, including Windows and Solaris, and allows you to create, bootstrap and manage OpenStack clouds. It has easy installation with ‘one-click’ Omnibus Installer, automatic system discovery with Ohai, text-based search capabilities and multiple environment support. Other notable features inclyde the “Knife” command line interface, “Dry Run” mode for testing potential changes, and the ability to manage 10,000+ nodes on a single Chef server. Features only available in the enterprise version of Chef include availablility as a hosted service, enhanced management console, centralized activity and resource reporting, as well as “Push” command and control client runs. Multi-tenancy, role-based access control (RBAC), high availability installation support and verification, along with centralized authentication using LDAP or Active Directory are included with Chef enterprise.

Ansible

Ansible is a model-driven configuration management tool that leverages SSH to improve security and simplify management. In addition to configuration management, it is capable of automating app deployment (even multi-tier deployment), workflow orchestration and cloud provisioning, hence the company likes the tool to be categorized as an “orchestration engine.” Ansible is built on five design principles including ease of use (doesn’t require writing scripts or custom code), low learning curve (both for sysadmins and developers), comprehensive automation (allowing you to automate almost anything in your environment), efficiency (since it runs on OpenSSH it doesn’t rely on memory or CPU resources), and security (it is inherently more secure because it doesn’t require an agent, additional ports or root level daemons). As many other open source projects, Ansible has a paid product that comes in the form of a web UI called Ansible Tower.

CFEngine

One of the earliest full-featured configuration management systems out there, CFEngine has gone through several iterations and maintained relevance as OS have gone from the local data center to the cloud. At the heart of the infrastructure automation framework, CFEngine is also a modeling and monitoring compliance engine, capable of sitting on a small footprint. As recommended by CFEngine, steps toward identifying an initial desired state include: 1) model the desired state of your environment; 2) simulate configuration changes before committing them; 3) confirm the desired state and set for automatic self-healing; 4) collect reports on the differences between actual and desired states. CFEngine has a library of reusable data-driven models that will help users model their desired states. These infrastructure patterns are designed to be reusable across the Enterprise.

Salt

As part of a larger, enterprise ready application, the configuration management piece of Salt is as robust and feature-full as would be expected. Built upon the remote execution core, execution of the system occurs on “minions” which receives commands from the central Salt master and replies with the results of said commands. Salt support simultaneous configuration of tens of thousands of hosts. Based upon host “states”, no programming is required to write the configuration files, which are small and easy to understand, that help identify the state of each host. Additionally, for those who do program, or admins who want to have more control and familiarity with their configuration files, any language can be used to render the configurations.

Tagged : / / / / / / / / / / / / / / /

Puppet Training for Devops and System Administrators | Puppet Course

puppet-training-for-devops-and-system-administrators

Puppet Training for DevOps and System Administrators

Agenda –

  • Introduction to Puppet
  • Installing and Configuring the Puppet Master
  • Installing and Configuring the Puppet Agent
  • Creating Manifests
  • Creating and Using Modules
  • Creating File Templates
  • Configuring Hiera
  • Windows Configuration Management
  • Version Control

Contact Info

  • Email – info@scmgalaxy.com
  • Call:- +91 700 483 5930
  • Skype – scmGalaxy

Training – http://bit.ly/scmgalaxy-training

Calender – http://bit.ly/scmgalaxy-calender

Location – Bangalore, Hydrabad, Pune, Mumbai, Delhi, USA, Australia, Canada

The Basics

  • Introduction To Configuration Management
  • About The Author
  • Why Puppet?
  • How To Access Your Working Files

The Puppet Infrastructure

  • uppet Agents
  • Puppet Masters
  • MCollective And Systems Orchestration
  • Cross Platform Puppet

The Puppet Run Cycle

  • Introduction To Puppet Run Cycle
  • Gathering System Facts
  • Node Matching And Catalogue Compilation

The Puppet Language – A Basic Primer

  • Puppet Resources – How To Define System Resources
  • Applying A Simple Puppet Manifest
  • Puppet Types
  • The Package File Service Patter
  • Applying Conditional Logic In Puppe
  • Fact Conditionals – Choosing A Course Of Action

Organizing A Puppet Environment

  • Defining Nodes
  • Puppet Modules – Reusable Code
  • Forge Modules – Where To Find Reusable Code
  • Provisioning A Web Server
  • Class Parameters – Applying Variables
  • Hiera Parameters – Defining Variables
  • Executing Modules Against A Puppet Master With An Agent
  • Reporting With Puppet

MCollective

  • MCollective And Live Management
  • MCollective With Puppet
  • Using MCollective To Interact With Services
  • Using MCollective To Interact With Puppet

Additional Tools

  • Managing Modules With Librarian-Puppet
  • Managing Directory Environments And Modules With R10K
  • External Node Classifiers And Reporting With Puppet Dashboard – Part 1
  • External Node Classifiers And Reporting With Puppet Dashboard – Part 2

Conclusion

  • Wrap-Up And Further Resources

About us:
scmGalaxy online platform is a community initiatives based on Software configuration management and DevOps that helps members and organizations to optimize their software development process, advocating agile methodologies and improve productivity across all aspects of Application lifecycle management. We provide consulting, training and mentoring services in agile development practices such as Source Code Management, Continuous Integration, Build management, Test-Driven development, Acceptance-Test driven development, Build automation, code quality practices and automated testing and continuous delivery.

We provide job oriented training in the area of Software Configuration management, Build and Release Engineering and DevOps domain . Candidates with engineering or software background and looking to either start or change their career to Build and Release Engineering, would benefit most from this training. This course offered online around the globe which include India, USA, Europe, Australia, Bangalore, Delhi, Pune, Mumbai, Chennai and Hydrabad. Instructor is an expert in Software configuration management, Build and release engineering and DevOps with more than 10 years industry experience in India.

Contact us at info@scmGalaxy.com

Course Objectives
To bring your team up to speed with agile development, We can also run the from Continuous Integration to Continuous Delivery with automated course within your premises.
Course Schedule
This course is an intensive 1-day & 2-day workshop with a mixture of teaching and lab exercises. Currently, this course is offered exclusively as an on-line course. Please contact us for more details.
Audience
This is a hands-on, practical course designed to teach specialized skills for real-world development situations. It is thus primarily aimed at a SCM Engineer, Build/Release Engineer, DevOps engineer and developer and QA audience.
Approach
The course is modular and flexible – depending on specific student needs and requests. Through our trainings, you benefit from the wide experience and architectural expertise of our team. We bring that experience to you in an highly interactive, intensely hands-on setting.
Assumptions
We assume participants have a reasonable understanding of Development in any language as well as a basic understanding of the Software Development Life Cycle.
Lab Work
All our courses are above all practical in nature. We believe that the best way to learn is by doing. So the course contains approximately 80% lab work.
Learning Resources
Each registrant will receive a copy of the student notes and lab solutions, a certificate of completion, and a CD containing all the tools covered in the course and CD containing all the tools covered in the course.
Contact Us
This course is provided on-site, and can be tailored to your particular requirements. If you would like our trainings delivered at your premises, or for any additional information please contact us.

Please email us at info@scmGalaxy.com

  • Call:- +91 700 483 5930
  • Skype – scmGalaxy

Tagged : / / / / / / / / / / / / / / / / / / / / / / /