In this tutorial we will see how we can create a basic multiple role based authentication page by using Laravel. To understand it we should have more than basic understandings of Laravel.
- To start it as we all know we have to create a project (xampp/htdocs directory) in our terminal by running the command given below:
composer create-project --prefer-dist laravel/laravel multi-auth "5.8.*"cd multi-auth- Once we have created the project we will run the make:auth command to create the default login authentication system of laravel.
php artisan make:auth- Now we need to customize the users_table under migration as per our requirement.
- Now we have to create model and migration for role table where we can see the different roles who can login like ‘admin’, ‘user’ etc.
php artisan make:model Role -m
- In the roles table we will customize the Schemas as per the requirement.
- So now we have two model naming Users and Roles and both are dependent on each other hence we need to make a relationship between them.
- To create a relationship we will create functions in both the model for the other one by giving the command given below.
- In the next step we need to create seeders for each of the model (User , Role). To create the UsersTableseeder and
RolesTableSeeder we will run the command given below.
php artisan make:seed UsersTableSeeder
php artisan make:seed RolesTableSeeder- After the following step we need to add insert function in the UsersTableseeder and RolesTableSeeder and also declare the use Illuminate\Support\Facades\DB; in both the seeders in the beginning since we will be using DB class in the seeders.
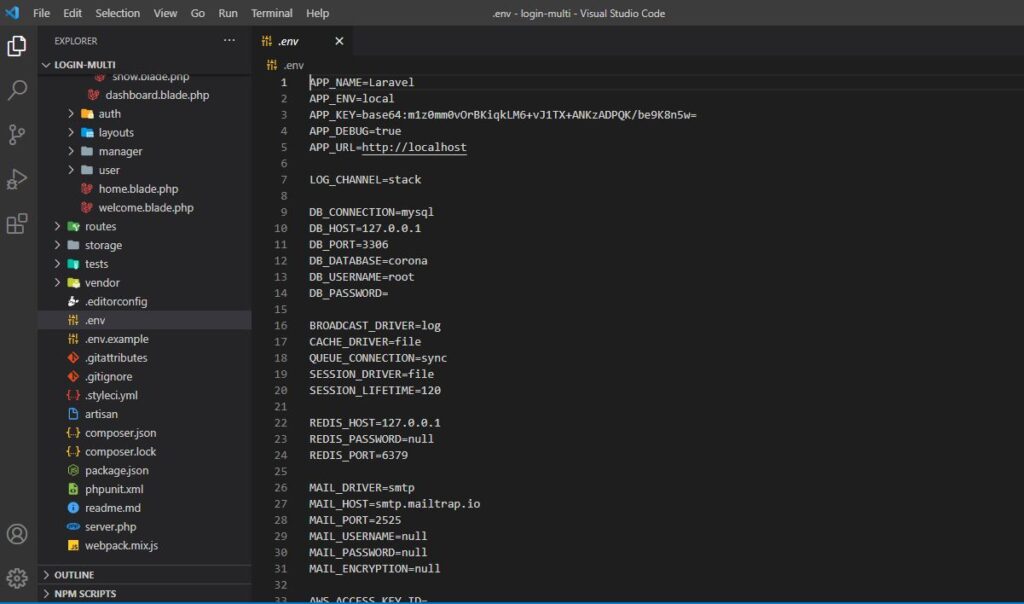
- Once we are done with the steps given above we will create a database and link it with the project in the .env file. In this project I have named the database as corona (since it is in trend 😛) and added that in my .env file as shown below, with that we will keep the username as root and leave the password blank.

- Once done with the database creation we will migrate our tables into the database with the command given below.
php artisan migrate- In the next step we need to define two created seeders files (UsersTableSeeder and RolesTableSeeder) into the DatabaseSeeder.php as shown below:
- Now we need to import our data stored in the Seeder files into the database which we created using the command:
php artisan db:seed- Until here we have set up the database for storing the details which will be provided by the user and now we need to create the controllers and the middleware to authenticate and redirect the users to there respective pages.
- First of all we need to create controller for User and the Admin.
- To create the controller we need to the follow the command given below:
php artisan make:controller Admin/AdminController
php artisan make:controller User/UserController- Now we will be creating middleware for the authentication of the Admin and the User.
php artisan make:middleware AdminMiddleware
php artisan make:middleware UserMiddleware
- Now we will add Auth trait in the AdminMiddleware and UserMiddleware for authentication of the User and the Admin by writing use Auth;
- In the next step we will add handle() function in the AdminMiddleware and UserMiddleware.
- We will also implement Condition for Admin and User Login in RedirectIfAuthenticated which is in app/Http/Middleware/RedirectIfAuthenticated.php.
- Now we will be implementing condition in the login controller before that we will remove ‘/home’ from protected $redirectTo = ‘/home’; since we don’t want to redirect the page to Home after logging in.
- Likewise we will implement condition in the ResetPasswordController and remove ‘/home’ from protected $redirectTo = ‘/home’;
- Once we are done with the above steps we will use AdminMiddleware and UserMiddleware in Kernal.php which is in app/Http/Kernel.php.
use App\Http\Middleware\AdminMiddleware;
use App\Http\Middleware\UserMiddleware;- After that we need to define and for defining we will add the command given below in routeMiddleware.
'admin' => AdminMiddleware::class,
'user' => UserMiddleware::class,- Now we are almost done with it and need to write the routes for the Admin and the User.
- Almost done but we need to make the views as well where we can redirect the admin or user once they login.
-Create a blade file for Admin dashboard under resource/views/admin/dashboard.blade.php.
-Create a blade file for User dashboard under resource/views/user/dashboard.blade.php.
- Under the dashboard blades of User and Admin we can write the basic HTML to check whether it is showing it when redirected.
It’s good to go now. You can leave a comment if getting any error while following the steps.
Latest posts by Joydeep M (see all)
- Laravel 5.8 CRUD operation with example - April 22, 2021
- How to Create Multiple Role Based Authentication in Laravel 5.8 - April 16, 2021
- SQL Queries - April 5, 2021
