Laravel 5.8 CRUD operation with example

In this tutorial we will learn how we can create a project in CRUD (Create, Read, Update and Delete) operations through Laravel. We will get to know how to create, update read and delete in Laravel from Scratch.

Initially have to download Laravel 5.8 version. For this you have to go to command prompt, in which first we have go to our folder path in which we want to download Laravel 5.8. After this we have to run “composer” command, because all Laravel depository is handled by composer. After run “composer” command we have to run following command:

composer create-project laravel/laravel=5.8 crud --prefer-dist

After downloading Laravel 5.8, we have to make Mysql database connection from Laravel 5.8.

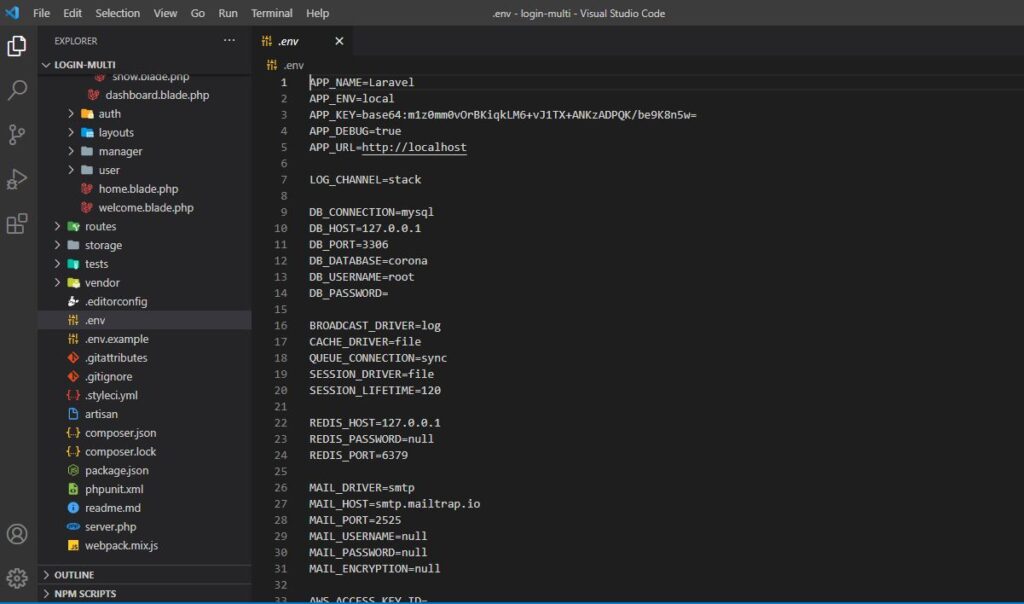
We have to find .env file in your Laravel 5.8 folder. Open that file and under we have to define our mysql database before that we have to create a database in our mysql named as ‘crud’ and then we have to configure our .env as given below.

DB_CONNECTION=mysql
DB_HOST=127.0.0.1
DB_PORT=3306
DB_DATABASE=crud
DB_USERNAME=root
DB_PASSWORD=

After this we have to create migration file in our Laravel folder. For this we have to write following command in your command prompt.

php artisan make:migration create_crud_table --create=crud

This command will create migration file in database/migrations folder. In this file we have to define table column which we want to create in table. Below we can find migration file in which we have define table column.

Now we want to migrate this table definition from this Laravel application to mysql database. For this we have write following command in command prompt. This command will make crud table in mysql database for perform CRUD operation from Laravel 5.8 application.

php artisan migrate

Now we have to create model for our database which is used for operations in controller class. To create a model we will run the command given below.

php artisan make:model Crud -m

This command will make Crud.php model file in app folder. In this file we have to define table column name which we can see below source code of Crud.php file.

Now we have to create Laravel 5.8 crud controller. For this we have to go to command prompt and under this we have write following command.

php artisan make:controller CrudsController --resource

This command will make CrudsController.php file in app/Http/Controllers folder. Once we open this file, we can find all predefine method for do CRUD operation in this controller file. We have to just add code for doing particular operation. Below we can find CRUD controller file code.

Now we have to set route of all CrudsController class method. For this we have to open to routes/web.php file. In this file we have to write following code for set route of all method.

Route::resource('crud','CrudsController');

Now in this step we have to set data in view file which has been store under resources/views folder, because this view file has received data from controller method, so here we have to set data in view file. Below we can find all view file which has been used in Crud application, and we can also find how data has been set and how to make form in Laravel 5.8 view file.

Now we can run the Laravel 5.8 Crud application, for this we have to go to command prompt, and write following command.

php artisan serve

For reference you can see the video given below:
Tagged :

SQL Queries

 👉  To give a table, or a column in a table, a temporary name we can use Alias:

Syntax: SELECT "column_name" AS "column_Alias" FROM "table_name";

For example we have a table with column_name as “SNo” , “Country” and “Capital” and we want to update it as “Serial Number” , “State” and “Country_Capital then we will run the following command:

👉 To count the number of rows in the table:

Syntax: SELECT COUNT(column_name) AS (alias_name) FROM table_name;

For example we want to count number of orders placed by a particular customer from customer_table:

This will show the count of numbers of order places by the customer id “CG-1234′ and the products ordered.

👉 To add the values in a columns we use Sum command:

Syntax: SELECT SUM (column_name) FROM table_name;

For example we want to add the profit amount from the sales table:

👉 To find out an average for a column in the table:

Syntax: SELECT AVG (column_name) FROM table_name;

For example we need to find the average age of the customers from customer table:

👉To find the minimum and the maximum value in a table:

  • Minimum
SELECT MIN (column_name) FROM table_name;

For example we want to find the minimum order sale made for a product from sales table:

  • Maximum
SELECT MAX (column_name) FROM table_name;

For example we want to find the maximum order sale made for a product from sales table:

👉 To groups rows that have the same values into summary rows, like “find the number of customers in each region” we use GROUP BY statement. The GROUP BY statement is often used with aggregate functions (COUNT(), MAX(), MIN(), SUM(), AVG()) to group the result-set by one or more columns.

Syntax: SELECT "column_name","function-type" (column_name) FROM table_name Group By "column-name";

For example we need to find the number orders places in each region in the table:

👉 To make conditions for aggregate functions we use HAVING clause. The difference between Having clause and Where clause is that we cannot make conditions in aggregate functions whereas we can make conditions in aggregate functions using Having clause.

Syntax: SELECT column_name, AGGREGATE FUNCTION column_name FROM tables GROUP BY (column1) HAVING condition;

For example we have some set of customers in four regions and we want to see in which region the count of customers is more than 200. In this scenario we will use the HAVING clause and set a condition of count more than 200.

This command will show the count of customers in the regions where it is more than 200.

👉 To go through a condition and return a value when the first condition is met (like an if-then-else statement) “CASE” statement is used. So, once a condition is true, it will stop reading and return the result. If no conditions are true, it returns the value in the ELSE clause.

Syntax: SELECT * CASE WHEN condition THEN result ELSE result END;
Tagged : / / / / / / /

Alter Table in MySql

In this tutorial we will see the commands which we can use to make changes in our table (as per April 2k21).

  • To add a column in an existing table:
Syntax: ALTER TABLE table_name ADD column_name DATATYPE;
  • To delete a column in an existing table:
Syntax: ALTER TABLE table_name DROP column_name;
  • To change the data type of a column in an existing table:
Syntax: ALTER TABLE table_name MODIFY COLUMN column_name NEW DATA TYPE;
  • To rename a column in an existing table:
Syntax: ALTER TABLE table_name CHANGE column_name NEW_COLUMN_NAME;
  • To update the column as NOT NULL Constraint:
Syntax: ALTER TABLE table_name MODIFY column_name DATATYPE NOT NULL;
  • To Sort the data in the Table:
Syntax: SELECT "column_name" FROM "table-name" [WHERE "condition"] ORDER BY "column_name" [ASC/DESC];

Tagged : / / / / /

MySql queries:

Inserting data into a existing table:

Syntax without column names specified:

INSERT INTO table_name VALUES ('value1','value2');

Example:

In the example we have inserted the data in a customer_table where we have 4 columns with name cust_id, first_name, last_name, age and we have inserted the data in the columns with this command.

Syntax without column names specified:

INSERT INTO table_name ('column1','column2') VALUES ('value1','value2');

Example:

In this example we have inserted the data in three columns excluding the last_name column, by doing this it will store the information in all the columns and will show NULL in the last_name.

Inserting data in multiple rows:

  • To ‘SELECT’ a statement in a table:
Select column_name from table_name;

Following command will show the data stored in the column_name column in the database.

  • To use ‘WHERE’ command in a table:
Select column_name from table_name Where (column_name = condition);

For example:

We have a table with Customers name , age and email given and we need to see only the data of customer whose age is greater than 25.

Select * from customer_table where age>25;

This command will show the data of the customers whose age is greater than 25.

  • To use logical operators in the query:
Select column_name from table_name Where (column_name = condition) AND (column_name = condition) OR (column_name = condition);
  • To update data in the table:
UPDATE table_name SET column_name='abc' WHERE condition(column);

For example to update the last name of a customer:

UPDATE customer_table SET Last_name='John' WHERE cust_id=5

Tagged : / / /

Creating a Table using MySql queries:

In this we will learn how we can create tables in the database using sql queries. As we know it becomes quite complicated to make the tables manually in the database. To ease the process we can follow the steps to make tables using my sql queries.

Syntax:

CREATE TABLE table_name (
    column1 column1 datatype column1 constraint,
    column2 column2 datatype column2 constraint,
    column3 column3 datatype column3 constraint,
   ....
);

Constraints:

  • NOT NULL CONSTRAINT – Ensures that a column cannot have a null value.
  • DEFAULT CONSTRAINT – Provides a default value for a column when none is specified.
  • UNIQUE CONSTRAINT – Ensures that all value in a column are different.
  • CHECK CONSTRAINT – Make sure all values in a column satisfy certian criteria.
  • PRIMARY_KEY CONSTRAINT – Used to uniquely identify a row in a table.
  • FOREIGN_KEY CONSTRAINT – Used to ensure referential integrity of the data.

Keys:

  • A primary key is used to uniquely identify each row in a table.
  • A primary key can consists of one or more columns on a table.
  • When multiple columns are used as primary key, it is called as Composite key.
  • A foreign key is a column (or columns) that references a column (most often primary key) of other table.
  • The purpose of foreign key is to referential integrity of the data.

As shown in the above picture, Cust_ID is the foreign key for order table whereas it is primary key for in the Customer table that means the value of Cust_ID will not change in either of the table.

For example we will create a table named as customer_table inside the ‘test’ database:

Tagged : / /

$_GET and $_POST Variable in PHP

  • $_GET and $_POST is generally used in the forms to transfer data from one file to another file. Both the variables are kind of same except when we need to keep our data secure we use $_POST and generally in the form we use $_POST.

We will see the explanation by a example:

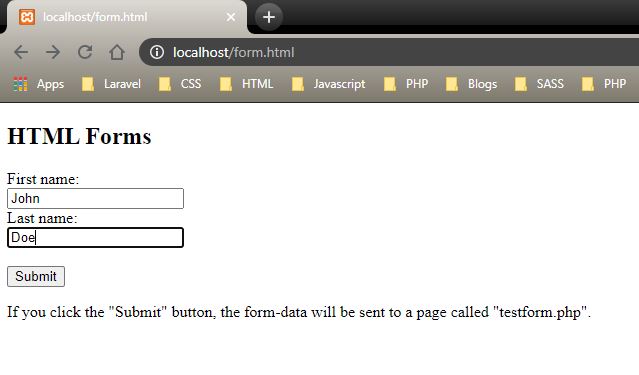
Form.html

Testform.php

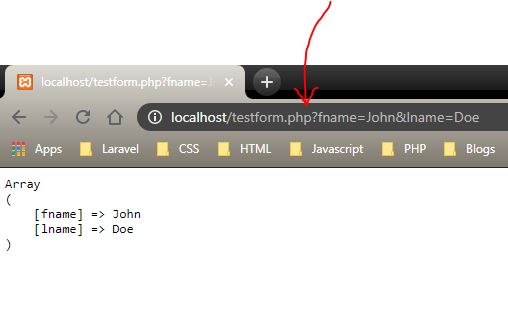
In this form we have used “get” method and we will see the output below:

As we can see we have used the method “get” in the form and in the output page of testform.php we can see the input given, also with that in the URL box we can see the details which we have provided in the form.html.

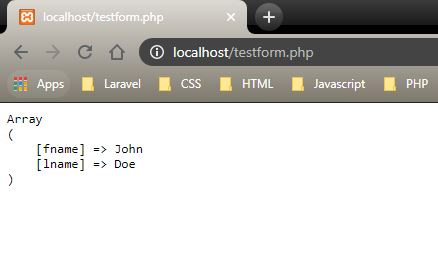
If we use “post” method in the form.html we will see the difference below:

As we can see in the URL box there is no such details provided which we can see while using “post” method.

Tagged : / / /

Super Global Variables in PHP

  • What is Super Global Variable?

Super global variable is a variable which can be used in two different files for manipulation.

For example we have a variable “a” in File1.php and we need to print, edit or any manipulation needed to be done in the variable in File2.php then we have to use Super Global Variable as a variable in File1.php.

  • Types of Super Global Variable in PHP:-

– $_GET

– $_POST

– $_REQUEST

– $_COOKIE

– $_SESSION

– $_FILES

  • To see the use of variable $_GET and $_POST follow the link given below:

/https://www.scmgalaxy.com/tutorials/_get-and-_post-variable-in-php/

  • Use of variable $_REQUEST

 $_REQUEST can catch the data which is sent using both POST GET methods whereas $_GET and $_POST can catch the data which is sent by get and post.

  • Use of variable $_SERVER

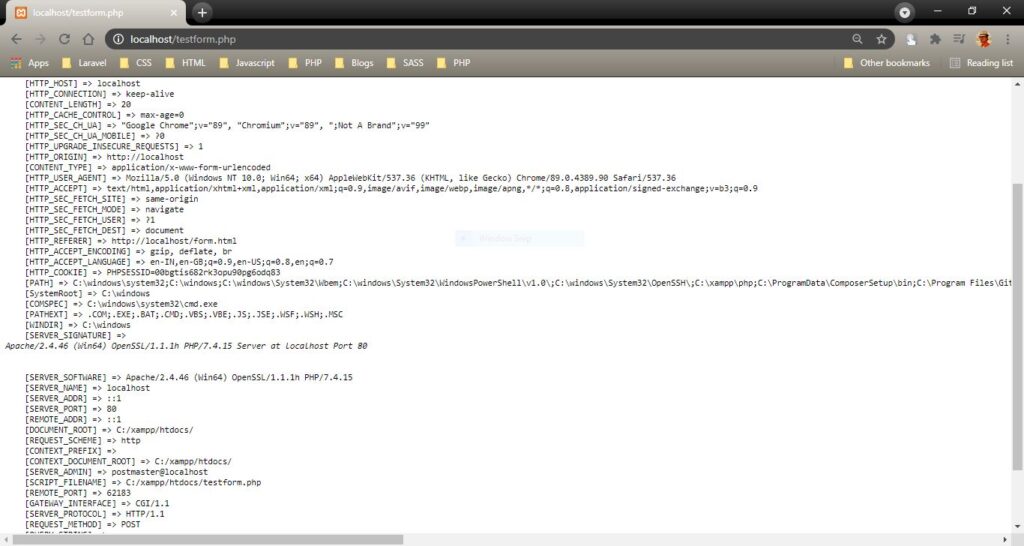
When we use $_SERVER we can extract extra data from the client when the form is filled. Extra data in a sense we can extract:

– HTTP Connection

– Server Information

– Host Information

– URL Information

We can see it with the example given below:

Now when we insert the data in the form.html we will see the following information:

  • Use of $_COOKIE variable:

Cookies are small file that the server embeds on the user’s computer each time the same computer requests a page with a browser it will send the cookie too. With PHP, we can both create and retrieve cookie values.

To create a cookie we need to run the following command:

setcookie()

Syntax:

setcookie(name, value, expire, path, domain, secure, httponly);

In the syntax only the name parameter is mandatory rest other parameters are optional.

Example for creating a cookie:

  • Use of $_SESSION variable

For session variable refer the link given below:

How Session works in PHP

Tagged : / / / /

How Session works in PHP

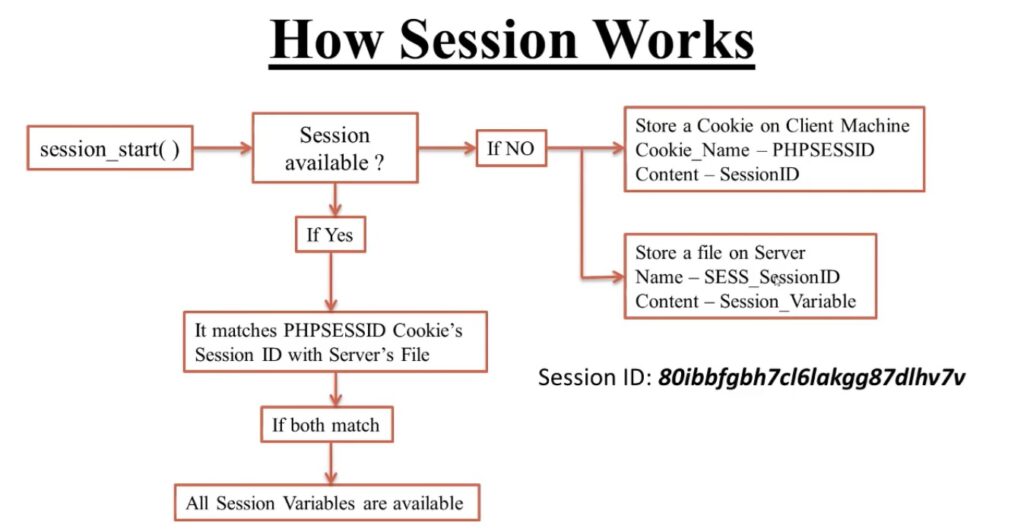
Session is a way to store information (in variables) to be used across multiple pages. We can see the architecture of session workflow below:

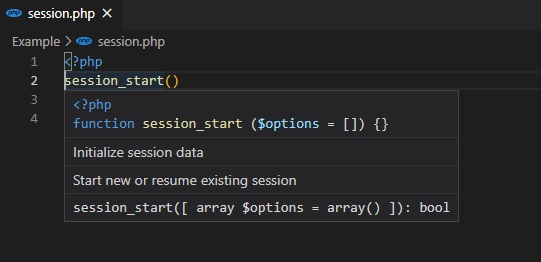
  • Initially we need to write the command session_start() to start a session.
  • Once we write the command server will check if there is a session available.
  • If there is no server then it will store a cookie in the client machine with the cookie name – PHPSESSID amd it will create a session id of 26 or 32 characters.
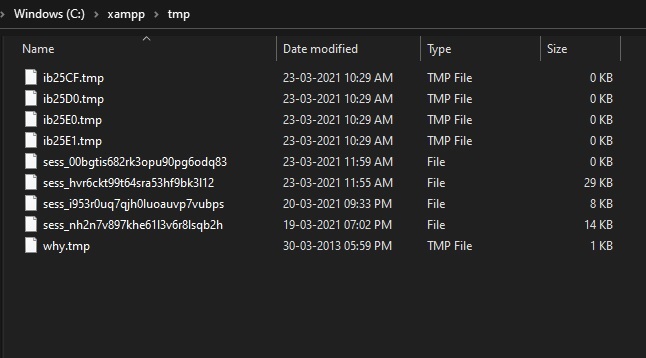
  • With that it will also store a file on server (Default Location – C:\xampp\tmp) with session id in the suffix.
  • If there is already a session in the client machine then it will show the variables stored in the session under (C:\xampp\tmp) the server.
  • Once we close the browser all the session ends.

Reference:

Tagged : /