The basic steps to adopt the continuous inspection pattern

continuous-inspection-pattern

The following outlines the basic steps to adopt the continuous inspection pattern:

1. Tool selection. Evaluate and select one or more tools that can perform static analysis on your code base. Evaluation criteria include: a. the programming and scripting language(s) used in your software projects versus the ones supported by the tool; b. whether the tool provides an API for developing customized verifications; c. integration with your IDE; d. integration with your continuous integration server; and a e. set of built-in verifications, which should include items that are deemed more relevant for your software project.

2. Verification selection. Most tools come with a variety of built-in verifications and metrics. You need to evaluate what built-in verifications in the selected tool(s) are applicable to your software project. Criteria may include: a. Modifiability requirements. If you are experiencing problems with maintenance and evolution of existing projects, you should enable verifications that pinpoint duplicated code, cyclic dependencies, overly complex and/or large classes and methods, and others that will help you to improve modularity and modifiability of the code. b. Security requirements. There are verifications that can spot security-related issues, such as SQL injection vulnerability, hard-coded credentials, and overridden security methods. Continuous Inspection – 7 c. Team skills. d. Quality of existing code base. It is likely that a more strict selection of verifications can be enabled for newer projects. For older code, a strict set of verifications may generate so many violations that they might tend to be ignored. In any case, it is desirable that the same selection of verifications is applied to all projects that are under the same governance system and quality scrutiny. e. Development is/is not outsourced. The development contractor and the contracting organizations may want to negotiate what types of violations will not be accepted in delivered code. f. Development team is/is not collocated. g. Greenfield development. An existing code base will often exhibit several violations and the cost to fix them may be too high. Greenfield development opens space to enable all verifications considered important and enforce them from the get-go—a zero-warning policy is more easily adopted in such scenarios. h. Feasibility to fix violations. Verifications that generate violations in the existing code that realistically will not be fixed in the foreseeable future due to lack of resources or other reasons should not be enabled.

3. Tool setup. The selected tools with the selected verifications enabled need to be configured on a continuous integration server. Ideally the tools should run as often as possible, say every 30 minutes. But in practice, if the code base is sizeable the static analysis can easily take tens of minutes. In that case, you may want to run the checks once every night.

4. Accountability for violations. It is important that developers are accountable for violations and that fixing them become part of the development process. As mentioned before, a zero-warning policy should be in place, at least for the most critical categories of violations. Checkpoints for fixing violations should be defined. For example, at the end of each sprint or at each code release, all violations should be fixed.

5. Customized verifications. The continuous inspection can go one step further and create customized verifications using the API available in the selected tools [Mer13]. This is a non-trivial step since it typically requires expressing an architecture decision or programming rule in syntactic terms of the target programming language. Albeit challenging to create, customized verifications represent an enormous enhancement to the different aspects of code health inspection. Built-in verifications are by-design generic. On the other hand, customized verifications can be specific to a software project or organization and hence more powerful. They can deal with module, layer, and method names that are specific to a project; they can accommodate known exceptions to a given rule; they are aware of home-made libraries and wrappers.

6. Enforcement at commit time. As an ultimate barrier to avoid code violations to enter the codebase, you can configure the automated verifications to be executed upon each source code commit operation [Mer13]. Of course, you need a versioning system that provides a mechanism to run user-defined scripts that can have access to the files in a code commit operation. This kind of solution will deny the code commit operation and give the user a clear error message pointing out the specific reason. Thus, even if a developer ignores the violations displayed on the IDE and on the continuous integration dashboard and reports, these Continuous Inspection – 8 violations won’t make it into the codebase because of the enforcement at commit time. Clearly, only violations that are critical and/or applicable to all source files in the code repository should be enabled to run on this solution.
Tagged : / / / / / / / / / / / / / /

Basic Work Cycle in Subversion (SVN) – Overview

work-cycle-in-subversion-sv

Basic Work Cycle in Subversion (SVN)

Subversion has numerous features, options, bells, and whistles, but on a day-to-day basis, odds are that you will use only a few of them. In this artile, we’ll run through the most common things that you might find yourself doing with Subversion in the course of a day’s work.

The typical work cycle looks like this:

  1. Update your working copy.
    • svn update
  2. Make changes.
    • svn add
    • svn delete
    • svn copy
    • svn move
  3. Examine your changes.
    • svn status
    • svn diff
  4. Possibly undo some changes.
    • svn revert
  5. Resolve conflicts (merge others’ changes).
    • svn update
    • svn resolve
  6. Commit your changes.
    • svn commit
Tagged : / / / / / / / / / / / / / /

Basic Perforce Command – P4 Command Reference

perforce-command-reference

Command

Description

p4 add
Open file(s) in a client workspace for addition to the depot.
p4 admin
Perform administrative operations on the server.
p4 branch
Create or edit a branch specification and its view.
p4 change
Create or edit a changelist specification.
p4 changelists
List submitted and pending changelists.
p4 changelist
Create or edit a changelist specification.
p4 client
Create or edit a client workspace specification and its view.
p4 clients
List all client workspaces currently known to the system.
p4 delete
Open file(s) in a client workspace for deletion from the depot.
p4 depot
Create or edit a depot specification.
p4 depots
Display a list of depots known to the Perforce server.
p4 describe
Provides information about changelists and the changelists’ files.
p4 groups
List groups of users.
p4 group
Add or delete users from a group, or set the maxresults, maxscanrows, and timeout limits for the members of a group.
p4 have
List files and revisions that have been synced to the client workspace
p4 info
Display information about the current client and server.
p4 integrate
Open files for branching or merging.
p4 integrated
Show integrations that have been submitted.
p4 job
Create or edit a defect, enhancement request, or other job specification.
p4 jobs
List jobs known to the Perforce server.
p4 label
Create or edit a label specification and its view.
p4 labels
Display list of defined labels.
p4 lock
Lock an opened file against changelist submission.
p4 login
Log in to a Perforce server by obtaining a ticket.
p4 logout
Log out of a Perforce server by removing or invalidating a ticket.
p4 passwd
Change a user’s Perforce password on the server.
p4 rename
Renaming files under Perforce.
p4 resolve
Resolve conflicts between file revisions.
p4 revert
Discard changes made to open files.
p4 set
Set Perforce variables in the Windows registry.
p4 submit
Send changes made to open files to the depot.
p4 sync
Copy files from the depot into the workspace.
p4 tag
Tag files with a label.
p4 triggers
Edit a list of scripts to be run conditionally whenever changelists are submitted, forms are updated, or when integrating Perforce with external authentication mechanisms.
p4 user
Create or edit Perforce user specifications and preferences.
p4 users
Print a list of all known users of the current server.
p4 verify
Verify that the server archives are intact.
p4 workspace
Create or edit a client workspace specification and its view.
Tagged : / / / / / / / / / /

The Four Basic Requirements for SCM Process – SCM Guide

scm-basic-requirements

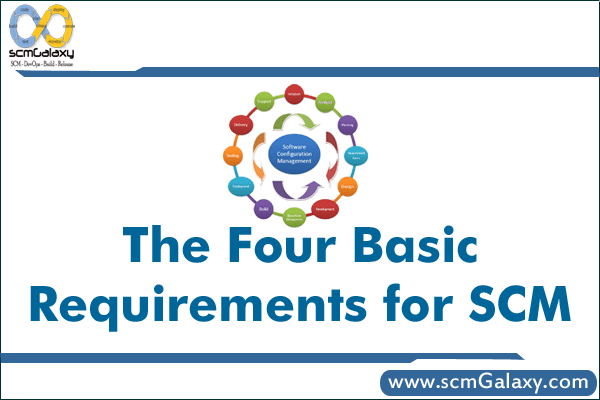
Identification, control, audit, and status accounting are the four basic requirements for a software configuration management system. These requirements must be satisfied regardless of the amount of automation within the SCM process. All four may be satisfied by an SCM tool, a tool set, or a combination of automated and manual procedures.

  1. Identification—Each software part is labeled so that it can be identified. Furthermore, there will be different versions of the software parts as they evolve over time, so a version or revision number will be associated with the part. The key is to be able to identify any and all artifacts that compose a released configuration item. Think of this as a bill of materials for all the components in your automobile. When the manufacturer realizes that there has been a problem with parking brakes purchased from a subcontractor, it needs to know all the automobile models using that version of the parking brake. It is the same with software. If we are building a multimedia system that has audio MPEG3 drivers for Windows 98, Windows 2000, Windows CE, Linux, and FreeBSD operating systems, how do we find out which releases are impacted when we find an error in the Linux product? You must go back to your SCM system to identify all the common components in all operating system releases that are impacted.
  2. Control—In the context of configuration management, “control” means that proposed changes to a CI are reviewed and, if approved, incorporated into the software configuration. The goal is to make informed decisions and to acknowledge the repercussions associated with a change to the system. These changes may impact budgets, schedules, and associated changes to other components. If a problem is reported in a released product, software engineers must act quickly to evaluate repercussions—a “fix” for one client’s version of the product may be dangerous to another. The control inherent in an SCM system shows each version in which the flawed component appears.
  3. Auditing—Auditing an SCM system means that approved requested changes have indeed been implemented. The audits allow managers to determine whether software evolution is proceeding both logically and in conformance with requirements for the software. The SCM system should document changes, versions, and release information for all components of each configuration item. When such documentation is in place, auditing becomes a straightforward analysis task.
  4. Status accounting—Reports and documentation produced by the status accounting function are the auditable entries. All approved parts of a software configuration must be accounted for, and the software parts list must reflect the transition from part CIn to CIn+1. This accounting provides the historic information to determine both what happened and when on the software project. Status accounting enables the auditing requirement of the SCM. As a project manager, the status accounting holds a wealth of information on the amount of effort required throughout the life cycle of the product in its development and maintenance. This is critical to the software project manager in making estimates for new systems based on historic information. The SCM can be used as one of the key components of the project managers’ metrics system.
Tagged : / / / / / / / / / / / / / / /

Perforce Basic Concepts | Perforce Overview | What is Perforce ?

perforce-basic-concepts

Perforce Basic

connects to a Perforce server to move files between Perforce depots and yourworkspace, as shown below. 

The precise definitions for these Perforce terms are as follows:depot: a file repository on the Perforce server. It contains all existing versions of all files ever submitted to the server. There can be multiple depots on a single server. Theexamples in this guide show a single depot.server: the program that executes the commands sent by client programs, maintains depot files, and tracks the state of workspaces.workspace: folders on the client computer where you work on revisions of files that are managed by Perforce.

Tagged : / / / / / / / / / / / / / /