Provision a AWS ec2 vm using chef | Step by Step Guide | AWS ec2 vm Tutorial

provision-a-aws-ec2-vm-using-chef

Provision a AWS ec2 vm using chef

Step 1: Install chefdk

Step 2: Setup AWS Credentails

Step X: Setup your knife config

Step X: Make sure following is set and exported in env.


AWS_ACCESS_KEY_ID=secrets AWS_SECRET_ACCESS_KEY=secrets AWS_DEFAULT_REGION=us-east-1 AWS_SSH_KEY=your_ssh_key_name AWS_ACCESS_KEY=secrets AWS_SECRET_KEY=secrets


Step 3: Genrate a new repository using the chef generate command

> chef generate repo chefdk-provision-demo
> cd chefdk-provision-demo

Step 4: Generate a provision cookbook. This is the required name, and it must be in the current directory.
> chef generate cookbook provision

Step 5: Edit the default recipe, $EDITOR provision/recipes/default.rb with following code…

context = ChefDK::ProvisioningData.context with_driver 'aws::us-west-2' options = { ssh_username: 'admin', use_private_ip_for_ssh: false, bootstrap_options: { key_name: 'jtimberman', image_id: 'ami-0d5b6c3d', instance_type: 'm3.medium', }, convergence_options: context.convergence_options, } machine context.node_name do machine_options options action context.action converge true end

Understand the code:
> To break this down, first we get the ChefDK provisioning context that will pass in options to chef-provisioning.
> Then we tell chef-provisioning to use the AWS driver, and in the us-west-2 region.
> The options hash is used to setup the instance.
> We’re using Debian 8, which uses the admin user to log in, an SSH key that exists in the AWS region, the actual AMI, and finally the instance type.
> Then, we’re going to set the convergence options automatically from ChefDK. This is the important part that will ensure the node has the right run list.

Step 6: Generate a Policyfile.rb and And edit its content, $EDITOR Policyfile.rb.
> chef generate policyfile
> vi policyfile.rb

name            "chefdk-provision-demo" default_source  :community run_list        "recipe[libuuid-user]" cookbook        "libuuid-user"

Here we’re simply getting the libuuid-user cookbook from Supermarket and applying the default recipe to the nodes that have this policy.

Step 7: The next step is to install the Policyfile. This generates the Policyfile.lock.json, and downloads the cookbooks to the cache, ~/.chefdk/cache/cookbooks. If this isn’t run, chef will complain, with a reminder to run it.

> chef install

Step 8: Finally, we can provision a testing system with this policy:

> chef provision testing –sync -n debian-libuuid

Reference:
http://jtimberman.housepub.org/blog/2015/05/15/quick-tip-chefdk-provision/

Tagged : / / / / / / / / / / / / / / / / /

Chef Code Analysis using Foodcritic | Foodcritic Tutorial

chef-code-analysis-using-foodcritic

What is Foodcritic? Foodcritic is a static linting tool that analyzes all of the Ruby code that is authored in a cookbook against a number of rules, and then returns a list of violations. In another word, Foodcritic is a helpful lint tool you can use to check your Chef cookbooks for common problems.

We use Foodcritic to check cookbooks for common problems:
Style
Correctness
Syntax
Best practices
Common mistakes
Deprecations

Foodcritic does not
Foodcritic does not validate the intention of a recipe, rather it evaluates the structure of the code, and helps enforce specific behavior, detect portability of recipes, identify potential run-time failures, and spot common anti-patterns.

When Foodcritic returns a violation, this does not automatically mean the code needs to be changed. It is important to first understand the intention of the rule before making the changes it suggests.

Foodcritic has two goals:

To make it easier to flag problems in your Chef cookbooks that will cause Chef to blow up when you attempt to converge. This is about faster feedback. If you automate checks for common problems you can save a lot of time.

To encourage discussion within the Chef community on the more subjective stuff – what does a good cookbook look like? Opscode have avoided being overly prescriptive which by and large I think is a good thing. Having a set of rules to base discussion on helps drive out what we as a community think is good style.

Foodcritic built-in Rules
It comes with 47 built-in rules that identify problems ranging from simple style inconsistencies to difficult to diagnose issues that will hurt in production. If you want to see the list of rules, please navigate the url as below;
http://www.foodcritic.io/

Prerequisites
Foodcritic runs on Ruby (MRI) 1.9.2+ which depending on your workstation setup may be a more recent version of Ruby than you have installed. The Ruby Version Manager (RVM) is a popular choice for running multiple versions of ruby on the same workstation, so you can try foodcritic out without running the risk of damaging your main install

Foodcritic installation

Method 1
Install RVM as non-root user

$ sudo /etc/init.d/iptables stop OR sudo start ufw

$ curl -s raw.github.com/wayneeseguin/rvm/master/binscripts/rvm-installer | bash -s stable
OR
$ sudo bash -s stable < <(curl -s https://raw.github.com/wayneeseguin/rvm/master/binscripts/rvm-installer )
OR
$ curl -s raw.github.com/wayneeseguin/rvm/master/binscripts/rvm-installer | sudo bash -s stable
OR
$ gpg –keyserver hkp://keys.gnupg.net –recv-keys 409B6B1796C275462A1703113804BB82D39DC0E3
OR
$ command curl -sSL https://rvm.io/mpapis.asc | gpg –import –

$ rvm get stable
$ rvm install ruby-2.2.3
$ gem install foodcritic

Method 2
Install ruby

$ sudo apt-get install ruby-2.2.3 (Ubantu)
$ sudo yum install ruby-2.2.3 (rhel)

Install foodcritic
> gem install foodcritic

Method 3
Alternatively install ChefDK which already includes foodcritic: https://downloads.getchef.com/chef-dk/

How to run Foodcritic?
You should now find you have a foodcritic command on your PATH. Run foodcritic to see what arguments it supports:

foodcritic [cookbook_path]
-r, –[no-]repl Drop into a REPL for interactive rule editing.
-t, –tags TAGS Only check against rules with the specified tags.
-f, –epic-fail TAGS Fail the build if any of the specified tags are matched.
-C, –[no-]context Show lines matched against rather than the default summary.
-I, –include PATH Additional rule file path(s) to load.
-S, –search-grammar PATH Specify grammar to use when validating search syntax.
-V, –version Display version.

How to setup Foodcritic with Jenkins

Configuring Jenkins to run foodcritic
To manually add a new job to Jenkins to check your cookbooks with foodcritic do the following:

  1. Ensure you have Ruby 1.9.2+ and the foodcritic gem installed on the box running Jenkins.
  2. You’ll probably need to install the Git plugin. In Jenkins select “Manage Jenkins” -> “Manage Plugins”. Select the “Available” tab. Check the checkbox next to the Git Plugin and click the “Install without restart” button.
  3. In Jenkins select “New Job”. Enter a name for the job “my-cookbook”, select “Build a free-style software project” and click “OK”.
  4. On the resulting page select “Git” under “Source Code Management” and enter the URL for your repo.
  5. Check the checkbox “Poll SCM” under “Build Triggers”.
  6. Click “Add Build Step” -> “Execute shell” under “Build”. This is where we will call foodcritic.
  7. Assuming you are using rvm enter the following as the command:
  8. #!/usr/bin/env rvm-shell 1.9.3
    foodcritic .
  9. Click “Save”.
  10. Cool, we’ve created your new job. Now lets see if it works. Click “Build Now” on the left-hand side.
  11. You can click the build progress bar to be taken directly to the console output.
  12. After a moment you should see that the build has been successful and foodcritic warnings (if any) are shown in your console output.
  13. Yes, for maximum goodness you should be automating all this with Chef. 🙂
  14. For more information refer to the instructions for building a “free-style software project” here:
    https://wiki.jenkins-ci.org/display/JENKINS/Building+a+software+project
  15. See also this blog post about rvm-shell which ensures you have the right version of Ruby loaded when trying to build with foodcritic:
    http://blog.ninjahideout.com/posts/rvm-improved-support-for-hudson

Failing the build
The above is a start, but we’d also like to fail the build if there are any warnings that might stop the cookbook from working.

CI is only useful if people will act on it. Lets start by only failing the build when there is a correctness problem that would likely break our Chef run. We’ll continue to have the other warnings available for reference in the console log but only correctness issues will fail the build.

Select the “my-cookbook” job in Jenkins and click “Configure”.

Scroll down to our “Execute shell” command and change it to look like the following:

#!/usr/bin/env rvm-shell 1.9.3
foodcritic -f correctness .
Click “Save” and then “Build Now”.

More complex expressions
Foodcritic supports more complex expressions with the standard Cucumber tag syntax. For example:

#!/usr/bin/env rvm-shell 1.9.3
foodcritic -f any -f ~FC014 .
Here we use any to fail the build on any warning, but then use the tilde ~ to exclude FC014. The build will fail on any warning raised, except FC014.

You can find more detail on Cucumber tag expressions at the Cucumber wiki:

https://github.com/cucumber/cucumber/wiki/Tags

Tracking warnings over time
The Jenkins Warnings plugin can be configured to understand foodcritic output and track your cookbook warnings over time.

You’ll need to install the Warnings plugin. In Jenkins select “Manage Jenkins” -> “Manage Plugins”. Select the “Available” tab. Check the checkbox next to the Warnings Plugin and click the “Install without restart” button.

From “Manage Jenkins” select “Configure System”. Scroll down to the “Compiler Warnings” section and click the “Add” button next to “Parsers”.

Enter “Foodcritic” in the Name field.

Enter the following regex in the “Regular Expression” field:

^(FC[0-9]+): (.*): ([^:]+):([0-9]+)$

Enter the following Groovy script into the “Mapping Script” field:

import hudson.plugins.warnings.parser.Warning

String fileName = matcher.group(3)
String lineNumber = matcher.group(4)
String category = matcher.group(1)
String message = matcher.group(2)

return new Warning(fileName, Integer.parseInt(lineNumber), “Chef Lint Warning”, category, message);

To test the match, enter the following example message in the “Example Log Message” field:

FC001: Use strings in preference to symbols to access node attributes: ./recipes/innostore.rb:30
Click in the “Mapping Script” field and you should see the following appear below the Example Log Message:

One warning found
file name: ./recipes/innostore.rb
line number: 30
priority: Normal Priority
category: FC001
type: Chef Lint Warning
message: Use strings in prefe[…]ols to access node attributes
Cool, it’s parsed our example message successfully. Click “Save” to save the parser.

Select the “my-cookbook” job in Jenkins and click “Configure”.

Check the checkbox next to “Scan for compiler warnings” underneath “Post-build Actions”.

Click the “Add” button next to “Scan console log” and select our “Foodcritic” parser from the drop-down list.

Click the “Advanced…” button and check the “Run always” checkbox.

Click “Save” and then “Build Now”.

Add the bottom of the console log you should see something similar to this:

[WARNINGS] Parsing warnings in console log with parsers [Foodcritic]
[WARNINGS] Foodcritic : Found 48 warnings.
Click “Back to Project”. Once you have built the project a couple of times the warnings trend will appear here.

Reference:
http://acrmp.github.io/foodcritic/
https://docs.chef.io/foodcritic.html
http://www.foodcritic.io/
https://atom.io/packages/linter-foodcritic
http://www.slideshare.net/harthoover/rapid-chef-development-with-berkshelf-testkitchen-and-foodcritic

Tagged : / / / / / / / / / / /

Most Useful Tools for Chef

useful-tools-for-chef

Useful Tools for Chef 

Chef Code Correctness (Chef Code Analysis)

  • Foodcritic
  • Rubocop

Chef Unit Testing

  • ChefSpec

Chef Integration Testing

  • TestKitchen
  • ServerSpec
  • RSpec

Some other tools which can be used along with Chef

  • dsh
  • gsh

Some other chef & Knife tools

  • knife-lastrun
  • knife-preflight
  • Chef-handlers
  • knife-flip
  • knife-bulkchangeenvironment
  • knife-env-diff
  • knife spork

Chef Tools for Windows

  • POSHChef – POSHChef has been built as a native chef client on Windows using PowerShell.
Tagged : / / / / / / /

How to Implement Chef roles using Chef server ?

implement-chef-roles-using-chef-server

What is Role?

A role is a way to define certain patterns and processes that exist across nodes in an organization as belonging to a single job function. Each role consists of zero (or more) attributes and a run-list. Each node can have zero (or more) roles assigned to it. When a role is run against a node, the configuration details of that node are compared against the attributes of the role, and then the contents of that role’s run-list are applied to the node’s configuration details. When a chef-client runs, it merges its own attributes and run-lists with those contained within each assigned role.

How to use Roles in Chef?

  1. Create a Role and add the cookbooks into it.
  2. Assign the role into each node or bootstrap new nodes using roles
  3. The the run list

How to create Role?

Method 1: In Chef Server directly

> knife role create client1

&

Add the run list e.g. “recipe[nginx]” under “run_list”

Save & exit

The role will be created in Chef Server.

Example

{ "name": "client1", "description": "", "json_class": "Chef::Role", "default_attributes": { }, "override_attributes": { }, "chef_type": "role", "run_list": [ "recipe[nginx]", "recipe[phpapp::web]" ], "env_run_lists": { } } 

Let’s download the role from the Chef server so we have it locally in a Chef repository.

> knife role show client1 -d -Fjson > roles/client1.json

Now, Lets bootstrap the node using knife with roles

> knife bootstrap --run-list "role[client1]" --sudo hostname

How to edit the roles in chef Server?

> knife role edit client1

Method 2: In local repo under chef-repo folder

> vi webserver.rb

example –

name "web_server" description "Role for web servers" run_list(   "role[base]",   "recipe{web_server]" ) 

& Then upload to chef server using following commands.

> knife role from file path/to/role/file

How Assigning Roles to Nodes?

> knife node list
> knife node edit node_name

This will bring up the node’s definition file, which will allow us to add a role to its run_list:

{ "name": "client1", "chef_environment": "_default", "normal": { "tags": [  ] 	}, "run_list": [ 	"recipe[nginx]" ] } 

For instance, we can replace our recipe with our role in this file:

{ "name": "client1", "chef_environment": "_default", "normal": { "tags": [ ] }, "run_list": [ "role[web_server]" ] } 

How to bootstrap node using role?

> knife bootstrap {{address}} --ssh-user {{user}} --ssh-password '{{password}}' --sudo --use-sudo-password --node-name node1 --run-list 'role[production]'
> knife bootstrap --run-list "role[phpapp-web]" --sudo hostname

How to run roles against nodes?

You can run chef-client on multiple nodes via knife ssh command like, To query for all nodes that have the webserver role and then use SSH to run the command sudo chef-client, enter:

> knife ssh "role:webserver" "sudo chef-client"

To find the uptime of all of web servers running Ubuntu on the Amazon EC2 platform, enter:

> knife ssh "role:web" "uptime" -x ubuntu -a ec2.public_hostname

Reference

http://docs.chef.io/roles.html

https://docs.chef.io/knife_ssh.html

https://docs.chef.io/knife_role.html

Tagged : / / / / / / / / / / / / /

Chef Commands Line Reference | Chef Commands Line Guide | Cheatsheet

chef-commands-line-reference

To run single recipe using chef-solo

> chef-solo -c /opt/chef/repo/config/solo.rb -o my_cookbook::recipe

To run the single reciepe in same machine

> chef-apply hello.rb

To generate the cookbook standard structure

> chef generate cookbook learn_chef_httpd
> knife cookbook create smartmontools -r md

To generate the template file in cookbook

> chef generate template learn_chef_httpd index.html

To run the cookbook in local mode

> sudo chef-client --local-mode --runlist ‘recipe[learn_chef_httpd]’

To download the cookbooks from market place

> knife cookbook site download learn_chef_httpd
> knife cookbook site install learn_chef_httpd

To Upload the cookbooks to chef server

> knife cookbook upload learn_chef_httpd
> knife cookbook upload -a

To bootstrap a nodes

> knife bootstrap {{address}} --ssh-user {{user}} --ssh-password '{{password}}' --sudo --use-sudo-password --node-name node1 --run-list 'recipe[learn_chef_apache2]'
> knife bootstrap uvo1t75faaktzc532w6.vm.cld.sr -x root -P Br356YS0iy –sudo –node-name firefox
> knife bootstrap 123.45.6.789 -x username -P password –sudo

To see the list of nodes

>knife node list

To edit the node run list

> knife node edit name_of_node

To see the info about each nodes

> knife node show node1

Run the cooksbooks on nodes

> knife ssh {{address}} 'sudo chef-client' --manual-list --ssh-user {{user}} --ssh-password '{{password}}'
> ssh username@ipadddress -i mycredentials.pem sudo chef-client

To add the run list to the nodes.

knife node run_list add C2445575914.domain 'recipe[hptrain]'
knife node run_list set test-node '''recipe[iptables]''' [Windows - Powershell]
knife node run_list set test-node 'recipe[iptables]' [Windows - Command]
Tagged : / / / / / / / / / / / /

Top 25 Chef configuration management interview questions and answers
chef-interview-questions-and-answers

Source – learn.chef.io

What is a resource?
Answer- A resource represents a piece of infrastructure and its desired state, such as a package that should be installed, a service that should be running, or a file that should be generated.

Question: What is a recipe?
Answer- A recipe is a collection of resources that describes a particular configuration or policy. A recipe describes everything that is required to configure part of a system. Recipes do things such as:

install and configure software components.
manage files.
deploy applications.
execute other recipes.

Question: What happens when you don’t specify a resource’s action?
Answer- When you don’t specify a resource’s action, Chef applies the default action.

Question: Are these two recipes the same?

package 'httpd'
service 'httpd' do    action [:enable, :start]  end

&&

service 'httpd' do    action [:enable, :start]    end
package 'httpd'

Answer-
No, they are not. Remember that Chef applies resources in the order they appear. So the first recipe ensures that the httpd package is installed and then configures the service. The second recipe configures the service and then ensures the package is installed.

Question: The second recipe may not work as you’d expect because the service resource will fail if the package is not yet installed.

Are these two recipes the same?

package 'httpd'
service 'httpd' do    action [:enable, :start]    end
package 'httpd'
service 'httpd' do    action [:start, :enable]    end

Answer-
No, they are not. Although both recipes ensure that the httpd package is installed before configuring its service, the first recipe enables the service when the system boots and then starts it. The second recipe starts the service and then enables it to start on reboot.

Are these two recipes the same?

file ‘/etc/motd’ do
owner ‘root’
group ‘root’
mode ‘0755’
action :create
end

file ‘/etc/motd’ do
action :create
mode ‘0755’
group ‘root’
owner ‘root’
end

Answer-
Yes, they are! Order matters with a lot of things in Chef, but you can order resource attributes any way you want.

Question –
Write a service resource that stops and then disables the httpd service from starting when the system boots.

Answer –
service ‘httpd’ do
action [:stop, :disable]
end

How does a cookbook differ from a recipe?
A recipe is a collection of resources, and typically configures a software package or some piece of infrastructure. A cookbook groups together recipes and other information in a way that is more manageable than having just recipes alone.

For example, in this lesson you used a template resource to manage your HTML home page from an external file. The recipe stated the configuration policy for your web site, and the template file contained the data. You used a cookbook to package both parts up into a single unit that you can later deploy.

How does chef-apply differ from chef-client?

chef-apply applies a single recipe; chef-client applies a cookbook.

For learning purposes, we had you start off with chef-apply because it helps you understand the basics quickly. In practice, chef-apply is useful when you want to quickly test something out. But for production purposes, you typically run chef-client to apply one or more cookbooks.

You’ll learn in the next module how to run chef-client remotely from your workstation.

What’s the run-list?

The run-list lets you specify which recipes to run, and the order in which to run them. The run-list is important for when you have multiple cookbooks, and the order in which they run matters.

What are the two ways to set up a Chef server?

Install an instance on your own infrastructure.
Use hosted Chef.

What’s the role of the Starter Kit?
The Starter Kit provides certificates and other files that enable you to securely communicate with the Chef server.

Where can you get reusable cookbooks that are written and maintained by the Chef community?
Chef Supermarket, https://supermarket.chef.io.

What’s the command that enables you to interact with the Chef server?
knife

What is a node?
A node represents a server and is typically a virtual machine, container instance, or physical server – basically any compute resource in your infrastructure that’s managed by Chef.

What information do you need to in order to bootstrap?
You need:

your node’s host name or public IP address.
a user name and password you can log on to your node with.
Alternatively, you can use key-based authentication instead of providing a user name and password.

What happens during the bootstrap process?
During the bootstrap process, the node downloads and installs chef-client, registers itself with the Chef server, and does an initial checkin. During this checkin, the node applies any cookbooks that are part of its run-list.

Which of the following lets you verify that your node has successfully bootstrapped?

The Chef management console.
knife node list
knife node show
You can use all three of these methods.

What is the command you use to upload a cookbook to the Chef server?
knife cookbook upload

How do you apply an updated cookbook to your node?
We mentioned two ways.

Run knife ssh from your workstation.
SSH directly into your server and run chef-client.
You can also run chef-client as a daemon, or service, to check in with the Chef server on a regular interval, say every 15 or 30 minutes.

Update your Apache cookbook to display your node’s host name, platform, total installed memory, and number of CPUs in addition to its FQDN on the home page.

Update index.html.erb like this.
<html>
<body>
<h1>hello from <%= node[‘fqdn’] %></h1>

<pre>
<%= node[‘hostname’] %>
<%= node[‘platform’] %> – <%= node[‘platform_version’] %>
<%= node[‘memory’][‘total’] %> RAM
<%= node[‘cpu’][‘total’] %> CPUs
</pre>
</body>
</html>

Then upload your cookbook and run it on your node.

What would you set your cookbook’s version to once it’s ready to use in production?

According to Semantic Versioning, you should set your cookbook’s version number to 1.0.0 at the point it’s ready to use in production.

What is the latest version of the haproxy community cookbook?

To know the latest version of any cookbook on Chef Supermarket, browse to its page and view the latest version from the version selection box.

Or, get the info from the knife cookbook site command, like this.

knife cookbook site show haproxy | grep latest_version
latest_version: http://cookbooks.opscode.com/api/v1/cookbooks/haproxy/versions/1.6.6

Create a second node and apply the awesome_customers cookbook to it. How long does it take?

You already accomplished the majority of the tasks that you need. You wrote the awesome_customers cookbook, uploaded it and its dependent cookbooks to the Chef server, applied the awesome_customers cookbook to your node, and verified that everything’s working.

All you need to do now is:

Bring up a second Red Hat Enterprise Linux or CentOS node.
Copy your secret key file to your second node.
Bootstrap your node the same way as before. Because you include the awesome_customers cookbook in your run-list, your node will apply that cookbook during the bootstrap process.
The result is a second node that’s configured identically to the first one. The process should take far less time because you already did most of the work.

Now when you fix an issue or add a new feature, you’ll be able to deploy and verify your update much more quickly!

What’s the value of local development using Test Kitchen?

Local development with Test Kitchen:

enables you to use a variety of virtualization providers that create virtual machine or container instances locally on your workstation or in the cloud.
enables you to run your cookbooks on servers that resemble those that you use in production.
speeds up the development cycle by automatically provisioning and tearing down temporary instances, resolving cookbook dependencies, and applying your cookbooks to your instances.

What is VirtualBox? What is Vagrant?

VirtualBox is the software that manages your virtual machine instances.

Vagrant helps Test Kitchen communicate with VirtualBox and configures things like available memory and network settings.

Verify that your motd cookbook runs on both CentOS 6.6 and CentOS 6.5.

Your motd cookbook is already configured to work on CentOS 6.6 as well as CentOS 6.5, so you don’t need to modify it.

To run it on CentOS 6.5, add an entry to the platforms section of your .kitchen.yml file like this.

---       driver:       name: vagrant
provisioner:       name: chef_zero
platforms:       - name: centos-6.6       driver:       box: opscode-centos-6.6       box_url: http://opscode-vm-bento.s3.amazonaws.com/vagrant/virtualbox/opscode_centos-6.6_chef-provisionerless.box       - name: centos-6.5       driver:       box: opscode-centos-6.5       box_url: http://opscode-vm-bento.s3.amazonaws.com/vagrant/virtualbox/opscode_centos-6.5_chef-provisionerless.box
suites:       - name: default       run_list:       - recipe[motd::default]       attributes:

In many cases, Test Kitchen can infer the box and box_url parameters, which specify the name and location of the base image, or box. We specify them here to show you how to use them.

Run kitchen list to see the matrix of test instances that are available. Here, we have two platforms – CentOS 6.5 and CentOS 6.6 – multiplied by one suite – default.

$kitchen list

Instance           Driver   Provisioner  Verifier  Transport  Last Action default-centos-66  Vagrant  ChefZero     Busser    Ssh        <Not Created> default-centos-65  Vagrant  ChefZero     Busser    Ssh        <Not Created>

Run kitchen converge to create the instances and apply the motd cookbook.

$kitchen converge    -----> Starting Kitchen (v1.4.0)    -----> Creating <default-centos-66>...    Bringing machine 'default' up with 'virtualbox' provider...    [...]    Running handlers:    Running handlers complete    Chef Client finished, 1/1 resources updated in 10.372334751 seconds    Finished converging <default-centos-66> (3m52.59s).    -----> Creating <default-centos-65>...    Bringing machine 'default' up with 'virtualbox' provider...    [...]    Running handlers:    Running handlers complete    Chef Client finished, 1/1 resources updated in 5.32753132 seconds    Finished converging <default-centos-65> (10m12.63s).  -----> Kitchen is finished. (19m47.71s)

Now to confirm that everything’s working, run kitchen login. But this time, you need to provide the instance name so that Test Kitchen knows which instance to connect to.

$kitchen login default-centos-66       Last login: Wed May 13 20:15:00 2015 from 10.0.2.2              hostname:  default-centos-66       fqdn:      default-centos-66       memory:    469392kB       cpu count: 1       [vagrant@default-centos-66 ~]$ logout       Connection to 127.0.0.1 closed.$kitchen login default-centos-65       Last login: Wed May 13 20:28:18 2015 from 10.0.2.2              hostname:  default-centos-65       fqdn:      default-centos-65       memory:    469452kB       cpu count: 1       [vagrant@default-centos-65 ~]$ logout       Connection to 127.0.0.1 closed.
Tagged : / / / / / / / / / / / / / / /

Chef configuration management interview questions and answers | Chef Interview Q&A
chef-interview-questions-and-answers

Source – learn.chef.io

What is a resource?
Answer- A resource represents a piece of infrastructure and its desired state, such as a package that should be installed, a service that should be running, or a file that should be generated.

Question: What is a recipe?
Answer- A recipe is a collection of resources that describes a particular configuration or policy. A recipe describes everything that is required to configure part of a system. Recipes do things such as:

install and configure software components.
manage files.
deploy applications.
execute other recipes.

Question: What happens when you don’t specify a resource’s action?
Answer- When you don’t specify a resource’s action, Chef applies the default action.

Question: Are these two recipes the same?

package 'httpd'
service 'httpd' do    action [:enable, :start]  end

&&

service 'httpd' do    action [:enable, :start]    end
package 'httpd'

Answer-
No, they are not. Remember that Chef applies resources in the order they appear. So the first recipe ensures that the httpd package is installed and then configures the service. The second recipe configures the service and then ensures the package is installed.

Question: The second recipe may not work as you’d expect because the service resource will fail if the package is not yet installed.

Are these two recipes the same?

package 'httpd'
service 'httpd' do    action [:enable, :start]    end
package 'httpd'
service 'httpd' do    action [:start, :enable]    end

Answer-
No, they are not. Although both recipes ensure that the httpd package is installed before configuring its service, the first recipe enables the service when the system boots and then starts it. The second recipe starts the service and then enables it to start on reboot.

Are these two recipes the same?

file ‘/etc/motd’ do
owner ‘root’
group ‘root’
mode ‘0755’
action :create
end

file ‘/etc/motd’ do
action :create
mode ‘0755’
group ‘root’
owner ‘root’
end

Answer-
Yes, they are! Order matters with a lot of things in Chef, but you can order resource attributes any way you want.

Question –
Write a service resource that stops and then disables the httpd service from starting when the system boots.

Answer –
service ‘httpd’ do
action [:stop, :disable]
end

How does a cookbook differ from a recipe?
A recipe is a collection of resources, and typically configures a software package or some piece of infrastructure. A cookbook groups together recipes and other information in a way that is more manageable than having just recipes alone.

For example, in this lesson you used a template resource to manage your HTML home page from an external file. The recipe stated the configuration policy for your web site, and the template file contained the data. You used a cookbook to package both parts up into a single unit that you can later deploy.

How does chef-apply differ from chef-client?

chef-apply applies a single recipe; chef-client applies a cookbook.

For learning purposes, we had you start off with chef-apply because it helps you understand the basics quickly. In practice, chef-apply is useful when you want to quickly test something out. But for production purposes, you typically run chef-client to apply one or more cookbooks.

You’ll learn in the next module how to run chef-client remotely from your workstation.

What’s the run-list?

The run-list lets you specify which recipes to run, and the order in which to run them. The run-list is important for when you have multiple cookbooks, and the order in which they run matters.

What are the two ways to set up a Chef server?

Install an instance on your own infrastructure.
Use hosted Chef.

What’s the role of the Starter Kit?
The Starter Kit provides certificates and other files that enable you to securely communicate with the Chef server.

Where can you get reusable cookbooks that are written and maintained by the Chef community?
Chef Supermarket, https://supermarket.chef.io.

What’s the command that enables you to interact with the Chef server?
knife

What is a node?
A node represents a server and is typically a virtual machine, container instance, or physical server – basically any compute resource in your infrastructure that’s managed by Chef.

What information do you need to in order to bootstrap?
You need:

your node’s host name or public IP address.
a user name and password you can log on to your node with.
Alternatively, you can use key-based authentication instead of providing a user name and password.

What happens during the bootstrap process?
During the bootstrap process, the node downloads and installs chef-client, registers itself with the Chef server, and does an initial checkin. During this checkin, the node applies any cookbooks that are part of its run-list.

Which of the following lets you verify that your node has successfully bootstrapped?

The Chef management console.
knife node list
knife node show
You can use all three of these methods.

What is the command you use to upload a cookbook to the Chef server?
knife cookbook upload

How do you apply an updated cookbook to your node?
We mentioned two ways.

Run knife ssh from your workstation.
SSH directly into your server and run chef-client.
You can also run chef-client as a daemon, or service, to check in with the Chef server on a regular interval, say every 15 or 30 minutes.

Update your Apache cookbook to display your node’s host name, platform, total installed memory, and number of CPUs in addition to its FQDN on the home page.

Update index.html.erb like this.
<html>
<body>
<h1>hello from <%= node[‘fqdn’] %></h1>

<pre>
<%= node[‘hostname’] %>
<%= node[‘platform’] %> – <%= node[‘platform_version’] %>
<%= node[‘memory’][‘total’] %> RAM
<%= node[‘cpu’][‘total’] %> CPUs
</pre>
</body>
</html>

Then upload your cookbook and run it on your node.

What would you set your cookbook’s version to once it’s ready to use in production?

According to Semantic Versioning, you should set your cookbook’s version number to 1.0.0 at the point it’s ready to use in production.

What is the latest version of the haproxy community cookbook?

To know the latest version of any cookbook on Chef Supermarket, browse to its page and view the latest version from the version selection box.

Or, get the info from the knife cookbook site command, like this.

knife cookbook site show haproxy | grep latest_version
latest_version: http://cookbooks.opscode.com/api/v1/cookbooks/haproxy/versions/1.6.6

Create a second node and apply the awesome_customers cookbook to it. How long does it take?

You already accomplished the majority of the tasks that you need. You wrote the awesome_customers cookbook, uploaded it and its dependent cookbooks to the Chef server, applied the awesome_customers cookbook to your node, and verified that everything’s working.

All you need to do now is:

Bring up a second Red Hat Enterprise Linux or CentOS node.
Copy your secret key file to your second node.
Bootstrap your node the same way as before. Because you include the awesome_customers cookbook in your run-list, your node will apply that cookbook during the bootstrap process.
The result is a second node that’s configured identically to the first one. The process should take far less time because you already did most of the work.

Now when you fix an issue or add a new feature, you’ll be able to deploy and verify your update much more quickly!

What’s the value of local development using Test Kitchen?

Local development with Test Kitchen:

enables you to use a variety of virtualization providers that create virtual machine or container instances locally on your workstation or in the cloud.
enables you to run your cookbooks on servers that resemble those that you use in production.
speeds up the development cycle by automatically provisioning and tearing down temporary instances, resolving cookbook dependencies, and applying your cookbooks to your instances.

What is VirtualBox? What is Vagrant?

VirtualBox is the software that manages your virtual machine instances.

Vagrant helps Test Kitchen communicate with VirtualBox and configures things like available memory and network settings.

Verify that your motd cookbook runs on both CentOS 6.6 and CentOS 6.5.

Your motd cookbook is already configured to work on CentOS 6.6 as well as CentOS 6.5, so you don’t need to modify it.

To run it on CentOS 6.5, add an entry to the platforms section of your .kitchen.yml file like this.

---       driver:       name: vagrant
provisioner:       name: chef_zero
platforms:       - name: centos-6.6       driver:       box: opscode-centos-6.6       box_url: http://opscode-vm-bento.s3.amazonaws.com/vagrant/virtualbox/opscode_centos-6.6_chef-provisionerless.box       - name: centos-6.5       driver:       box: opscode-centos-6.5       box_url: http://opscode-vm-bento.s3.amazonaws.com/vagrant/virtualbox/opscode_centos-6.5_chef-provisionerless.box
suites:       - name: default       run_list:       - recipe[motd::default]       attributes:

In many cases, Test Kitchen can infer the box and box_url parameters, which specify the name and location of the base image, or box. We specify them here to show you how to use them.

Run kitchen list to see the matrix of test instances that are available. Here, we have two platforms – CentOS 6.5 and CentOS 6.6 – multiplied by one suite – default.

$kitchen list

Instance           Driver   Provisioner  Verifier  Transport  Last Action default-centos-66  Vagrant  ChefZero     Busser    Ssh        <Not Created> default-centos-65  Vagrant  ChefZero     Busser    Ssh        <Not Created>

Run kitchen converge to create the instances and apply the motd cookbook.

$kitchen converge    -----> Starting Kitchen (v1.4.0)    -----> Creating <default-centos-66>...    Bringing machine 'default' up with 'virtualbox' provider...    [...]    Running handlers:    Running handlers complete    Chef Client finished, 1/1 resources updated in 10.372334751 seconds    Finished converging <default-centos-66> (3m52.59s).    -----> Creating <default-centos-65>...    Bringing machine 'default' up with 'virtualbox' provider...    [...]    Running handlers:    Running handlers complete    Chef Client finished, 1/1 resources updated in 5.32753132 seconds    Finished converging <default-centos-65> (10m12.63s).  -----> Kitchen is finished. (19m47.71s)

Now to confirm that everything’s working, run kitchen login. But this time, you need to provide the instance name so that Test Kitchen knows which instance to connect to.

$kitchen login default-centos-66       Last login: Wed May 13 20:15:00 2015 from 10.0.2.2              hostname:  default-centos-66       fqdn:      default-centos-66       memory:    469392kB       cpu count: 1       [vagrant@default-centos-66 ~]$ logout       Connection to 127.0.0.1 closed.$kitchen login default-centos-65       Last login: Wed May 13 20:28:18 2015 from 10.0.2.2              hostname:  default-centos-65       fqdn:      default-centos-65       memory:    469452kB       cpu count: 1       [vagrant@default-centos-65 ~]$ logout       Connection to 127.0.0.1 closed.
Tagged : / / / / / / / / / / / / / / /

Bootstrap a Microsoft Windows node using Chef

Bootstrap a Microsoft Windows node, the “knife windows” plugin is required, 

More info about knife window tool, http://docs.chef.io/plugin_knife_windows.html

knife bootstrap windows winrm uvo1eak9a5geec05f7z.vm.cld.sr –winrm-user administrator –winrm-password ‘Rx4m7W4PQu’ –node-name firefox_win –run-list ‘recipe[snc_firefox]’

nife bootstrap windows winrm uvo1eak9a5geec05f7z.vm.cld.sr -x administrator -P Rx4m7W4PQu

Tagged : / / / / / / / /

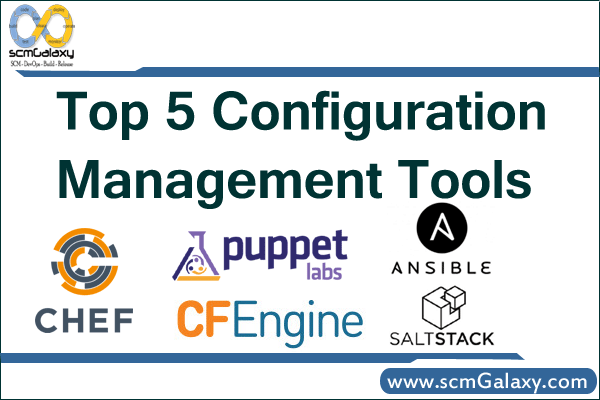
Top 5 Configuration Management Tools

top-5-configuration-management-tools

Top 5 Configuration Management Tools

Puppet

In computing, Puppet is an open-source configuration management utility. It runs on many Unix-like systems as well as on Microsoft Windows, and includes its own declarative language to describe system configuration.

Puppet is produced by Puppet Labs, founded by Luke Kanies in 2005. It is written in Ruby and released as free software under the GNU General Public License (GPL) until version 2.7.0 and the Apache License 2.0 after that.

What started out as a popular DevOps tool has quickly become a movement. Written in Ruby, like Chef, Puppet also comes in both an open source and enterprise version. However, where Chef has a healthy offering of features across both open source and enterprise versions, Puppet has placed the majority of its feature set into enterprise status. Features that the open source version comes with include provisioning (Amazon EC2, Google Compute Engine), configuration management (operating systems and applications) plus 2,000+ pre-built configurations on Puppet Forge. Considerably more features are available for the enterprise version, including the open source features plus graphical user interface, event inspector (visualize infrastructure changes), supported modules, and provisioning (VMware VMs). Configuration management (discovery, user accounts), orchestration, task automation, role-based access control (with external authentication support) are also included. Puppet enterprise has a unified cross-platform installer of all components and support.

Chef

Offered as both an open source and enterprise product, Chef is a powerful tool for full IT infrastructure configuration management. With open source Chef at the heart of both offerings, shared features include a flexible and scalable automation platform, access to 800+ reusable cookbooks and integration with leading cloud providers. Chef also offers enterprise platform support, including Windows and Solaris, and allows you to create, bootstrap and manage OpenStack clouds. It has easy installation with ‘one-click’ Omnibus Installer, automatic system discovery with Ohai, text-based search capabilities and multiple environment support. Other notable features inclyde the “Knife” command line interface, “Dry Run” mode for testing potential changes, and the ability to manage 10,000+ nodes on a single Chef server. Features only available in the enterprise version of Chef include availablility as a hosted service, enhanced management console, centralized activity and resource reporting, as well as “Push” command and control client runs. Multi-tenancy, role-based access control (RBAC), high availability installation support and verification, along with centralized authentication using LDAP or Active Directory are included with Chef enterprise.

Ansible

Ansible is a model-driven configuration management tool that leverages SSH to improve security and simplify management. In addition to configuration management, it is capable of automating app deployment (even multi-tier deployment), workflow orchestration and cloud provisioning, hence the company likes the tool to be categorized as an “orchestration engine.” Ansible is built on five design principles including ease of use (doesn’t require writing scripts or custom code), low learning curve (both for sysadmins and developers), comprehensive automation (allowing you to automate almost anything in your environment), efficiency (since it runs on OpenSSH it doesn’t rely on memory or CPU resources), and security (it is inherently more secure because it doesn’t require an agent, additional ports or root level daemons). As many other open source projects, Ansible has a paid product that comes in the form of a web UI called Ansible Tower.

CFEngine

One of the earliest full-featured configuration management systems out there, CFEngine has gone through several iterations and maintained relevance as OS have gone from the local data center to the cloud. At the heart of the infrastructure automation framework, CFEngine is also a modeling and monitoring compliance engine, capable of sitting on a small footprint. As recommended by CFEngine, steps toward identifying an initial desired state include: 1) model the desired state of your environment; 2) simulate configuration changes before committing them; 3) confirm the desired state and set for automatic self-healing; 4) collect reports on the differences between actual and desired states. CFEngine has a library of reusable data-driven models that will help users model their desired states. These infrastructure patterns are designed to be reusable across the Enterprise.

Salt

As part of a larger, enterprise ready application, the configuration management piece of Salt is as robust and feature-full as would be expected. Built upon the remote execution core, execution of the system occurs on “minions” which receives commands from the central Salt master and replies with the results of said commands. Salt support simultaneous configuration of tens of thousands of hosts. Based upon host “states”, no programming is required to write the configuration files, which are small and easy to understand, that help identify the state of each host. Additionally, for those who do program, or admins who want to have more control and familiarity with their configuration files, any language can be used to render the configurations.

Tagged : / / / / / / / / / / / / / / /