Limited Time Offer!

For Less Than the Cost of a Starbucks Coffee, Access All DevOpsSchool Videos on YouTube Unlimitedly.
Master DevOps, SRE, DevSecOps Skills!

Enroll Now

Top 10 Decision Management Systems

Decision Management Systems (DMS) are software platforms or frameworks that facilitate the management, automation, and optimization of business decisions. These systems typically incorporate business rules management, analytics, and decision modeling capabilities to enable organizations to make informed and consistent decisions. DMS can be used across various industries and business functions, including finance, healthcare, customer service, supply chain management, and more.

Here are 10 popular Decision Management Systems (DMS):

  1. IBM Operational Decision Manager
  2. FICO Decision Management Suite
  3. SAS Decision Manager
  4. Oracle Business Rules
  5. Pega Decision Management
  6. TIBCO BusinessEvents
  7. Red Hat Decision Manager
  8. SAP Decision Service Management
  9. OpenRules
  10. Drools

1. IBM Operational Decision Manager:

IBM’s DMS provides a comprehensive platform for modeling, automating, and optimizing business decisions. It combines business rules management, predictive analytics, and optimization techniques.

Key features:

  • Business Rules Management: IBM ODM offers a powerful business rules management system (BRMS) that allows organizations to define, manage, and govern business rules. It provides a user-friendly interface for business analysts to author and update rules without the need for coding.
  • Decision Modeling: ODM includes decision modeling capabilities that enable organizations to model and visualize their decision logic using decision tables, decision trees, and decision flowcharts. This makes it easier to understand and communicate complex decision-making processes.
  • Decision Validation and Testing: ODM provides tools for validating and testing decision models and business rules. Users can simulate different scenarios, analyze rule conflicts or inconsistencies, and verify the accuracy and completeness of their decision logic.

2. FICO Decision Management Suite:

FICO’s DMS offers a suite of tools for decision modeling, optimization, and rules management. It enables organizations to automate and improve decision-making processes using advanced analytics.

Key features:

  • Decision Modeling and Strategy Design: The suite provides a visual decision modeling environment that allows business analysts and domain experts to define and document decision logic using decision tables, decision trees, and decision flows. It enables the creation of reusable decision models and strategies.
  • Business Rules Management: FICO Decision Management Suite includes a powerful business rules engine that allows organizations to define, manage, and execute complex business rules. It provides a user-friendly interface for managing rule sets, rule versioning, and rule governance.
  • Analytics Integration: The suite integrates with advanced analytics capabilities, including predictive modeling, machine learning, and optimization techniques. This enables organizations to leverage data-driven insights to enhance decision-making and optimize outcomes.

3. SAS Decision Manager:

SAS Decision Manager is a comprehensive platform that allows organizations to model, automate, and monitor decision processes. It provides a visual interface for creating and deploying rules and decision flows.

Key features:

  • Decision Modeling: SAS Decision Manager allows users to model and visualize decision logic using graphical interfaces and decision tables. It provides a user-friendly environment for business analysts and domain experts to define decision rules and dependencies.
  • Business Rules Management: The platform offers a powerful business rules management system (BRMS) that enables organizations to define, manage, and govern business rules. It supports the creation and management of rule sets, rule libraries, and rule versioning.
  • Decision Automation: SAS Decision Manager enables the automation of decision processes. It allows for the execution of decision logic within operational systems and workflows, reducing manual effort and ensuring consistent and timely decision-making.

4. Oracle Business Rules:

Oracle Business Rules provides a platform for modeling, automating, and managing business rules. It integrates with other Oracle products and offers a range of features for decision management.

Key features:

  • Rule Authoring and Management: Oracle Business Rules offers a user-friendly interface for defining, authoring, and managing business rules. It provides a graphical rule editor that allows business users and subject matter experts to define rules using a visual representation.
  • Decision Modeling: The platform supports decision modeling using decision tables, decision trees, and other visual representations. It enables users to define decision logic and dependencies in a structured and intuitive manner.
  • Rule Repository and Versioning: Oracle Business Rules includes a rule repository that allows for the storage, organization, and versioning of rules. It provides a centralized location to manage and govern rules, ensuring consistency and traceability.

5. Pega Decision Management:

Pega Decision Management is part of Pega’s unified platform for business process management and customer engagement. It provides tools for designing, executing, and optimizing business decisions.

Key features:

  • Decision Modeling: Pega Decision Management allows users to model and visualize decision logic using decision tables, decision trees, and other visual representations. It provides a user-friendly interface for business users and domain experts to define and manage decision rules.
  • Business Rules Management: The platform includes a powerful business rules engine that enables organizations to define, manage, and govern business rules. It supports the creation and management of rule sets, rule libraries, and rule versioning.
  • Decision Strategy Design: Pega Decision Management provides tools for designing decision strategies. It allows users to define and orchestrate a series of decisions, actions, and treatments to optimize customer interactions and outcomes.

6. TIBCO BusinessEvents:

TIBCO BusinessEvents is a complex event processing platform that enables organizations to make real-time decisions based on streaming data and business rules. It offers high-performance event processing and decision automation capabilities.

Key features:

  • Event Processing: TIBCO BusinessEvents provides powerful event processing capabilities that allow organizations to detect, analyze, and correlate events in real-time. It can handle high volumes of events from multiple sources and process them with low latency.
  • Complex Event Processing (CEP): The platform supports complex event processing, which involves analyzing and correlating multiple events to identify patterns, trends, and anomalies. It enables organizations to gain insights from event data and take appropriate actions in real-time.
  • Business Rules and Decision Management: TIBCO BusinessEvents incorporates a business rules engine that allows organizations to define, manage, and execute business rules. It enables the automation of decision-making processes based on real-time event data.

7. Red Hat Decision Manager:

Red Hat Decision Manager is an open-source decision management platform that combines business rules management, complex event processing, and predictive analytics. It provides tools for building and managing decision services.

Key features:

  • Business Rules Management: Red Hat Decision Manager offers a powerful business rules engine that allows organizations to define, manage, and execute business rules. It provides a user-friendly interface for business users and domain experts to author and maintain rules.
  • Decision Modeling: The platform supports decision modeling using decision tables, decision trees, and other visual representations. It allows users to model and visualize decision logic in a structured and intuitive manner.
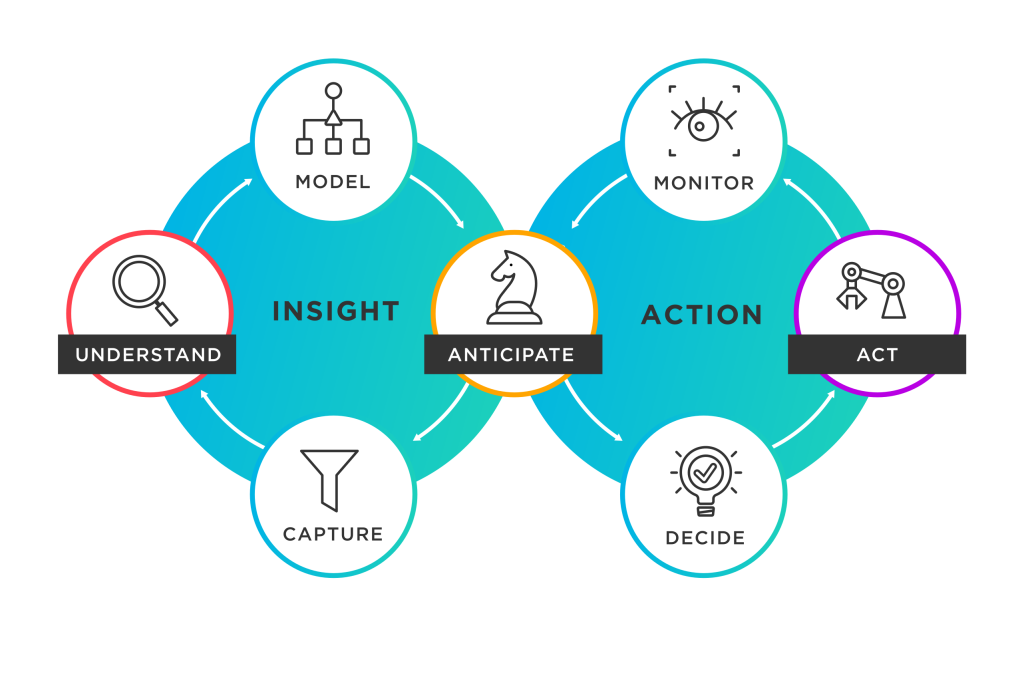
  • Decision Services and Execution: Red Hat Decision Manager enables the deployment of decision services as reusable components that can be integrated into operational systems and workflows. It supports real-time or near-real-time decision execution within existing applications.

8. SAP Decision Service Management:

SAP Decision Service Management is a component of SAP’s business process management suite. It allows organizations to model, execute, and monitor decision services based on business rules.

Key features:

  • Business Rules Engine: SAP decision management solutions typically include a business rules engine that allows organizations to define and manage their business rules. This engine enables the execution of rules in real time or as part of automated processes.
  • Decision Modeling and Visualization: These solutions often provide tools for decision modeling and visualization, allowing business users and analysts to design decision logic using graphical interfaces, decision tables, or other visual representations.
  • Decision Automation: SAP decision management solutions support the automation of decision-making processes. This involves integrating decision services into operational systems and workflows, enabling consistent and automated decision execution.

9. OpenRules:

OpenRules is an open-source decision management platform that focuses on business rules management. It provides a lightweight and flexible solution for modeling and executing business rules.

Key features:

  • Rule Authoring and Management: OpenRules offers a user-friendly and intuitive rule authoring environment. It provides a spreadsheet-based interface, allowing business users and subject matter experts to define and maintain rules using familiar spreadsheet tools such as Microsoft Excel or Google Sheets.
  • Rule Execution Engine: OpenRules includes a powerful rule execution engine that evaluates and executes business rules. It supports both forward and backward chaining rule execution, allowing complex rule dependencies and reasoning to be handled effectively.
  • Decision Modeling and Visualization: The platform supports decision modeling using decision tables, decision trees, and other visual representations. It enables users to model and visualize decision logic in a structured and easy-to-understand manner.

10. Drools:

Drools is an open-source business rules management system that enables organizations to model, validate, and execute business rules. It offers a rich set of features and integrates well with other systems.

Key features:

  • Rule Authoring and Management: Drools offers a rich set of tools and editors for authoring and managing business rules. It provides a domain-specific language (DSL) and a graphical rule editor, allowing both business users and developers to define and maintain rules effectively.
  • Rule Execution Engine: Drools includes a highly efficient and scalable rule execution engine. It supports forward chaining, backward chaining, and hybrid rule execution strategies, allowing complex rule dependencies and reasoning to be handled efficiently.
  • Decision Modeling and Visualization: The platform supports decision modeling using decision tables, decision trees, and other visual representations. It allows users to model and visualize decision logic in a structured and intuitive manner.
Tagged : / / / /

Windows Installer Component Management

rajeshkumar created the topic: Windows Installer Component Management
The Windows® Installer reduces the total cost of ownership (TCO) of your applications by increasing the ability of your customers to manage and maintain application components during setup and run time. The installation database tracks which applications require a particular component, which files comprise each component, where each file is installed on the system, and where component sources are located. This allows developers to author packages that provide the following benefits:
• Increased resiliency of applications. Use the installer to detect and reinstall damaged components without having to rerun setup. The installer checks the path of a component at run time. This frees applications from dependency on static file paths which commonly differ between computers and can point to missing components. For more information, see Resiliency.
• Installation-On-Demand. This feature set is not installed during setup but is specified in the database to be installed just-in-time for use if required by the application in the future. Users do not need to rerun setup. For more information, see Installation-On-Demand.
• Advertisement of shortcuts to features, applications, or entire products in the user interface. Users can install these on-demand by using the shortcuts. Users can also remove features, applications, or entire products on-demand. For more information, see Advertisement.
• Installation customization. An administrator can apply transforms to the database that tailor the installation for a particular group of users. For more information, see Customization.
• Easier deployment of application updates. Use the installer to update your products. For more information, see Patching and Upgrades.
• Feature shortcut display. The installer displays shortcuts to features that run locally with shortcuts to features that run remotely. Because the installation database specifies the run context of each feature, visibly equivalent entry points can be presented to users as needed.
• Keep usage metrics on features. Developers can provide an installation package that keeps usage count of a feature by all client applications and removes components that are not being used.
• Incorporate installations. Developers can incorporate the component management capabilities of the installer into their applications by authoring an installation package and by using the Installer Functions in their application code. The following figure illustrates an application requesting the installation of a feature.
Regards,
Rajesh Kumar
Twitt me @ twitter.com/RajeshKumarIn

Tagged :

Top 5 Application Performance Management Tools

top-application-performance-management-tools
This is the age of applications. We are using various applications in our day-to-day life to get our things done or to get information and for various other things. Therefore, applications are now playing a vital role in our life and so that for today’s businesses. In these days organisations whether they are small or large they somehow rely upon applications for there marketing, customer relations or engagements or to reach them directly and for various other reasons. Therefore, it’s really important to manage application performance so that business runs smoothly and generate productivity continuously and users can get what they want. Simply means to say everyone benefits when applications run at their best.
But, how to know is your application is performing well or not ? You can not test them manually every time or You can not wait when the users will call the customer support with issues. Right?
So, Here comes the solution “Application Performance Management” Tools. Let’s see what it is and it’s importance ?
Application performance management or APM is a kind of practice through which you can easily detect and short out the issues which occurs in applications while using, so that your application users have a good experience with it. Actually, APM monitors and manage the performance, availability and security of the application. It provides data to the administrators which makes their job easy to find the issues and resolve before it impacts on application performance.
Now, let’s check out the major benefits of Application performance management
1. Reduce Downtime (Availability) – When you integrate APM tool you can decrease your application downtime by 80 to 90 percent.
2. End User Experience – The main purpose of any application is to satisfy the user or to give them a quality experience while using there platform and APM makes it possible.
3. Generate Leads – If your application is for ecommerce or for sales perspective than it’s really important that it’s perform well so that you don’t miss the opportunity to generate the sales or leads in your business.
4. Productivity – APM can help you to save your time in troubleshooting which ultimately means you have more time to implement other things and for changes and monitoring.
Now let’s move on to the section where, You will get the real benefit of this article. All these things cannot possible without a right tool. So, I have done some research and make this list of Top 5 Application Performance Management Tools.
Here is the list:-

1. New Relic APM


New Relic APM

Highlights
  • Application Monitoring
  • Deployment Analysis, History, and Comparison
  • Database Monitoring
  • Availability & Error Monitoring
  • Complete report
  • Team Collaboration – Team can work together
  • Secure

2. AppDynamics


AppDynamics

Highlights
  • End-to-end transaction tracing
  • Troubleshooting and control
  • Code level visibility
  • Scalability
  • Dynamic baselining and alerting
  • Data retention

3. Foglight


Foglight
Highlights
  • Integrated transaction- and customer-centric application performance monitoring
  • User Experience Monitoring
  • Transaction DNA
  • Advanced analytics
  • Enhanced collaboration
4. BMC Software APM
BMC Software APM
Highlights
  • Application Centric Infrastructure Monitoring
  • Synthetic Testing
  • End user experience monitoring
  • Deep dive diagnostic
5. OpsView

OpsView

Highlights
  • Track and alert on application health
  • Group apps by business process
  • Set thresholds to trigger alerts
  • Ensure business services are meeting SLAs
  • Supports monitoring of major application servers
  • Synthetic transactions to monitor end-to-end performance
So, This is my list of Application Performance Management Tools. Hope you guys will like my efforts and if you think this list should contain some other tools instead of this than feel free to share with us in the comment section below.
Tagged : / / / / / / / / / / / / / / / / /

Top 5 Release Management Tools

release-management-tools
These days the software industry is going under transformation and lots of new tools and skills introduced in software development process. So, today we will talk about a similar process & tool which plays a vital role in Software development. The process name is Release management. In this article we are going to help you to select best release management tools which are mostly used by professionals these days.
But, before moving forward let’s have a look on to the Release management.
Let’s see what is Release Management ?
As per the “wikipedia” Release management is the process of managing, planning, scheduling and controlling a software build through different stages and environments; including testing and deploying software releases. But in simple words we can say “Release management is a process to oversees development, testing, support and deployment of software.” It is comparatively new process in the comparison of others but growing rapidly within the software development process.

It’s growing rapidly which means it’s really beneficial in “Software Development Life Cycle”,

So let’s have a look on to the benefits.

1. Team Collaboration — Release management helps to bridge the gap between development & operation team by involving them into the process through information sharing and instant communication. 
2. Configuration Management  Release management helps to know what environment setting is, application requirements, and dependences exist in the production, test, and development environments.
3. Efficiency  Release management helps to increase the efficiency by reducing the time which spent on finding and fixing the problems with the help of tools which ultimately results to deliver reliable and quality software faster to the market or customer.
4. Increased Productivity  It also helps to increase productivity by pre planning of the best practices in the release process through which teams can utilise there times on important things rather than figuring out the what steps should be next or versions should be used or any other stuffs like that which delay the delivery process.
5. Minimizing Failure Risk  Release management helps to reduce the risk of release failure by making strong policies and allocation of works based on researched information and by providing them real time visibility into the release status which helps them to find the possible cause of failures and they can act on them quickly.
Now, let’s move on to the next section. Release management is not an easy task to do. It requires team coordination , build versions tracking , transparency and much more. There for release management requires dedicated tools to make this process easy. So, I have done some research and choose the top 5 release management tools which are mostly used these days by professionals.
Here is the list:-
1. Serena Release Control

 serena-release-control

  • Dashboards and Reports
  • Environment Management
  • Planning and Control
  • Communication and Collaboration
  • Managing Deployment and Task Lists
  • Enterprise Scalability

2. ElectricFlow

 electricflow

  • Microservices and Container Orchestration
  • Shared Visibility
  • Process as Code
  • Advanced Deployment Strategies
  • Enterprise Security and Compliance
  • Automation at Any Scale
  • Automated Rollbacks
  • Environment Reservations and Calendaring
  • Built-in Artifact Repository

3. BMC Release Process Management

 bmc-release-process-management

  • Easy to use
  • Executable checklist
  • Centralized management
  • Meaningful metrics
  • Extensive reach
  • Better planning

4. URelease

 urelease

  • Multi-Application Continuous Delivery
  • Impact Analysis
  • Release Pipeline Visualization
  • Release Gates
  • Deployment Plans and Templates
  • Federated Release Dashboard


5. XL Release


 xl-release

  • End-to-end release dashboards
  • Complex pipeline orchestration
  • Automation that scales
  • In-depth analytics and reports
  • Enterprise auditability and controls
  • Easy to use
So, This is my list of Top release management tools. Hope you guys will like my efforts and if you think this list should contain some other tools instead of this than feel free to share with us in the comment section below.
Tagged : / / / / / / / / / / / / /

Top 5 IT Management Tools | IT Management Software

it-management-tools

IT Management Software | Top 5 IT Management Tools

  • Servicenow
  • BMC Remedy
  • Jira
  • Salesforce
  • Sharepoint
Tagged : / / / / / / / / / / / / / / / / /

Top 25 Chef configuration management interview questions and answers

chef-interview-questions-and-answers

Source – learn.chef.io

What is a resource?
Answer- A resource represents a piece of infrastructure and its desired state, such as a package that should be installed, a service that should be running, or a file that should be generated.

Question: What is a recipe?
Answer- A recipe is a collection of resources that describes a particular configuration or policy. A recipe describes everything that is required to configure part of a system. Recipes do things such as:

install and configure software components.
manage files.
deploy applications.
execute other recipes.

Question: What happens when you don’t specify a resource’s action?
Answer- When you don’t specify a resource’s action, Chef applies the default action.

Question: Are these two recipes the same?

package 'httpd'
service 'httpd' do    action [:enable, :start]  end

&&

service 'httpd' do    action [:enable, :start]    end
package 'httpd'

Answer-
No, they are not. Remember that Chef applies resources in the order they appear. So the first recipe ensures that the httpd package is installed and then configures the service. The second recipe configures the service and then ensures the package is installed.

Question: The second recipe may not work as you’d expect because the service resource will fail if the package is not yet installed.

Are these two recipes the same?

package 'httpd'
service 'httpd' do    action [:enable, :start]    end
package 'httpd'
service 'httpd' do    action [:start, :enable]    end

Answer-
No, they are not. Although both recipes ensure that the httpd package is installed before configuring its service, the first recipe enables the service when the system boots and then starts it. The second recipe starts the service and then enables it to start on reboot.

Are these two recipes the same?

file ‘/etc/motd’ do
owner ‘root’
group ‘root’
mode ‘0755’
action :create
end

file ‘/etc/motd’ do
action :create
mode ‘0755’
group ‘root’
owner ‘root’
end

Answer-
Yes, they are! Order matters with a lot of things in Chef, but you can order resource attributes any way you want.

Question –
Write a service resource that stops and then disables the httpd service from starting when the system boots.

Answer –
service ‘httpd’ do
action [:stop, :disable]
end

How does a cookbook differ from a recipe?
A recipe is a collection of resources, and typically configures a software package or some piece of infrastructure. A cookbook groups together recipes and other information in a way that is more manageable than having just recipes alone.

For example, in this lesson you used a template resource to manage your HTML home page from an external file. The recipe stated the configuration policy for your web site, and the template file contained the data. You used a cookbook to package both parts up into a single unit that you can later deploy.

How does chef-apply differ from chef-client?

chef-apply applies a single recipe; chef-client applies a cookbook.

For learning purposes, we had you start off with chef-apply because it helps you understand the basics quickly. In practice, chef-apply is useful when you want to quickly test something out. But for production purposes, you typically run chef-client to apply one or more cookbooks.

You’ll learn in the next module how to run chef-client remotely from your workstation.

What’s the run-list?

The run-list lets you specify which recipes to run, and the order in which to run them. The run-list is important for when you have multiple cookbooks, and the order in which they run matters.

What are the two ways to set up a Chef server?

Install an instance on your own infrastructure.
Use hosted Chef.

What’s the role of the Starter Kit?
The Starter Kit provides certificates and other files that enable you to securely communicate with the Chef server.

Where can you get reusable cookbooks that are written and maintained by the Chef community?
Chef Supermarket, https://supermarket.chef.io.

What’s the command that enables you to interact with the Chef server?
knife

What is a node?
A node represents a server and is typically a virtual machine, container instance, or physical server – basically any compute resource in your infrastructure that’s managed by Chef.

What information do you need to in order to bootstrap?
You need:

your node’s host name or public IP address.
a user name and password you can log on to your node with.
Alternatively, you can use key-based authentication instead of providing a user name and password.

What happens during the bootstrap process?
During the bootstrap process, the node downloads and installs chef-client, registers itself with the Chef server, and does an initial checkin. During this checkin, the node applies any cookbooks that are part of its run-list.

Which of the following lets you verify that your node has successfully bootstrapped?

The Chef management console.
knife node list
knife node show
You can use all three of these methods.

What is the command you use to upload a cookbook to the Chef server?
knife cookbook upload

How do you apply an updated cookbook to your node?
We mentioned two ways.

Run knife ssh from your workstation.
SSH directly into your server and run chef-client.
You can also run chef-client as a daemon, or service, to check in with the Chef server on a regular interval, say every 15 or 30 minutes.

Update your Apache cookbook to display your node’s host name, platform, total installed memory, and number of CPUs in addition to its FQDN on the home page.

Update index.html.erb like this.
<html>
<body>
<h1>hello from <%= node[‘fqdn’] %></h1>

<pre>
<%= node[‘hostname’] %>
<%= node[‘platform’] %> – <%= node[‘platform_version’] %>
<%= node[‘memory’][‘total’] %> RAM
<%= node[‘cpu’][‘total’] %> CPUs
</pre>
</body>
</html>

Then upload your cookbook and run it on your node.

What would you set your cookbook’s version to once it’s ready to use in production?

According to Semantic Versioning, you should set your cookbook’s version number to 1.0.0 at the point it’s ready to use in production.

What is the latest version of the haproxy community cookbook?

To know the latest version of any cookbook on Chef Supermarket, browse to its page and view the latest version from the version selection box.

Or, get the info from the knife cookbook site command, like this.

knife cookbook site show haproxy | grep latest_version
latest_version: http://cookbooks.opscode.com/api/v1/cookbooks/haproxy/versions/1.6.6

Create a second node and apply the awesome_customers cookbook to it. How long does it take?

You already accomplished the majority of the tasks that you need. You wrote the awesome_customers cookbook, uploaded it and its dependent cookbooks to the Chef server, applied the awesome_customers cookbook to your node, and verified that everything’s working.

All you need to do now is:

Bring up a second Red Hat Enterprise Linux or CentOS node.
Copy your secret key file to your second node.
Bootstrap your node the same way as before. Because you include the awesome_customers cookbook in your run-list, your node will apply that cookbook during the bootstrap process.
The result is a second node that’s configured identically to the first one. The process should take far less time because you already did most of the work.

Now when you fix an issue or add a new feature, you’ll be able to deploy and verify your update much more quickly!

What’s the value of local development using Test Kitchen?

Local development with Test Kitchen:

enables you to use a variety of virtualization providers that create virtual machine or container instances locally on your workstation or in the cloud.
enables you to run your cookbooks on servers that resemble those that you use in production.
speeds up the development cycle by automatically provisioning and tearing down temporary instances, resolving cookbook dependencies, and applying your cookbooks to your instances.

What is VirtualBox? What is Vagrant?

VirtualBox is the software that manages your virtual machine instances.

Vagrant helps Test Kitchen communicate with VirtualBox and configures things like available memory and network settings.

Verify that your motd cookbook runs on both CentOS 6.6 and CentOS 6.5.

Your motd cookbook is already configured to work on CentOS 6.6 as well as CentOS 6.5, so you don’t need to modify it.

To run it on CentOS 6.5, add an entry to the platforms section of your .kitchen.yml file like this.

---       driver:       name: vagrant
provisioner:       name: chef_zero
platforms:       - name: centos-6.6       driver:       box: opscode-centos-6.6       box_url: http://opscode-vm-bento.s3.amazonaws.com/vagrant/virtualbox/opscode_centos-6.6_chef-provisionerless.box       - name: centos-6.5       driver:       box: opscode-centos-6.5       box_url: http://opscode-vm-bento.s3.amazonaws.com/vagrant/virtualbox/opscode_centos-6.5_chef-provisionerless.box
suites:       - name: default       run_list:       - recipe[motd::default]       attributes:

In many cases, Test Kitchen can infer the box and box_url parameters, which specify the name and location of the base image, or box. We specify them here to show you how to use them.

Run kitchen list to see the matrix of test instances that are available. Here, we have two platforms – CentOS 6.5 and CentOS 6.6 – multiplied by one suite – default.

$kitchen list

Instance           Driver   Provisioner  Verifier  Transport  Last Action default-centos-66  Vagrant  ChefZero     Busser    Ssh        <Not Created> default-centos-65  Vagrant  ChefZero     Busser    Ssh        <Not Created>

Run kitchen converge to create the instances and apply the motd cookbook.

$kitchen converge    -----> Starting Kitchen (v1.4.0)    -----> Creating <default-centos-66>...    Bringing machine 'default' up with 'virtualbox' provider...    [...]    Running handlers:    Running handlers complete    Chef Client finished, 1/1 resources updated in 10.372334751 seconds    Finished converging <default-centos-66> (3m52.59s).    -----> Creating <default-centos-65>...    Bringing machine 'default' up with 'virtualbox' provider...    [...]    Running handlers:    Running handlers complete    Chef Client finished, 1/1 resources updated in 5.32753132 seconds    Finished converging <default-centos-65> (10m12.63s).  -----> Kitchen is finished. (19m47.71s)

Now to confirm that everything’s working, run kitchen login. But this time, you need to provide the instance name so that Test Kitchen knows which instance to connect to.

$kitchen login default-centos-66       Last login: Wed May 13 20:15:00 2015 from 10.0.2.2              hostname:  default-centos-66       fqdn:      default-centos-66       memory:    469392kB       cpu count: 1       [vagrant@default-centos-66 ~]$ logout       Connection to 127.0.0.1 closed.$kitchen login default-centos-65       Last login: Wed May 13 20:28:18 2015 from 10.0.2.2              hostname:  default-centos-65       fqdn:      default-centos-65       memory:    469452kB       cpu count: 1       [vagrant@default-centos-65 ~]$ logout       Connection to 127.0.0.1 closed.
Tagged : / / / / / / / / / / / / / / /

Chef configuration management interview questions and answers | Chef Interview Q&A

chef-interview-questions-and-answers

Source – learn.chef.io

What is a resource?
Answer- A resource represents a piece of infrastructure and its desired state, such as a package that should be installed, a service that should be running, or a file that should be generated.

Question: What is a recipe?
Answer- A recipe is a collection of resources that describes a particular configuration or policy. A recipe describes everything that is required to configure part of a system. Recipes do things such as:

install and configure software components.
manage files.
deploy applications.
execute other recipes.

Question: What happens when you don’t specify a resource’s action?
Answer- When you don’t specify a resource’s action, Chef applies the default action.

Question: Are these two recipes the same?

package 'httpd'
service 'httpd' do    action [:enable, :start]  end

&&

service 'httpd' do    action [:enable, :start]    end
package 'httpd'

Answer-
No, they are not. Remember that Chef applies resources in the order they appear. So the first recipe ensures that the httpd package is installed and then configures the service. The second recipe configures the service and then ensures the package is installed.

Question: The second recipe may not work as you’d expect because the service resource will fail if the package is not yet installed.

Are these two recipes the same?

package 'httpd'
service 'httpd' do    action [:enable, :start]    end
package 'httpd'
service 'httpd' do    action [:start, :enable]    end

Answer-
No, they are not. Although both recipes ensure that the httpd package is installed before configuring its service, the first recipe enables the service when the system boots and then starts it. The second recipe starts the service and then enables it to start on reboot.

Are these two recipes the same?

file ‘/etc/motd’ do
owner ‘root’
group ‘root’
mode ‘0755’
action :create
end

file ‘/etc/motd’ do
action :create
mode ‘0755’
group ‘root’
owner ‘root’
end

Answer-
Yes, they are! Order matters with a lot of things in Chef, but you can order resource attributes any way you want.

Question –
Write a service resource that stops and then disables the httpd service from starting when the system boots.

Answer –
service ‘httpd’ do
action [:stop, :disable]
end

How does a cookbook differ from a recipe?
A recipe is a collection of resources, and typically configures a software package or some piece of infrastructure. A cookbook groups together recipes and other information in a way that is more manageable than having just recipes alone.

For example, in this lesson you used a template resource to manage your HTML home page from an external file. The recipe stated the configuration policy for your web site, and the template file contained the data. You used a cookbook to package both parts up into a single unit that you can later deploy.

How does chef-apply differ from chef-client?

chef-apply applies a single recipe; chef-client applies a cookbook.

For learning purposes, we had you start off with chef-apply because it helps you understand the basics quickly. In practice, chef-apply is useful when you want to quickly test something out. But for production purposes, you typically run chef-client to apply one or more cookbooks.

You’ll learn in the next module how to run chef-client remotely from your workstation.

What’s the run-list?

The run-list lets you specify which recipes to run, and the order in which to run them. The run-list is important for when you have multiple cookbooks, and the order in which they run matters.

What are the two ways to set up a Chef server?

Install an instance on your own infrastructure.
Use hosted Chef.

What’s the role of the Starter Kit?
The Starter Kit provides certificates and other files that enable you to securely communicate with the Chef server.

Where can you get reusable cookbooks that are written and maintained by the Chef community?
Chef Supermarket, https://supermarket.chef.io.

What’s the command that enables you to interact with the Chef server?
knife

What is a node?
A node represents a server and is typically a virtual machine, container instance, or physical server – basically any compute resource in your infrastructure that’s managed by Chef.

What information do you need to in order to bootstrap?
You need:

your node’s host name or public IP address.
a user name and password you can log on to your node with.
Alternatively, you can use key-based authentication instead of providing a user name and password.

What happens during the bootstrap process?
During the bootstrap process, the node downloads and installs chef-client, registers itself with the Chef server, and does an initial checkin. During this checkin, the node applies any cookbooks that are part of its run-list.

Which of the following lets you verify that your node has successfully bootstrapped?

The Chef management console.
knife node list
knife node show
You can use all three of these methods.

What is the command you use to upload a cookbook to the Chef server?
knife cookbook upload

How do you apply an updated cookbook to your node?
We mentioned two ways.

Run knife ssh from your workstation.
SSH directly into your server and run chef-client.
You can also run chef-client as a daemon, or service, to check in with the Chef server on a regular interval, say every 15 or 30 minutes.

Update your Apache cookbook to display your node’s host name, platform, total installed memory, and number of CPUs in addition to its FQDN on the home page.

Update index.html.erb like this.
<html>
<body>
<h1>hello from <%= node[‘fqdn’] %></h1>

<pre>
<%= node[‘hostname’] %>
<%= node[‘platform’] %> – <%= node[‘platform_version’] %>
<%= node[‘memory’][‘total’] %> RAM
<%= node[‘cpu’][‘total’] %> CPUs
</pre>
</body>
</html>

Then upload your cookbook and run it on your node.

What would you set your cookbook’s version to once it’s ready to use in production?

According to Semantic Versioning, you should set your cookbook’s version number to 1.0.0 at the point it’s ready to use in production.

What is the latest version of the haproxy community cookbook?

To know the latest version of any cookbook on Chef Supermarket, browse to its page and view the latest version from the version selection box.

Or, get the info from the knife cookbook site command, like this.

knife cookbook site show haproxy | grep latest_version
latest_version: http://cookbooks.opscode.com/api/v1/cookbooks/haproxy/versions/1.6.6

Create a second node and apply the awesome_customers cookbook to it. How long does it take?

You already accomplished the majority of the tasks that you need. You wrote the awesome_customers cookbook, uploaded it and its dependent cookbooks to the Chef server, applied the awesome_customers cookbook to your node, and verified that everything’s working.

All you need to do now is:

Bring up a second Red Hat Enterprise Linux or CentOS node.
Copy your secret key file to your second node.
Bootstrap your node the same way as before. Because you include the awesome_customers cookbook in your run-list, your node will apply that cookbook during the bootstrap process.
The result is a second node that’s configured identically to the first one. The process should take far less time because you already did most of the work.

Now when you fix an issue or add a new feature, you’ll be able to deploy and verify your update much more quickly!

What’s the value of local development using Test Kitchen?

Local development with Test Kitchen:

enables you to use a variety of virtualization providers that create virtual machine or container instances locally on your workstation or in the cloud.
enables you to run your cookbooks on servers that resemble those that you use in production.
speeds up the development cycle by automatically provisioning and tearing down temporary instances, resolving cookbook dependencies, and applying your cookbooks to your instances.

What is VirtualBox? What is Vagrant?

VirtualBox is the software that manages your virtual machine instances.

Vagrant helps Test Kitchen communicate with VirtualBox and configures things like available memory and network settings.

Verify that your motd cookbook runs on both CentOS 6.6 and CentOS 6.5.

Your motd cookbook is already configured to work on CentOS 6.6 as well as CentOS 6.5, so you don’t need to modify it.

To run it on CentOS 6.5, add an entry to the platforms section of your .kitchen.yml file like this.

---       driver:       name: vagrant
provisioner:       name: chef_zero
platforms:       - name: centos-6.6       driver:       box: opscode-centos-6.6       box_url: http://opscode-vm-bento.s3.amazonaws.com/vagrant/virtualbox/opscode_centos-6.6_chef-provisionerless.box       - name: centos-6.5       driver:       box: opscode-centos-6.5       box_url: http://opscode-vm-bento.s3.amazonaws.com/vagrant/virtualbox/opscode_centos-6.5_chef-provisionerless.box
suites:       - name: default       run_list:       - recipe[motd::default]       attributes:

In many cases, Test Kitchen can infer the box and box_url parameters, which specify the name and location of the base image, or box. We specify them here to show you how to use them.

Run kitchen list to see the matrix of test instances that are available. Here, we have two platforms – CentOS 6.5 and CentOS 6.6 – multiplied by one suite – default.

$kitchen list

Instance           Driver   Provisioner  Verifier  Transport  Last Action default-centos-66  Vagrant  ChefZero     Busser    Ssh        <Not Created> default-centos-65  Vagrant  ChefZero     Busser    Ssh        <Not Created>

Run kitchen converge to create the instances and apply the motd cookbook.

$kitchen converge    -----> Starting Kitchen (v1.4.0)    -----> Creating <default-centos-66>...    Bringing machine 'default' up with 'virtualbox' provider...    [...]    Running handlers:    Running handlers complete    Chef Client finished, 1/1 resources updated in 10.372334751 seconds    Finished converging <default-centos-66> (3m52.59s).    -----> Creating <default-centos-65>...    Bringing machine 'default' up with 'virtualbox' provider...    [...]    Running handlers:    Running handlers complete    Chef Client finished, 1/1 resources updated in 5.32753132 seconds    Finished converging <default-centos-65> (10m12.63s).  -----> Kitchen is finished. (19m47.71s)

Now to confirm that everything’s working, run kitchen login. But this time, you need to provide the instance name so that Test Kitchen knows which instance to connect to.

$kitchen login default-centos-66       Last login: Wed May 13 20:15:00 2015 from 10.0.2.2              hostname:  default-centos-66       fqdn:      default-centos-66       memory:    469392kB       cpu count: 1       [vagrant@default-centos-66 ~]$ logout       Connection to 127.0.0.1 closed.$kitchen login default-centos-65       Last login: Wed May 13 20:28:18 2015 from 10.0.2.2              hostname:  default-centos-65       fqdn:      default-centos-65       memory:    469452kB       cpu count: 1       [vagrant@default-centos-65 ~]$ logout       Connection to 127.0.0.1 closed.
Tagged : / / / / / / / / / / / / / / /

Top 5 Configuration Management Tools

top-5-configuration-management-tools

Top 5 Configuration Management Tools

Puppet

In computing, Puppet is an open-source configuration management utility. It runs on many Unix-like systems as well as on Microsoft Windows, and includes its own declarative language to describe system configuration.

Puppet is produced by Puppet Labs, founded by Luke Kanies in 2005. It is written in Ruby and released as free software under the GNU General Public License (GPL) until version 2.7.0 and the Apache License 2.0 after that.

What started out as a popular DevOps tool has quickly become a movement. Written in Ruby, like Chef, Puppet also comes in both an open source and enterprise version. However, where Chef has a healthy offering of features across both open source and enterprise versions, Puppet has placed the majority of its feature set into enterprise status. Features that the open source version comes with include provisioning (Amazon EC2, Google Compute Engine), configuration management (operating systems and applications) plus 2,000+ pre-built configurations on Puppet Forge. Considerably more features are available for the enterprise version, including the open source features plus graphical user interface, event inspector (visualize infrastructure changes), supported modules, and provisioning (VMware VMs). Configuration management (discovery, user accounts), orchestration, task automation, role-based access control (with external authentication support) are also included. Puppet enterprise has a unified cross-platform installer of all components and support.

Chef

Offered as both an open source and enterprise product, Chef is a powerful tool for full IT infrastructure configuration management. With open source Chef at the heart of both offerings, shared features include a flexible and scalable automation platform, access to 800+ reusable cookbooks and integration with leading cloud providers. Chef also offers enterprise platform support, including Windows and Solaris, and allows you to create, bootstrap and manage OpenStack clouds. It has easy installation with ‘one-click’ Omnibus Installer, automatic system discovery with Ohai, text-based search capabilities and multiple environment support. Other notable features inclyde the “Knife” command line interface, “Dry Run” mode for testing potential changes, and the ability to manage 10,000+ nodes on a single Chef server. Features only available in the enterprise version of Chef include availablility as a hosted service, enhanced management console, centralized activity and resource reporting, as well as “Push” command and control client runs. Multi-tenancy, role-based access control (RBAC), high availability installation support and verification, along with centralized authentication using LDAP or Active Directory are included with Chef enterprise.

Ansible

Ansible is a model-driven configuration management tool that leverages SSH to improve security and simplify management. In addition to configuration management, it is capable of automating app deployment (even multi-tier deployment), workflow orchestration and cloud provisioning, hence the company likes the tool to be categorized as an “orchestration engine.” Ansible is built on five design principles including ease of use (doesn’t require writing scripts or custom code), low learning curve (both for sysadmins and developers), comprehensive automation (allowing you to automate almost anything in your environment), efficiency (since it runs on OpenSSH it doesn’t rely on memory or CPU resources), and security (it is inherently more secure because it doesn’t require an agent, additional ports or root level daemons). As many other open source projects, Ansible has a paid product that comes in the form of a web UI called Ansible Tower.

CFEngine

One of the earliest full-featured configuration management systems out there, CFEngine has gone through several iterations and maintained relevance as OS have gone from the local data center to the cloud. At the heart of the infrastructure automation framework, CFEngine is also a modeling and monitoring compliance engine, capable of sitting on a small footprint. As recommended by CFEngine, steps toward identifying an initial desired state include: 1) model the desired state of your environment; 2) simulate configuration changes before committing them; 3) confirm the desired state and set for automatic self-healing; 4) collect reports on the differences between actual and desired states. CFEngine has a library of reusable data-driven models that will help users model their desired states. These infrastructure patterns are designed to be reusable across the Enterprise.

Salt

As part of a larger, enterprise ready application, the configuration management piece of Salt is as robust and feature-full as would be expected. Built upon the remote execution core, execution of the system occurs on “minions” which receives commands from the central Salt master and replies with the results of said commands. Salt support simultaneous configuration of tens of thousands of hosts. Based upon host “states”, no programming is required to write the configuration files, which are small and easy to understand, that help identify the state of each host. Additionally, for those who do program, or admins who want to have more control and familiarity with their configuration files, any language can be used to render the configurations.

Tagged : / / / / / / / / / / / / / / /

Ways to Perforce server Disk Space Cleanup and Repos Size Management

perforce-server-disk-space-cleanup-and-repos-size-management

DRAFT VERSION

  1. Cleaning up Old Checkpoints
  2. Playing with Symlink(Softlink) and Redirecting the ROOT folder to drive where we have enough place.
  3. Deleting db.have and recreate it manually
  4. Display disk space information on the server using “p4 diskspace”
  5. Display size information for files in the depot using “p4 sizes”
Tagged : / / / / / / / / / / / / / / / / /

Chef configuration management | Chef Training | Chef Course | Online | Classroom

Chef Training

This course aims to prepare key development, engineering, and operations staff to use Chef to write infrastructure. Each of the core units in the course has hands on exercises to reinforce the material. You will learn Chef by using it. At the end of the class, students will have a code repository that can be used and modified to solve real business problems.

Click Here

Course agenda:

Day 1:

  • What Is Configuration Management?
  • Why You Need a Configuration Management Tool to Automate IT
  • What Is Chef?
  • Why Chef Might Be a Good Tool for Your Enterprise
  • Where Do We Go From Here?
  • Chef Development Tools
    • Install and Configuration Chef Development Tools on Windows
    • Install and Configuration Chef Development Tools on Linux
  • Overview of Ruby
  • Ruby Syntax and Examples
  • Chef Syntax and Examples
  • Working with Knife
  • Writing First Chef Recipe
  • Chef and Its Terminology
    • Attributes
    • Metadata
    • Recipes
    • Resources
    • Templates
    • Definitions
    • Recipes
    • Writing recipes
    • Cookbook Dependencies
    • Controlling Impotency
    • Notifications
    • Template Variables

Day 2:

  • Cookbooks
  • Using Cookbooks
  • Windows – IIS, MSI, Exe, Zip files, Tomcat,
  • Linux – RPM, Shell Script, Yum Repos,
  • Common – SVN, Vagrant, Test Kitchen
  • Introducing Vagrant & Virtualbox
  • Introducing Test Kitchen
  • Spinning up your first Virtual Machine
  • Introducing OpsCode
  • Developing a Cookbooks
    • Developing Your First Cookbook
    • Writing a Recipe
    • Creating the Index File
    • Changing the Metadata
    • Uploading the Cookbook
    • Running the Cookbook
    • Add an Attribute
    • Add a Resource to the Default Recipe
    • Add the Template File
    • Uploading and Running the Cookbook
    • Using Environments
  • Modeling your infrastructure
    • Roles
    • Implementing a role
    • Determining which recipes you need
    • Applying recipes to roles
    • Mapping your roles to nodes
    • Environments
    • Organizing your configuration data

Day 3:

  • Cloud Provisioning Using Chef
    • Provisioning Using Vagrant and Chef
    • Providers and Provisioners
    • Installing Vagrant
    • Configuring Vagrant
    • Vagrant Provisioning Using Chef
    • AWS and Chef Provisioning Using Vagrant
    • Provisioning Using Knife
  • Troubleshooting and Debugging
    • Chef Troubleshooting and Debugging
    • Debugging Chef Client Run
    • Debugging Recipes Using Logs
    • Debugging Recipes Using Chef Shell
    • Troubleshooting Chef Client
  • Recipe Inclusion
  • Data Bags
  • Search Roles
  • Configuring Services like Apache
  • Deployment using chef
    • Looking at your application deployment cookbook
    • Deployment using zip/tar files. E.g: Apache Tomcat deployment and configured as service.
    • Windows – Configuring Services like IIS
    • Dependencies Management
  • Integrating with the Cloud
    • Amazon EC2
    • Rackspace Cloud
Tagged : / / / / / / / / / / / / / / / /