Upload Document and send Mail in Laravel | How to send attachment files to email using laravel ?

In this tutorial im going to demonstrate how to upload document and send data via Email. Please follow some easy steps mentioned below.

First let’s go to install laravel project

composer create-project laravel/laravel learning-project "5.8.*"

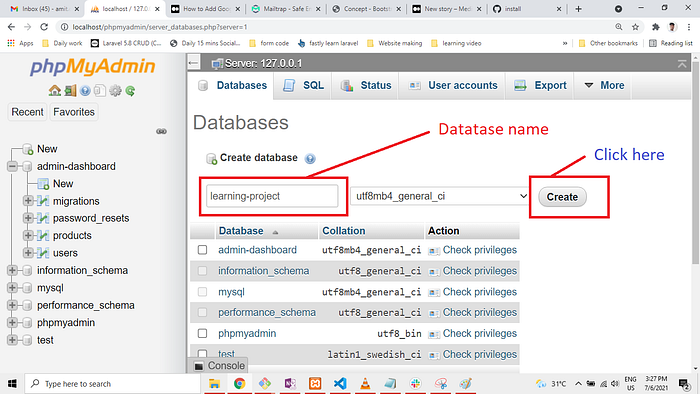
lets go to .env folder and put database name and connect to database.

DB_CONNECTION=mysql
DB_HOST=127.0.0.1
DB_PORT=3306
DB_DATABASE=learning-project
DB_USERNAME=root
DB_PASSWORD=

Let’s to create Controller

php artisan make:controller SendEmailController

Go to your controller SendEmailController and paste below code

<?php

namespace App\Http\Controllers;

use Illuminate\Http\Request;
use Illuminate\Support\Facades\Mail;
use App\Mail\SendMail;
use App\UploadImage;

class SendEmailController extends Controller
{

function index()
{
return view('send_email');
}
public function store(Request $request){
$request->validate([
'name'=>'required',
'email' => 'required',
'image'=> 'required',
]);

$resume = time() . '.' . $request['image']->getClientOriginalExtension();
$imagesendbymailwithstore= new UploadImage();
$imagesendbymailwithstore->name = $request->name;
$imagesendbymailwithstore->email = $request->email;
$imagesendbymailwithstore->image = $resume;
$imagesendbymailwithstore->save();

// for mailling function working
$imagesendbymailwithstore = array(
'name' => $request->name,
'email' => $request->email,
'image' => $request->image,

);
Mail::to($imagesendbymailwithstore['email'])->send(new SendMail($imagesendbymailwithstore));
$request['image']->move(base_path() . '/storage/app/public', $resume);
return back()->with('success', 'Thanks for contacting us!');
}
}

Next create model and migration file so run below code.

php artisan make:model UploadImage -m

Next step go to your migration and and table

database\migrations\2020_10_23_070450_create_upload_images_table.php

Add follow column name

$table->string('name');
$table->string('email');
$table->string('image');
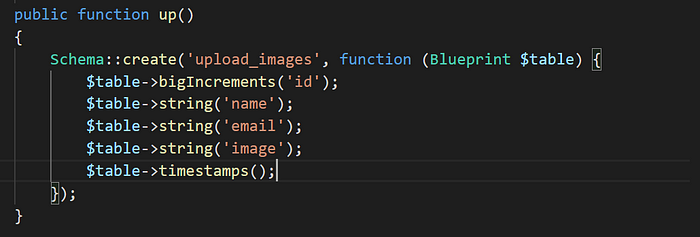
Now migrate the table

php artisan migrate

Create a Mailable class first you have to create an account in mailtrap or click this url https://mailtrap.io/ after create account you have to copy Username: XXXXXXXXX and password: XXXXXXXXXX and put in .env file see pic
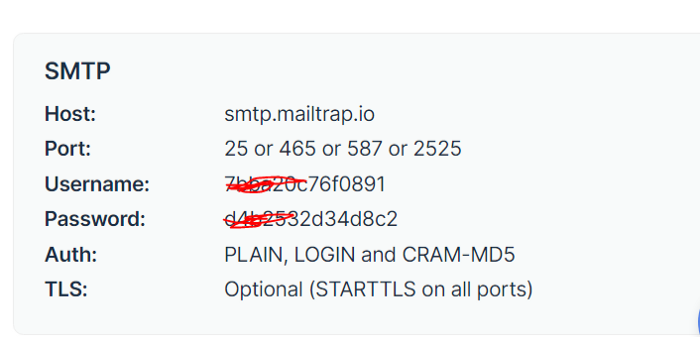
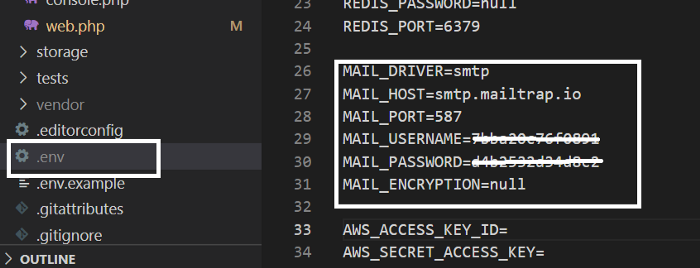
Now we are ready for make mailable class for this we have to go teminal and write following

Then make a view page send_email.blade.php

<!DOCTYPE html>
<html>
<head>
<title> send a mail with Attachment </title>
<script src="https://ajax.googleapis.com/ajax/libs/jquery/3.1.0/jquery.min.js"></script>
<link rel="stylesheet" href="https://maxcdn.bootstrapcdn.com/bootstrap/3.3.6/css/bootstrap.min.css" />
<script src="https://maxcdn.bootstrapcdn.com/bootstrap/3.3.7/js/bootstrap.min.js"></script>
<style type="text/css">
.box{
width:600px;
margin:0 auto;
border:1px solid #ccc;
}
.has-error
{
border-color:#cc0000;
background-color:#ffff99;
}
</style>
</head>
<body>
<br />
<br />
<br />
<div class="container box">
<h3 align="center">send a mail with Attachment using laravel 5.8</h3><br />
@if (count($errors) > 0)
<div class="alert alert-danger">
<button type="button" class="close" data-dismiss="alert">×</button>
<ul>
@foreach ($errors->all() as $error)
<li>{{ $error }}</li>
@endforeach
</ul>
</div>
@endif
@if ($message = Session::get('success'))
<div class="alert alert-success alert-block">
<button type="button" class="close" data-dismiss="alert">×</button>
<strong>{{ $message }}</strong>
</div>
@endif

<form method="post" action="{{ route('sendemail.store') }}" enctype="multipart/form-data" role="form" class="form-horizontal" id="location">
{{ csrf_field() }}
<div class="form-group">
<label>Enter Your Name</label>
<input type="text" name="name" class="form-control" value="" />
</div>
<div class="form-group">
<label>Enter Your Email</label>
<input type="text" name="email" class="form-control" value="" />
</div>

<div class="form-group">
<label for="resume" placeholder="(resume type *PDF*)">Document:<span class="text-danger font-weight-bold">*</span></label>
<input type="file" class="w-100 p-1" name="image" value="{{old('resume')}}"/>
<label class="text-danger mt-1" >(*File type- PDF & Maximum size 1 MB*)</label>
</div>
<div class="form-group">
<input type="submit" name="send" class="btn btn-info" value="Send" />
</div>
</form>

</div>
</body>
</html>

Next step make one blade page resources/view/dynamic_email_template.blade.php

<p style="margin-left:10%;">First Name - <b>{{ $data['name'] }} </b></p>
<p style="margin-left:10%;">last Name - <b>{{ $data['email'] }} </b></p>


<p>It would be appriciative, if you gone through this feedback.</p>

Next one to create SendMail.php file run below code.

php artisan make:mail SendMail

Next step go to App\Mail\SendMail.php and paste below code

<?php

namespace App\Mail;

use Illuminate\Bus\Queueable;
use Illuminate\Mail\Mailable;
use Illuminate\Queue\SerializesModels;
use Illuminate\Contracts\Queue\ShouldQueue;

class SendMail extends Mailable
{
use Queueable, SerializesModels;
public $imagesendbymailwithstore;
/**
* Create a new message instance.
*
* @return void
*/
public function __construct($imagesendbymailwithstore)
{
$this->imagesendbymailwithstore = $imagesendbymailwithstore;
}

/**
* Build the message.
*
* @return $this
*/
public function build()
{
return $this->from('info@scmgalaxy.com')
->subject('New image from Devops Team')
->view('dynamic_email_template')
->with('data', $this->imagesendbymailwithstore)
->attach($this->imagesendbymailwithstore['image']->getRealPath(),
[
'as' => $this->imagesendbymailwithstore['image']->getClientOriginalName(),
'mime' => $this->imagesendbymailwithstore['image']->getClientMimeType(),
]);

}
}

Next define routes go to your routes/web.php file and paste below code.

Route::get('sendemail','SendEmailController@index');
Route::post('sendemail.store','SendEmailController@store')->name('sendemail.store');

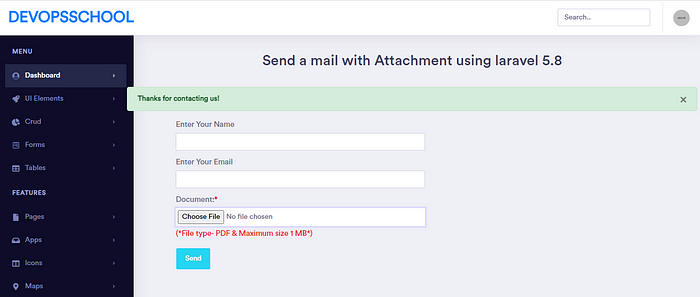
Now run below code and refresh your browser and fill form

php artisan servehttp://127.0.0.1:8000

Now form look- like this
Thanks i hope its helpfull for you 🙏🙏
Tagged : / / /

How to Install Laravel and Create first View Page in Laravel ?

In this tutorial im going to describe how to install laravel project and create first view pages, so follow some easy steps define below.

First let’s go to install laravel project

composer create-project laravel/laravel learning-project "5.8.*"

lets go to .env folder and put database name and connect to database.

DB_CONNECTION=mysql
DB_HOST=127.0.0.1
DB_PORT=3306
DB_DATABASE=learning-project
DB_USERNAME=root
DB_PASSWORD=

Now migrate the table

php artisan migrate

Now Open your project and go to Resouces/view folder and create folllowing files

create.blade.php
dashboard.blade.php
home.blade.php
blog.blade.php

Go to create.blade.php and paste below code

<h1>this is create pages</h1>

Next go to dashboard.blade.php and paste below code

<h1>this is dashboard pages</h1>

Now create blog.blade.php file and paste below lines.

<h1>this is blog pages</h1>

Next go to Route/web.php and add below line

Go to Route/web.php

<?php

/*
|--------------------------------------------------------------------------
| Web Routes
|--------------------------------------------------------------------------
|
| Here is where you can register web routes for your application. These
| routes are loaded by the RouteServiceProvider within a group which
| contains the "web" middleware group. Now create something great!
|
*/

Route::get('/', function () {
return view('welcome');
});

Route::get('/dashboard', function (){
return view('dashboard');
});

Route::get('/create', function (){
return view('create');
});

Route::get('/blog', function (){
return view('blog');
});

And last one serve below code in your terminal.

php artisan serve

Copy below url and paste in your browser.

http://127.0.0.1:8000/blog
http://127.0.0.1:8000/create

Thank i hope its helpfull for you. 🙏🙏🙏Amit Kumar

Tagged : / /

How to Send Email when someone Register and also send email verification

In this tutorial I’m going to describe how to get email verification when someone register in laravel. Please follow some easy steps mentioned below.

First let’s go to install laravel project

composer create-project laravel/laravel mail-verification "5.8.*"

👇 Database Configuration

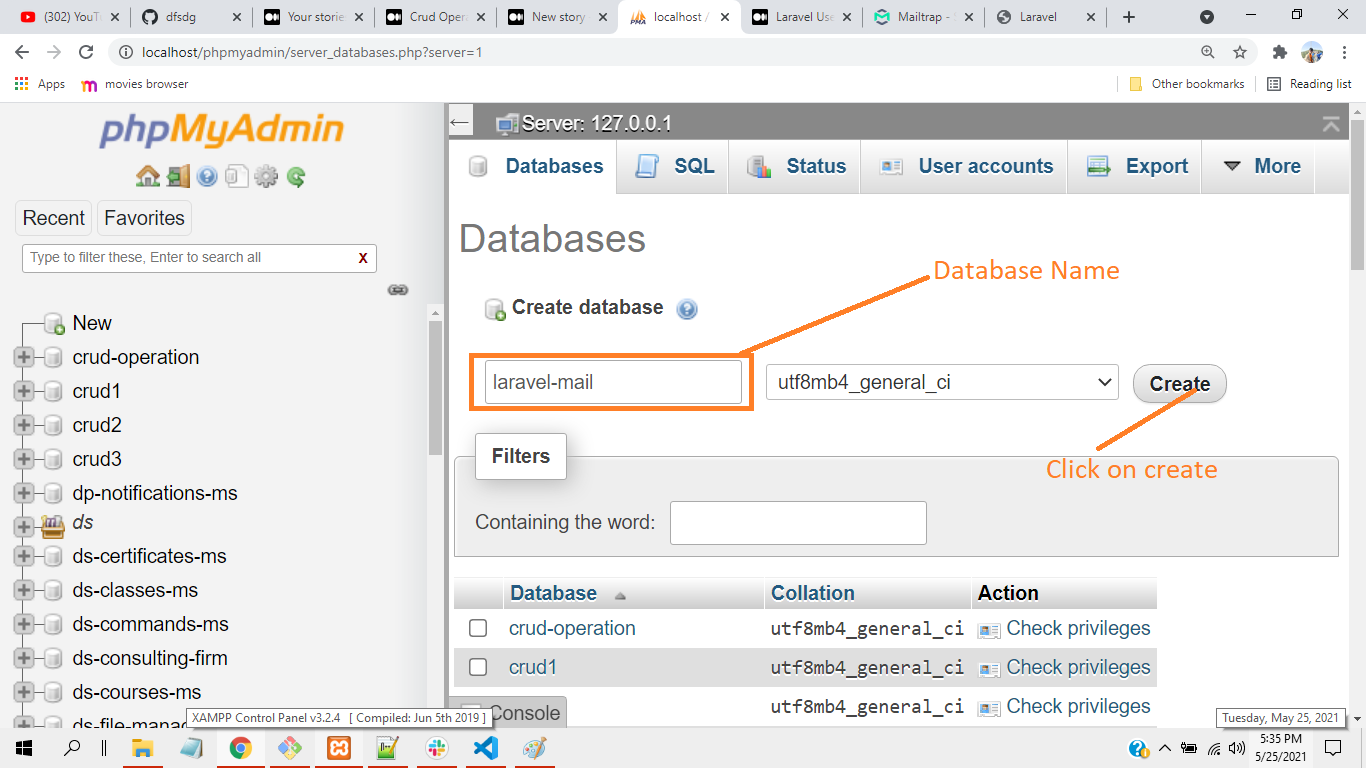
Setup database with your installed laravel 8 project . lets go to .env folder and put database name and connect to database.

DB_CONNECTION=mysql
DB_HOST=127.0.0.1
DB_PORT=3306
DB_DATABASE=laravel-mail
DB_USERNAME=root
DB_PASSWORD=

Next click on create

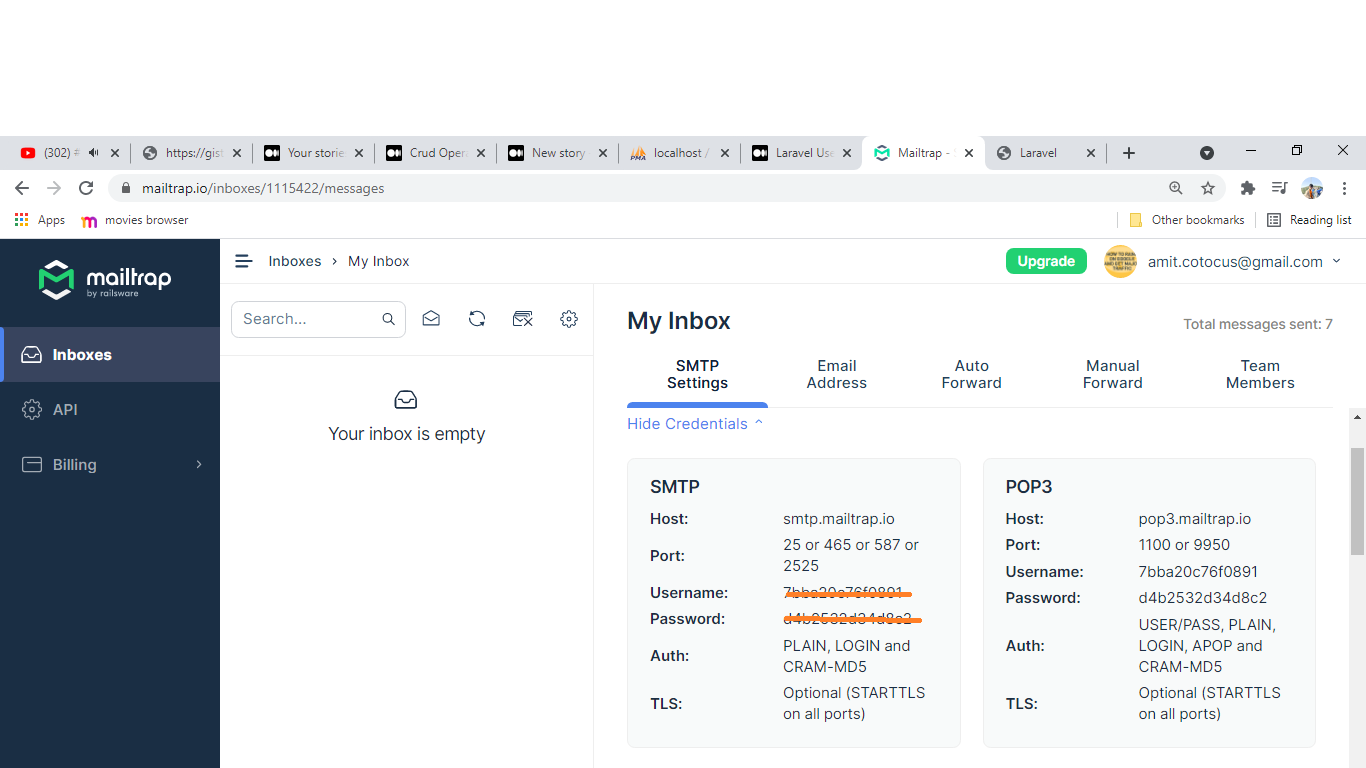
Next set up to mail trap for getting mail

Go to this URL — MailTrapio

Go to .env and put your mailtrap credentials

MAIL_MAILER=smtp
MAIL_HOST=smtp.mailtrap.io
MAIL_PORT=2525
MAIL_USERNAME=puthere-----
MAIL_PASSWORD=puthere-----
MAIL_ENCRYPTION=null
MAIL_FROM_ADDRESS=null
MAIL_FROM_NAME="${APP_NAME}"

Now migrate the table

php artisan migrate

Now Create Auth

php artisan make:auth

Go to App/user.php file and paste below code

<?php

namespace App;

use Illuminate\Notifications\Notifiable;
use Illuminate\Contracts\Auth\MustVerifyEmail;
use Illuminate\Foundation\Auth\User as Authenticatable;

class User extends Authenticatable implements MustVerifyEmail
{
use Notifiable;

/**
* The attributes that are mass assignable.
*
* @var array
*/
protected $fillable = [
'name', 'email', 'password',
];

/**
* The attributes that should be hidden for arrays.
*
* @var array
*/
protected $hidden = [
'password', 'remember_token',
];

/**
* The attributes that should be cast to native types.
*
* @var array
*/
protected $casts = [
'email_verified_at' => 'datetime',
];
}

Next go to Set-up Routes

Routes/web.php

Replace Auth:Routes to below code

Auth::routes(['verify' => true]);

Next go to HomeController.php file and paste below function code

public function __construct()
{
$this->middleware(['auth', 'verified']);
}

Now set-up is completed run below code

php artisan serve

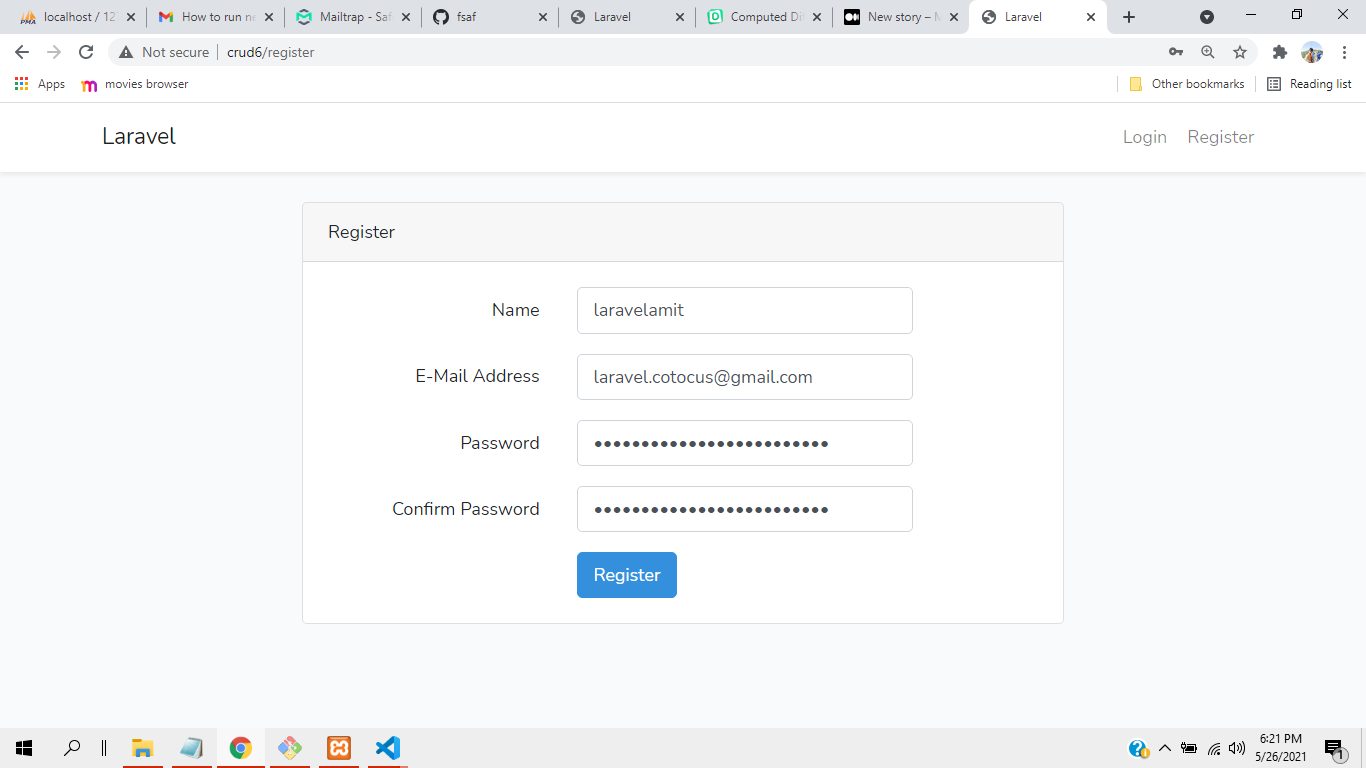
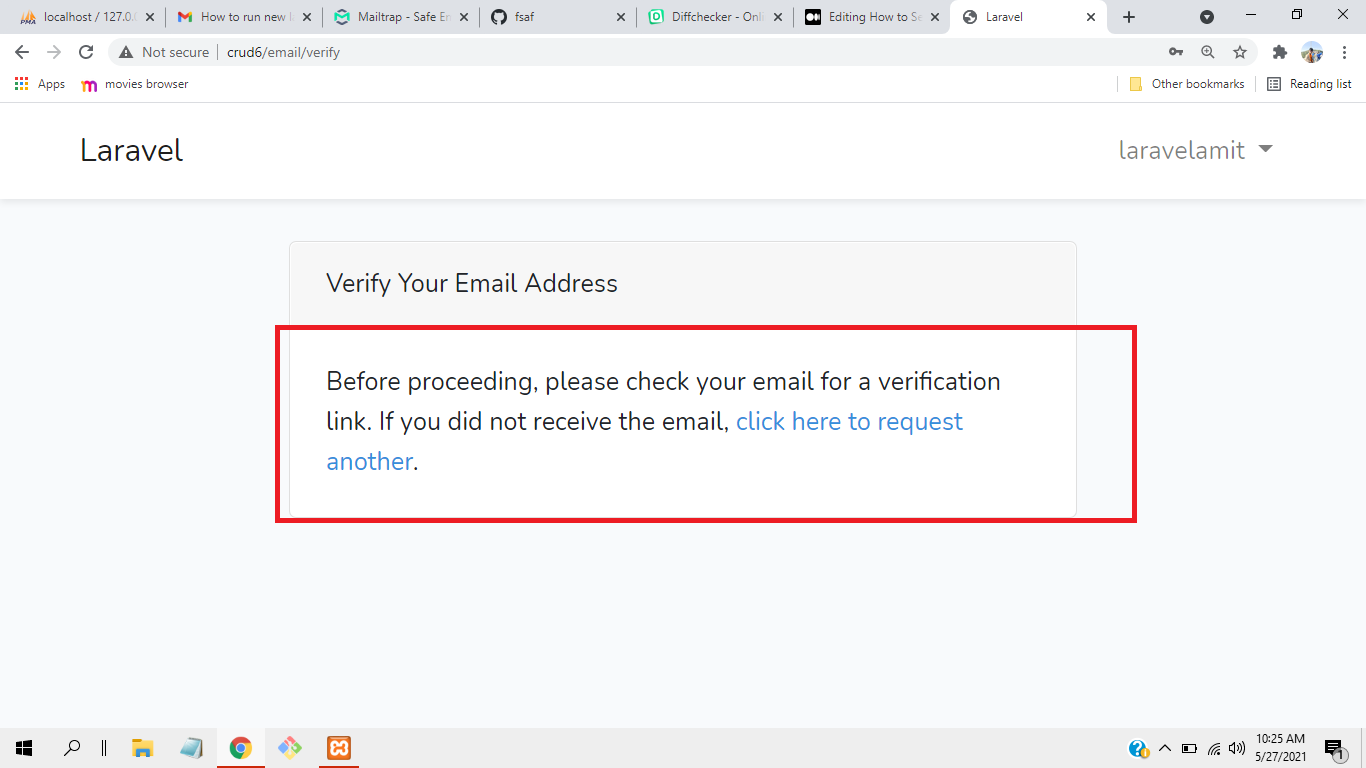
Now page is look like this

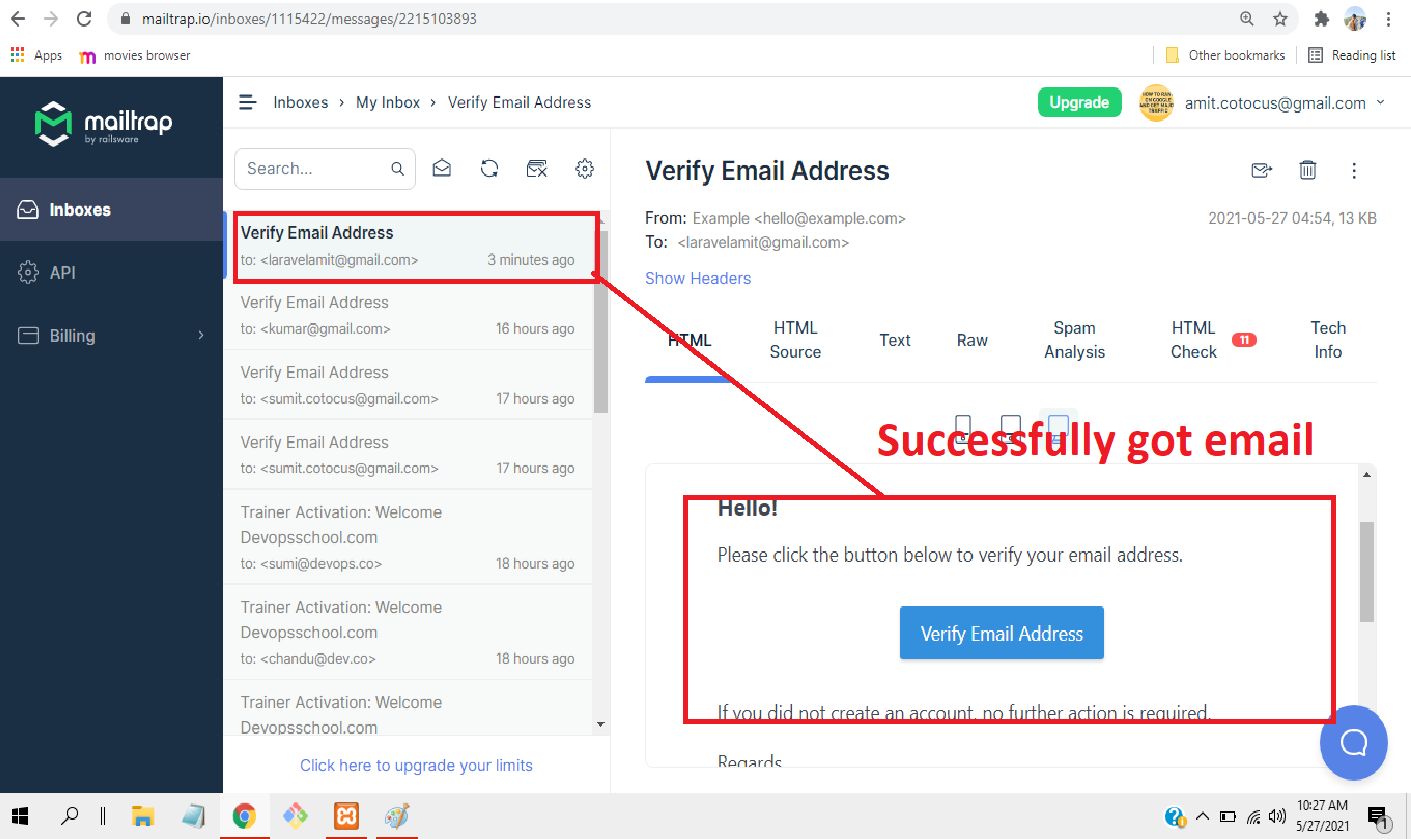
Now you got successfully got verification email

Now also you’ll get email when register

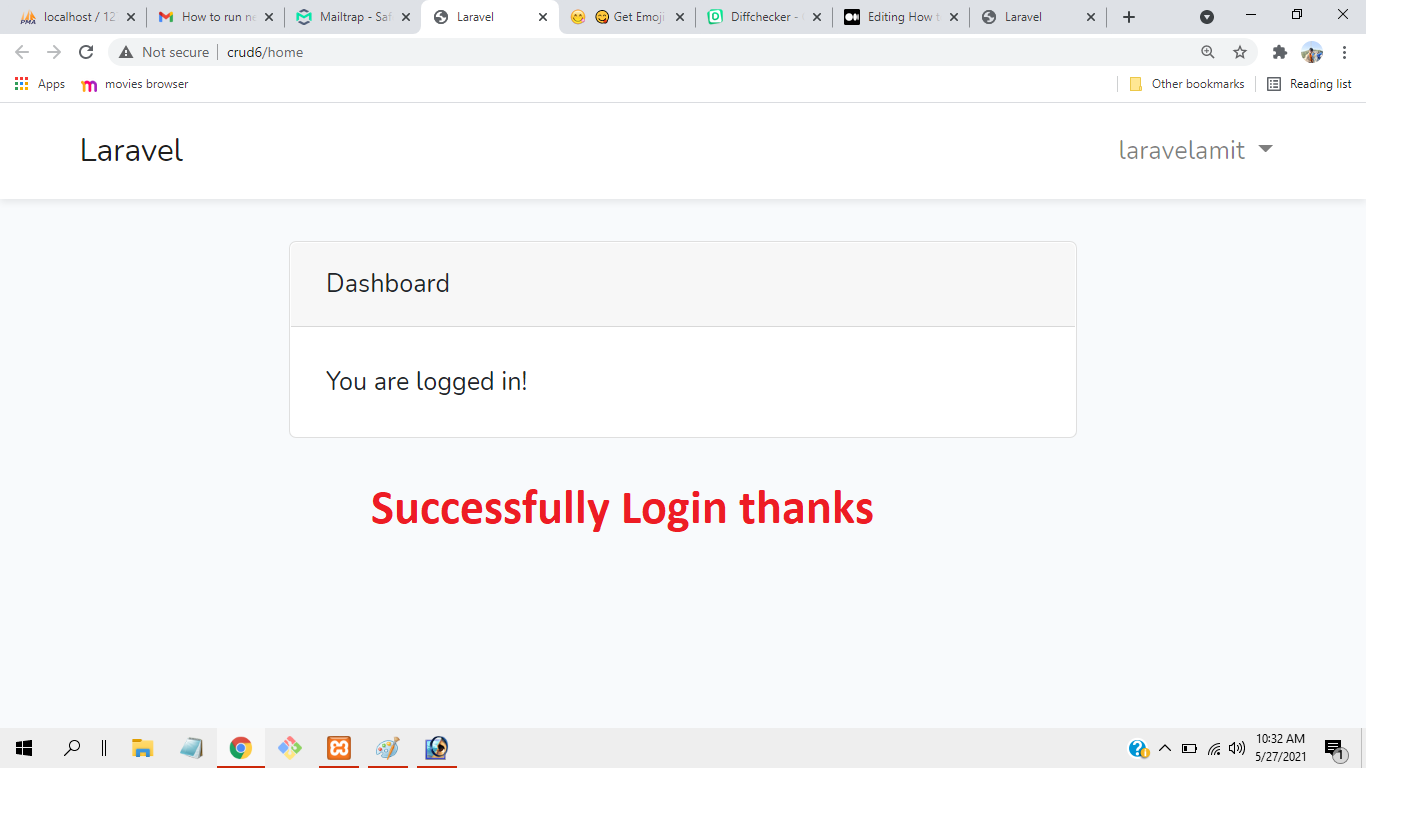
Login successfully when you verify email

Thanks i hope its helpful for you 🙏🙏

Tagged : / / /

Laravel 5.8 CRUD Tutorial with examples

Create Route for View:

Syntax: Route::get('uri', function(){return view('view_name')});

To write it in a simpler way:

Syntax:- Route::view method

Example:- Route::view(‘about’,’aboutme’)

-We should create view in structured way(inside folder) that means all the views should not be in the view folder and we can make it in structured way by making folder in views.

-To create route for view which is inside folder:

Syntax:- Route::get(‘uri’, Function(){
return view(‘folder_name.view_name’)});

Example:- Route::get(‘aboutprofile’, Function(){return view(‘admin.profile’)});

-Passing data from Route to view:

*Data should be in array and in key value/pair.

*Inside the view, we can then access each value using its corresponding key.

Example 1:-

Route::get(‘contact’, function(){
Return view(‘contactme’,[‘name’=>’Sonam’]);
});

 *We can also use the with method to add individual pieces of date to the view.

Example:-

Route::get(‘contact’, function(){
return view(‘contactme’)->with(‘name’,’Sonam’)
});

-Accessing the data which is passed from Route to view:

<h1>Hello{{$name}}</h1>

-Returning view from web.php using parameter:

Route::get(‘user/(u_id}’, function($id){
Return view(‘myuser’,[‘id’=>$id]);
});

(In the User View)

<body>
<h1>User page </h1>
<h1>{{$id123}}</h1>
</body>

-For multiple parameter:

(In web.php)

Route::get(‘post/{post_id}/comment/{comment_id}’, function($post_id, $comment_id){
Return view(‘mypost’,[‘postid’=>$post_id, ‘commentid=>’$comment_id’]);
});

(In the Post View)

<body>
<h1>User page </h1>
<h1>Post Id:{{$postid}}</h1>
<h1>Comment Id:{{$commentid}}</h1>
</body>

-For making optional parameter:

(In web.php)

Route::get(‘user/(name?}’, function($name=null){
Return view(‘myuser’,[‘name’=>$name]);

(In User view)

<body>
<h1>User page </h1>
</body>

For calling this in the server we can type 127.0.0.1.8000 or 127.0.0.1.8000/name and it will display the content in both scenario without giving error. Though it will not return any name if we do not enter /name.

-For regular expression

(In web.php)

Route::get(‘product/{p_name}’, function($name){
Return view(‘myproduct’,[name’=>$name]);
})->where(‘p_name’=>‘[A-za-z]+’);

(In myproduct view file)

<body>
<h1>Product page </h1>
<h1>{{$name}}</h1>
</body>

To redirect from one view to another view:

(In web.php)

Route::view(‘login’, ‘mylogin’);
Route::view(‘register’,’myregister’)
Route::redirect(‘login’, ‘register’);

(In View file)

<body>
<h1>Login</h1>
</body>

To fallback:

(In web.php)

Route::fallback(function(){
Return view(‘default;);
});

In Default View:

<body>
<h1>Default</h1>
</body>

Controllers

 Controllers can group related request handling logic into a single class. Instead of defining all of your request handling logic as closures in route files, you may wish to organize this behaviour using controller classes.

– Controllers are stored in the app/Http/Controllers

-Controller extends the base controller class included with Laravel.

Defining Controller Class

Run command: php artisan make:controller controller_name

Example: php artisan make:controller AboutController

Creating Route for Controller Class

(In AboutController.php)

<?php

namespace App\Http\Controllers;

use Illuminate\Http\Request;

class HomeController extends Controller
{
	Function show(){
		Return ‘Hello Controller’;}
}

(In Web.php)

Use App\Http\Controllers\AboutControllers;

Route::get(‘about’,[AboutController::class,’show’]);

Syntax:

Route::get(‘URI’,[ControllerName::class,’method_name’]);

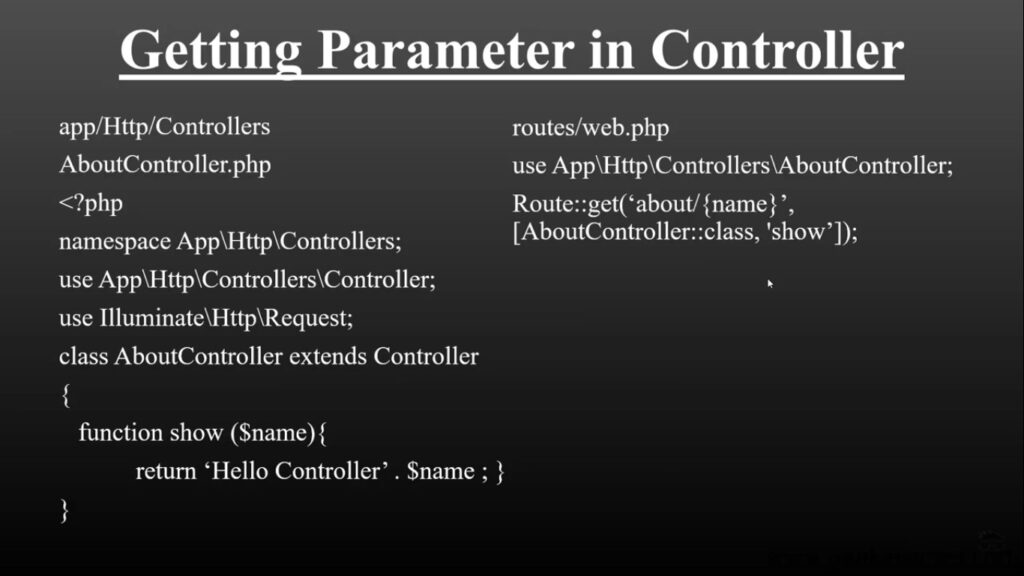
Getting parameter in Controller

In AboutController.php

<?php

namespace App\Http\Controllers;

use Illuminate\Http\Request;

class HomeController extends Controller
{
	Function show(){
		Return ‘Hello Controller’,$name;}
}

In web.php

Use App\Http\Controllers\AboutController;

Route::get(‘about/{name}’),[AboutController::class,’show’]);

To import controller in web.php

Use App\Http\Controllers\AboutController;

Controller returning string with parameter

In AboutController

function show($name){
return “Hello Controller”.$name;

In web.php

Route::get(‘about/{name}’,[Aboutcontroller::class,’show’]};

Returning View from Controller Class

In AboutControllers

<?php

namespace App\Http\Controllers;

use Illuminate\Http\Request;

class HomeController extends Controller
{
	function show(){
		return view(‘Hello Controller’);}
}

In web.php

Use App\Http\Controllers\AboutController;

Route::get(‘about’,[AboutController::class,’show’]);

In Views:

<body>
<h1>About my controller</h1>
</body>

Tagged : / / / /