npm run dev issue (npm ERR! code ELIFECYCLE)

Error:-

> cross-env NODE_ENV=development node_modules/webpack/bin/webpack.js --progress --hide-modules --config=node_modules/laravel-mix/setup/webpack.config.js

[webpack-cli] Error: Unknown option '--hide-modules'
[webpack-cli] Run 'webpack --help' to see available commands and options
npm ERR! code ELIFECYCLE
npm ERR! errno 2
npm ERR! @ development: `cross-env NODE_ENV=development node_modules/webpack/bin/webpack.js --progress --hide-modules --config=node_modules/laravel-mix/setup/webpack.config.js`
npm ERR! Exit status 2
npm ERR!
npm ERR! Failed at the @ development script.
npm ERR! This is probably not a problem with npm. There is likely additional logging output above.

npm ERR! A complete log of this run can be found in:
npm ERR!     C:\Users\Cotocus5\AppData\Roaming\npm-cache\_logs21-08-12T12_23_56_189Z-debug.log
npm ERR! code ELIFECYCLE
npm ERR! errno 2
npm ERR! @ dev: `npm run development`
npm ERR! Exit status 2
npm ERR!
npm ERR! Failed at the @ dev script.
npm ERR! This is probably not a problem with npm. There is likely additional logging output above.

npm ERR! A complete log of this run can be found in:
npm ERR!     C:\Users\Cotocus5\AppData\Roaming\npm-cache\_logs21-08-12T12_23_56_273Z-debug.log

Solution:-

Step 1:- Run this command to verify cache

npm cache verify

Step 2:- Recheck your package.json and webpack.mix.js file it is correct or not.

Step 3:- Then Delete the Node Module file which is present in your project folder.

Step 4:- Run the Npm install command.

npm install

Step 5:- Then Run npm run dev command.

npm run dev
Tagged : / / / /

How to use 3d transform property in CSS?

This property is used to apply a 2D or 3D transformation to an element. We can set below values: –

  • translate()
  • rotate()
  • scale()
  • skew()
  • matrix()
  • translate3d()
  • rotate3d()
  • scale3d()
  • matrix3d()
  • perspective()

3D Transform

  • transform
  • transform-origin
  • transform-style
  • perspective
  • perspective-origin
  • backface-visibility

translate3d( )

Syntax: –

transform: translateX(px)
transform: translateY(px)
transform: translateZ(px)
transform: translate3d(Xpx, Ypx, Zpx)

Ex: –

transform: translateX(10px)
transform: translateY(5px)
transform: translate3d(10px, 5px, 20px)

rotate3d( )

Syntax: –

transform: rotateX(deg)
transform: rotateY(deg)
transform: rotateZ(deg)
transform: rotate3d(Xdeg, Ydeg, Zdeg, Angledeg)

Ex: –

transform: rotateX(50deg)
transform: rotateY(40deg)
transform: rotateZ(20deg)
transform: rotate3d(50deg, 50deg, 50deg, 60deg)

scale3d( )

Syntax: –

transform: scaleX(x)
transform: scaleY(y)
transform: scaleZ(z)
transform: scale3d(x, y, z)

Ex:-

transform: scaleX(3)
transform: scaleY(4)
transform: scaleZ(5)
transform: scale3d(3, 4, 5)

matrix()

Syntax: –

transform: matrix3d(n,n,n,n,n,n,n,n,n,n,n,n,n,n,n,n)

Ex:-

transform:

Tagged : / / / / / / / / /

History Object and Location Object in javascript?

History Object

The History object is a read-only array of URL strings that shows where the user has been recently.

Syntax: –

window.history.property

window.history.method

Property

  • length – It returns the number of URLs in the history list.

Methods

  • back ( ) – It loads the previous URL in the history list.
  • forward ( ) – It loads the next URL in the history list.
  • go ( ) – It access a particular item in the history list relative to the current position. Using a negative value moves to a history item previous to the current location, while a positive number moves forward in the history list.

Location Object

This is used to access the current location (URL) of the window. The Location object can be both read and replaced, so it is possible to update the location of a page through scripting. Location object is a property of Window.

Syntax:-

window.location.property

window.location.method

Properties

  • hash – The part of the URL including and following the # symbol.
  • host – The hostname and port number.
  • hostname – hostname
  • href – entire URL
  • pathname – Path relative to the host.
  • port – Port Number
  • protocol – Protocol of URL
  • search – The part of the URL including and after the ?

Methods

  • assign(URL) – It changes the location of current page with the passed in URL.
  • reload( ) – Reload the current page.
  • replace (URL) – Replaces the current page with the given URL in history. As it is replaced in history, it won’t be possible to access the current page with back/forward.
Tagged : / / / /

How to use 2d transform property in CSS?

This property is used to apply a 2D or 3D transformation to an element. We can set below values: –

  • translate()
  • rotate()
  • scale()
  • skew()
  • matrix()

Ex:-

div { transform: rotate(20deg); }

translate( )

This method is used to move an element from its current position.

Syntax: –

transform: translateX(px)

transform: translateY(px)

transform: translate(Xpx, Ypx)

Ex: –

transform: translateX(10px)

transform: translateY(5px)

transform: translate(10px, 5px)

rotate( )

This method is used to rotate an element clockwise or anti-clockwise according to a given degree.

Using negative values will rotate the element anti-clockwise.

Syntax: –

transform: rotate(ndeg)

Ex: –

transform: rotate(50deg)

transform: rotate(-40deg)

scale( )

This method is used to increases or decreases the size of an element

Syntax: –

transform: scaleX(width)
transform: scaleY(height)
transform: scale(width, height)

Ex: –

transform: scaleX(3)
transform: scaleY(4)
transform: scale(3, 4)

skew()

This method is used to skews an element along the X and Y-axis by the given angles.

Syntax: –

transform: skewX(deg)
transform: skewY(deg)
transform: skew(Xdeg, Ydeg)

Ex: –

transform: skewX(30deg)
transform: skewY(40deg)
transform: skew(30deg, 40deg)
transform: skew(30deg)

matrix()

This method is used to combines all the 2D transform methods into one.

The matrix() method take six parameters, containing mathematic functions, which allows you to rotate, scale, move (translate), and skew elements.

The parameters are as follow:

matrix(scaleX(),skewY(),skewX(),scaleY(),translateX(),translateY())

Syntax: –

transform:

Ex: –

transform:

none

No transform

Ex: –

transform: none;

Tagged : / / / / / / / /

Moving Windows in JavaScript

Moving Windows

moveBy ( ) – This method moves the current window by a specified amount of pixels.

Syntax:- window.moveBy(horizontalPixels, verticalPixels);

Where,

window – It is the name of the window to move or is called just window if it is the main window.

horizontalPixels – It is the number of horizontal pixels to move the window where positive numbers move the window to the right and negative numbers to the left.

verticalPixels – It is the number of vertical pixels to move the window where positive number move the window down and negative number up.

Ex:- newWindow.moveBy(200, 200);

Moving Windows

moveTo ( ) – This method moves the window to the specified coordinates.

Syntax:- window.moveTo(x, y);

Where,

window – It is the name of the window to move or is called just window if it is the main window.

x – It is the screen co-ordinate on the x-axis to move the window to.

y – It is the screen co-ordinate on the y-axis to move the window to.

Ex:- newWindow.moveTo(200, 200);

Resizing Windows

Resizing Windows

resizeBy ( ) – This method is used to resize the current window by a certain amount, relative to its current size. 

Syntax:- window.resizeBy(width, height);

Where,

window – It is the name of the window to move or is called just window if it is the main window.

width – It is the number of width pixels, where positive numbers increase the window and negative numbers decrease.

height – It is the number of height pixels, where positive numbers increase the window and negative numbers decrease.

Ex:- newWindow.resizeBy(200, 200);

Resizing Windows

resizeTo ( ) – This method is used to resize a window to the specified width and height.

Syntax:- window.resizeTo(width, height);

Where,

window – It is the name of the window to move or is called just window if it is the main window.

width – It is an integer representing the new outerWidth in pixels (including scroll bars, title bars, etc).

height – It is an integer value representing the new outerHeight in pixels (including scroll bars, title bars, etc).

Ex:- newWindow.resizeTo(200, 200);

Scrolling Windows
scrollBy ( ) – This method scrolls the document in the window by the given amount.

Syntax:- window.scrollBy(x, y); or window.scrollBy(options);

Where,

window – It is the name of the window to scroll or is called just window if it is the main window.

x – How many pixels to scroll by, along the x-axis (horizontal). Positive values will scroll to the right, while negative values will scroll to the left

y – How many pixels to scroll by, along the y-axis (vertical). Positive values will scroll down, while negative values scroll up

Options – It is an object with three possible properties:
top, which is the same as the y-coord
left, which is the same as the x-coord
behavior, which is a string containing one of smooth, instant, or auto; default is auto

Note – For this method to work, the visible property of the window’s scrollbar must be set to true!

Scrolling Windows
scrollTo ( ) – This method scrolls to a particular set of coordinates in the document.

Syntax:- window.scrollTo(x, y); or window.scrollTo(options);

Where,

window – It is the name of the window to scroll or is called just window if it is the main window.

x – It is the pixel along the horizontal axis of the document that you want to be displayed in the upper left.

y – It is the pixel along the vertical axis of the document that you want to be displayed in the upper left.

options is an object with three possible properties:
top, which is the same as the y-coord
left, which is the same as the x-coord
behavior, which is a string containing either smooth, instant, or auto; default is auto

Tagged : / / / /

Why Microsoft Azure Security Technologies getting so important?

Cloud computing is an innovation of computing world from all types of issues such as low storage capacity, huge investments, high operating costs, low security, huge maintenance, etc.

Microsoft Azure is in the one of the top cloud service providers in the market right now & growing at a faster rate with its unique features. Constant innovativeness, high flexibility and easy to use approach have acquired its huge popularity in the cloud computing segment. Azure is one of the widely deployed tolls by many organizations and offering more employment opportunities.

Azure Security Technologies

Azure Security Technologies is a security management system that strengthens the security posture of your data centers, and also provides advanced threat protection across your hybrid workloads in the cloud whether in Azure or not and also on premises.

Azure is a hybrid cloud service platform. It supports a wide variety of operating systems, computing languages, architectures, resources, applications, and computers.

Azure Security Technology addresses the three most urgent security challenges:

  1. Rapidly changing workloads.
  2. Increasingly sophisticated attacks.
  3. Security skills are in short supply.

To help users protected against these challenges, it provides tools to:

Strengthen security posture

It assesses user’s environment and enables to understand the status of resources, and whether they are secure.

Protect against threats

It assesses your workloads and raises threat prevention and security alerts.

Get secure faster

Everything is done in cloud speed. Because it is natively integrated, deployment of Security Centre is easy, providing you with auto provisioning and protection with Azure services.

Types of Services in Azure Security

For Azure data security and encryption best practices, the recommendations are around the services discussed below:

  • General Azure Security
  • Operations Security
  • Applications Security
  • Storage Security
  • Network Security
  • Backup and Disaster Recovery
  • Identity and Access Management

Why is Cloud Technology getting so important?

Azure provides tools and capabilities for security to create a secure Azure platform.  One of the cloud’s keys to data security is to prepare for future environments in which the data may exist and what protections are required for that state. Cloud provides significant benefits in addressing significant threats to information management.

In an on-site environment, organizations are likely to have unfulfilled responsibilities and limited resources available to invest in security, creating an environment where attackers can exploit vulnerabilities at all layers.

This will manage Docker-integrated Linux containers; develop Html, Python, .NET, PHP, Java, and Node.js apps; and develop backends for iOS, Android, and Windows computers. With more and more enterprises shifting to Azure cloud, there lies a definite need for Azure Security. Cloud storage eliminates the need to build data centers and invest in costly equipment.

Businesses are switching rapidly to cloud technology to speed up innovation and encourage collaboration. This is where Security Services comes into the picture. It is a procedure and technology that secure the cloud computing environment against cyberattacks.

AZ-500: Microsoft Azure Security Technologies

Master the skills required for the Microsoft Azure AZ-500 exam and gain security knowledge in Microsoft Azure.

AZ-500

This course is designed to help one master the skills required for the Microsoft Azure AZ-500 certification exam.

It is an associate-level exam which tests candidates for advanced security knowledge and experience working with various aspects of Microsoft Azure. In this course,  you will progressively build and expand upon both your security knowledge and hands-on experience working with Azure technologies. This is not limited to: identity and security, hybrid cloud, monitoring, encryption, database security, and securing both apps and services for the Cloud.

More to go and more to run.

If you want to be a Certified Azure Security Engineer Associate and build your career in cloud computing, then I would suggest you DevOpsSchool, one of the best institute for Azure certification. DevOpsSchool offer Master in Microsoft Azure DevOps online and classroom training and certification course by an expert.

I hope this blog will helpful for you.

Thank you!!

Tagged : / / / / / /

What is a window object in JavaScript? What are its properties?

Window Object

  • Window object represents the browser’s window or potentially frame, that a document is displayed in.
  • As long as a browser window is open, even if no document is loaded in the window, the window object is defined in the current model in memory.
  • All global JavaScript variables, functions and objects automatically become members of the window object.

Dialog boxes

It is used to provide some information to users.

Type of Dialog box:-

  • Alert
  • Confirm
  • Prompt

alert ( ) Method

This Window object’s method is used to display data in the alert dialog box. alert really should be used only when you truly want to stop everything and let the user know something.

Syntax:- window.alert( ) or alert ( )

confirm ( ) Method

This Window object’s method is used to display a message for a user to respond to by pressing either an OK button to agree with the message to a Cancel button to disagree with the message. It returns true on OK and false on Cancel.

Syntax:- window.confirm( ) or confirm ( )

prompt ( ) Method

Window object’s method prompt() can be used to get input from the user, named prompt. The prompt( ) method displays a dialog box that prompts the visitor for input.

Once the prompt function obtains input from the user, it returns that input. If the user press the cancel button in the dialog or close box, a value null will be returned.

Syntax: – prompt(text, defaultText)

open ( ) Method

The open( ) method creates a new secondary browser window, similar to choosing New Window from the File menu. It returns a Window object representing the newly-created window. If the window couldn’t be opened, the returned value is instead null.

Syntax: – window.open (URL, name, features, replace)

URL – URL indicates the document to load into the window. If no URL is specified, a new window with about: blank is opened

Name – Specifies the target attribute or the name of the window. The following values are supported:

_blank – URL is loaded into a new window. This is default
_parent – URL is loaded into the parent frame
_self – URL replaces the current page
_top – URL replaces any framesets that may be loaded

open ( ) Method

Syntax: – window.open (URL, name, features, replace)

Features – It is a comma-delimited string that lists the features of the window.

Replace – It indicates whether or not the URL specified should replace the window’s contents. This would apply to a window that was already created. Value can be true/false.

Features

Feature ParameterValueExample
alwaysLoweredyes/noalwaysLowered=yes
alwaysRaisedyes/noalwaysRaised=no
centerscreenyes/nocenterscreen=yes
chromeyes/nochrome=yes/true
closeyes/noclose=no
dialogyes/nodialog=yes
dependentyes/nodependent=yes
z-lockyes/noz-lock=yes
hotkeysyes/nohotkeys=yes

Features

Feature ParameterValueExample
locationyes/nolocation=no
menubaryes/nomenubar=no
minimizableyes/nominimizable=no
modalyes/nomodal=yes
personalbaryes/nopersonalbar=yes/true
resizableyes/noresizable=no
scrollbarsyes/noscrollbars=no
statusyes/nostatus=no
titlebaryes/notitlebar=yes

Features

Feature ParameterValueExample
toolbaryes/notoolbar=yes
toppixel valuetop=20
heightpixel valueheight=200
widthpixel valuewidth=200
innerHeightpixel valueinnerHeight=200
innerWidthpixel valueinnerWidth=200
outerHeightpixel valueouterHeight=200
outerWidthpixel valueouterWidth=200
leftpixel valueleft=20

close ( ) Method

Once a window is open, the close ( ) method is used to close it. It closes the current window or the window on which it was called. This method is only allowed to be called for windows that were opened by a script using the window.open() method. It is often used together with open ( ) method.

Syntax: – window.close ( )

Tagged : / / / /

Top 15 Methods & built-in tools to troubleshoot windows operating systems

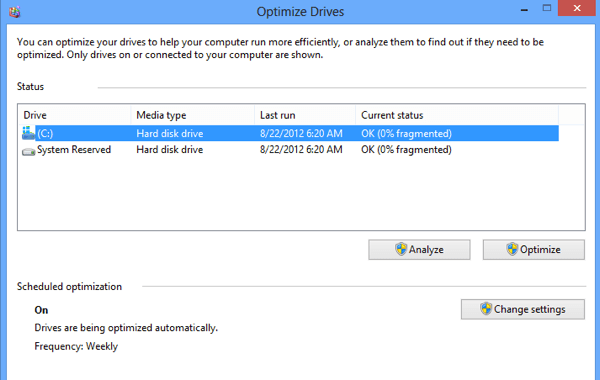
1.Defragmentation and optimize drives

Optimizing your drives can help your PC run smoother and boot up faster. To optimize them:

  1. Select the search bar on the taskbar and enter defrag.
  2. Select Defragment and Optimize Drives.
  3. Select the disk drive you want to optimize.
  4. Select the Optimize button.

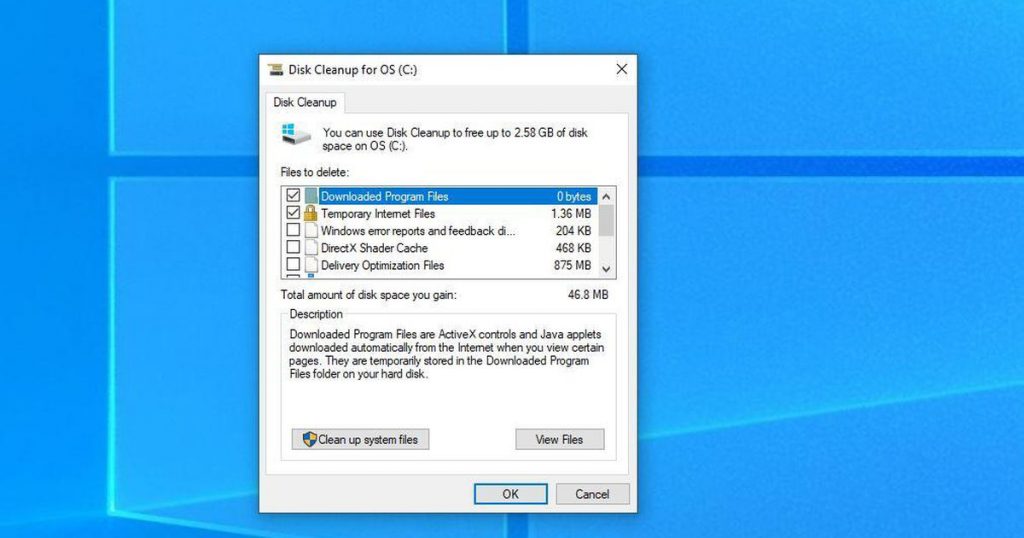
2.Disk cleanup

To delete temporary files:

  1. In the search box on the taskbar, type disk cleanup, and select Disk Cleanup from the list of results.
  2. Select the drive you want to clean up, and then select OK.
  3. Under Files to delete, select the file types to get rid of. To get a description of the file type, select it.
  4. Select OK.

If you need to free up more space, you can also delete system files:

  1. In Disk Cleanup, select Clean up system files.
  2. Select the file types to get rid of. To get a description of the file type, select it.
  3. Select OK.

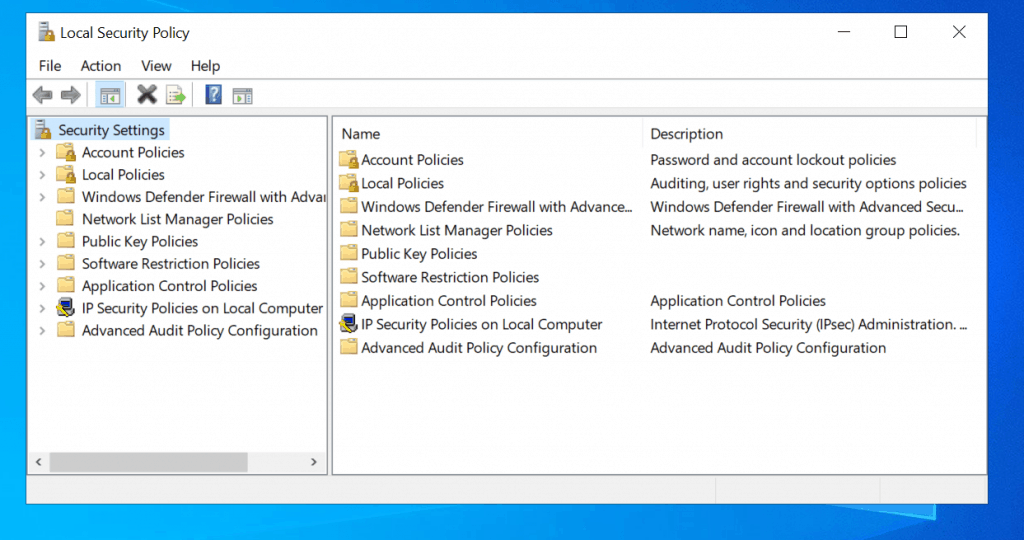
3.Local Security Policy

The local security policy of a system is a set of information about the security of a local computer. The local security policy information includes the following: … Which user accounts may access the system and how. For example, interactively, through a network, or as a service.

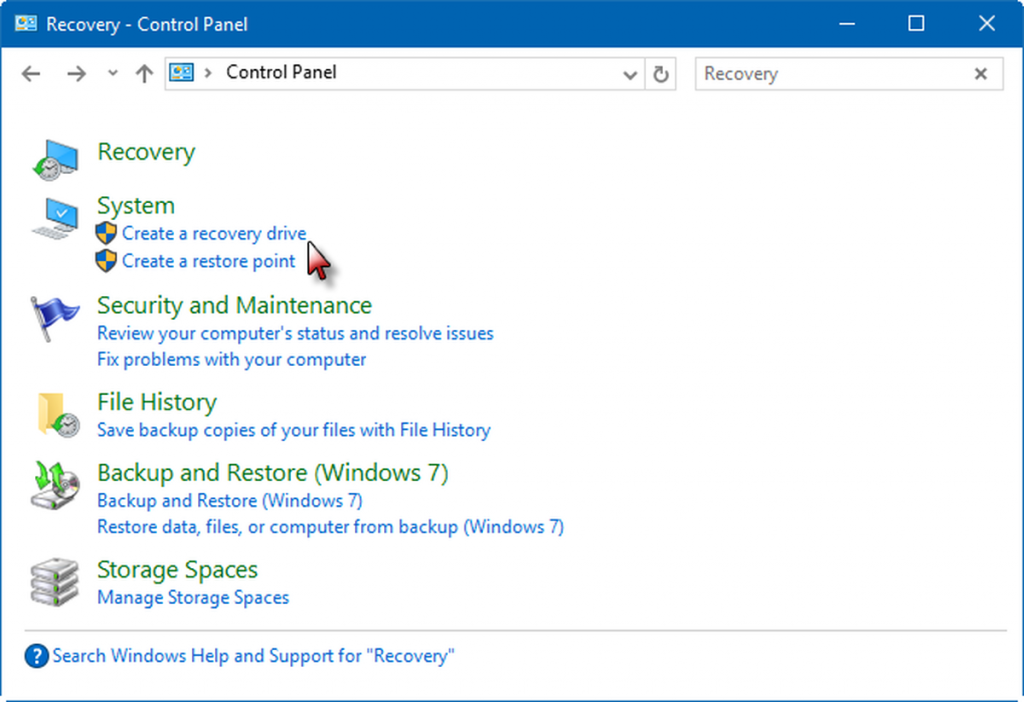
4.Recovery drive


A recovery drive stores a copy of your Windows 10 environment on an external source, like a DVD or USB drive. … In most cases you would be out of luck, but not if you’ve already created a recovery drive, which stores a copy of your Windows 10 environment on another source, such as a DVD or USB drive.

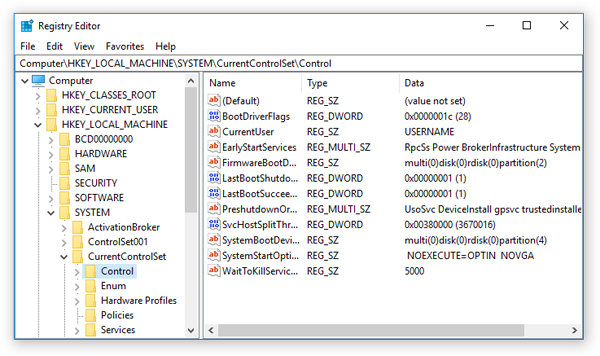
5.Registry editor


Registry Editor allows users to perform the following functions: Creating, manipulating, renaming, and deleting registry keys, subkeys, values, and value data. Importing and exporting . … Loading, manipulating, and unloading registry hive format files (Windows NT systems only).

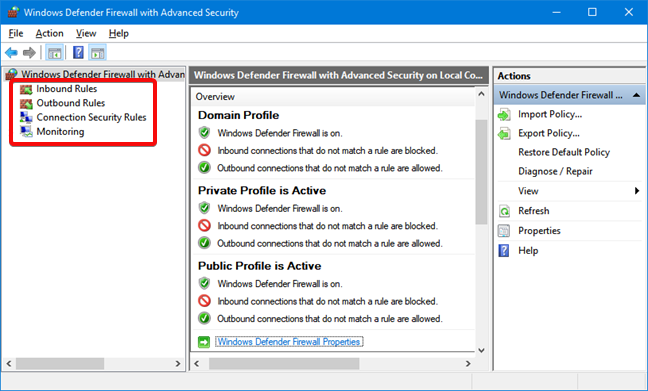
6.Windows defender firewall with advanced security


Windows Defender Firewall with Advanced Security is an important part of a layered security model. By providing host-based, two-way network traffic filtering for a device, Windows Defender Firewall blocks unauthorized network traffic flowing into or out of the local device.

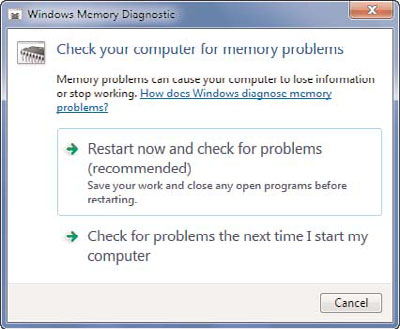
7.Windows memory diagnostic

How to Start Memory Diagnostic Tool in Windows 10

  1. Open Control Panel.
  2. Click on System and Security.
  3. Click on Administrative Tools.
  4. Double-click the “Windows Memory Diagnostic” shortcut.
  5. Click the “Restart now and check for problems” option (The tool also offers an option to schedule a test in the next reboot).

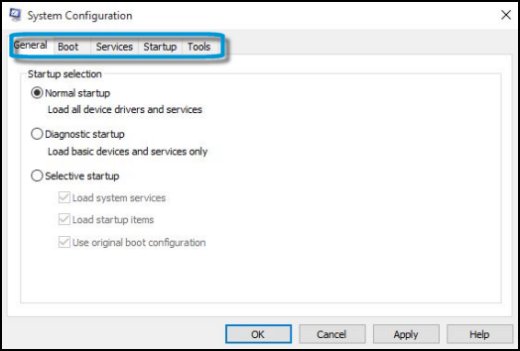
8.System configuration

A system configuration (SC) in systems engineering defines the computers, processes, and devices that compose the system and its boundary. More generally, the system configuration is the specific definition of the elements that define and/or prescribe what a system is composed of.

9.Control panel

 You can use Control Panel to change settings for Windows. These settings control nearly everything about how Windows looks and works.

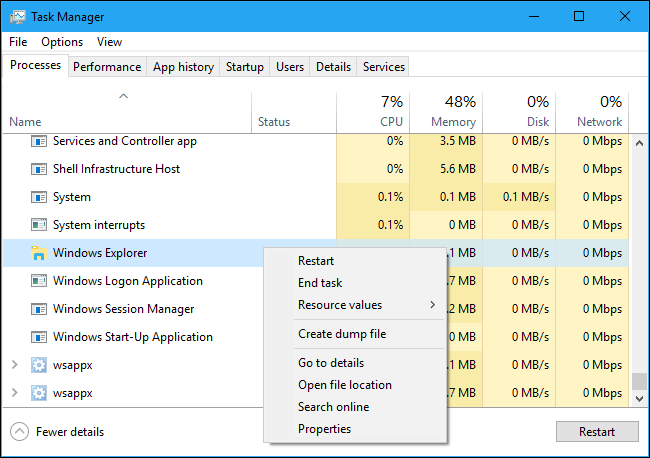
10.Task Manager 

Task Manager (Windows) … Task Manager, previously known as Windows Task Manager, is a task manager, system monitor, and startup manager included with Microsoft 

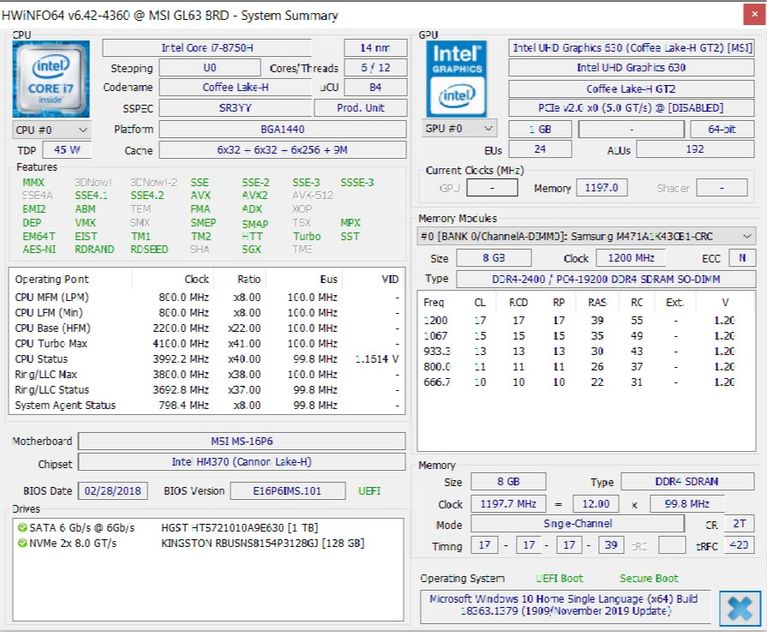
11.HWiNFO

HWiNFO is the most comprehensive system summary tool by a long shot. It displays all information about your computer- from the CPU temperatures to fan voltages. In fact, if you are using a Ryzen processor, this should be your go-to choice as alternatives such as CPU-Z have been known to show incorrect readings.

It’s a good tool to have when you want the most accurate readouts of everything related to your computer components.

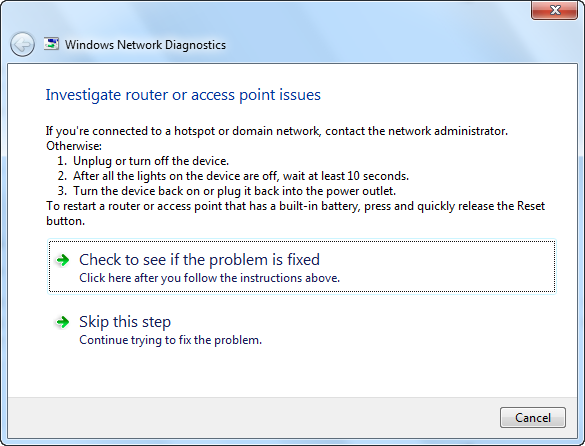
12.Windows Network Diagnostics Tool

This tool will perform several tests to troubleshoot network connectivity or performance issues. If there are problems with the connection, this tool will try to diagnose the problem and present some possible solutions. It can be used to troubleshoot different network problems such as Internet connectivity, issues connecting to a shared folder, HomeGroup connectivity issues, and even network printer problems. WNDT will automatically run when it detects a problem.

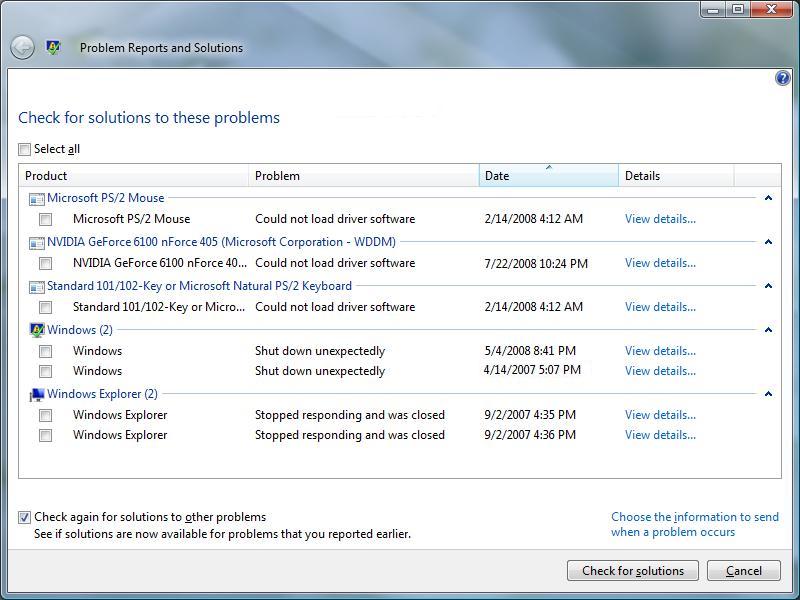
13.Problem Reports and Solutions Tool

This tool will automatically check for problems in Windows related to installations and applications. We can also run this tool manually if we have a particular problem. This tool also enables us to view the problem history. We can also check for new solutions on the Internet. We can always clear solutions and problem history.

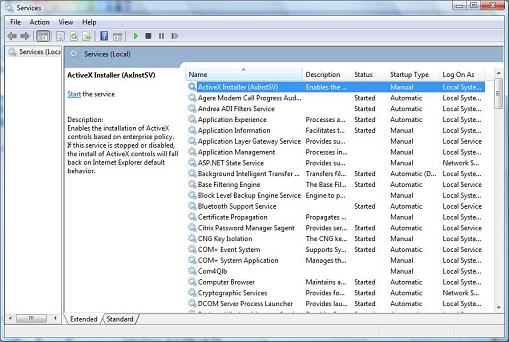
14.Services Console

To start or stop the services in real-time, we can use the Services console. The Services console (MMC snap-in) lists detailed information about each service and provides management options. This is the same list as in MSConfig, however, it provides more information and more management options. Keep in mind that services need some type of authentication to be able to start. By default, most services work with a local system account, but we can specify another account to be used when the service wants to start.

15.Windows Diagnostic Infrastructure (WDI)

Starting from Windows 7 we have a Windows Diagnostic Infrastructure (WDI) available. WDI is a set of diagnostic tools that identify existing disk, network, and memory problems. They detect failures and alert us of potential problems. WDI can show us information about existing problems and help us prevent future problems.

Tagged : /

What is Event in Javascript?

What is Event

The actions to which JavaScript can respond are called Events. An Event is some notable action to which a script can respond.

  • Clicking an element
  • Submitting a form
  • Scrolling page
  • Hovering an element

Event Handler

An Event handler is JavaScript code associated with a particular part of the document and a particular event. A handler is executed if and when the given event occurs at the part of the document to which it is associated.

  • onclick
  • ondblclick
  • onchange
  • onblur

Event Binding with HTML Attribute

These bindings are element attributes, such as onclick and on change, which can be set equal to JavaScript that is to be executed when the given event occurs at that object.

Ex: – <button onclick= “alert(‘Button Clicked’);”>Click Me</button>

Event Binding with JavaScript

When we use this approach we can add or remove handlers dynamically as well as it improves the separation between the structure of the document and its logic and presentation.

Ex: –

Event Binding with JavaScript

Overwriting Event Handler

DOM Event Model

The DOM 2 Event Model specification describes a standard way to create, capture, handle and cancel event in a tree like structure such as an XHTML document’s object hierarchy.

Phases

  • Capture Phase
  • Target Phase
  • Bubbling Phase

addEventListener ( )

This method is introduced by DOM2, used to engage an event handler in a page.

Syntax:-
Object.addEventListener(event, handler, capturePhase);

Where,

  • Object is the node to which the listener is to be bound.
  • Event is a string indicating the type of event.
  • Handler is the function that should be called when the event occurs.
  • capturePhase is a Boolean indicating whether to use Bubbling (false) or Capture (true). This is optional. If you omit there is false by default.

Ex:-
btn.addEventListener(“click”, show, false);

Why we should use addEventListener ( ) ?

Why we should use addEventListener ( )

  • It allows you to bind multiple handlers to an object for the same event.
  • It enables you finer-grained control of the phase when the listener is activated (Capture or Bubbling).
  • It works on any DOM element, not just HTML elements.

removeEventListener ( )

DOM Event Flow/ Event Propagation

The DOM 2 Event Model specification describes a standard way to create, capture, handle and cancel event in a tree like structure such as an XHTML document’s object hierarchy.

Phases

  • Capture Phase
  • Target Phase
  • Bubbling Phase

Event Object

DOM events pass an Event object as an argument to handlers. This object contains extra information about the event that occurred.

Ex:- addEventListener(“click”, function(e) { });

Event Methods

  • stopPropagation() –  Prevents further propagation of the current event in the capturing and bubbling phases.

Syntax:- e.stopPropagation();

  • stopImmediatePropagation() – Prevents other listeners of the same event from being called.

Syntax:- e.stopImmediatePropagation();

  • preventDefault()  – The Event interface’s preventDefault() method tells the user agent that if the event does not get explicitly handled, its default action should not be taken as it normally would be.

Syntax:- e.preventDefault();

Mouse Event

  • mousedown – It fires when mouse button is pressed down.
  • mouseup – It fires when the mouse button is released.
  • click – It fires when something is clicked. mousedown, mouseup and click events fires in sequence.
  • dblclick – It fires when something is clicked twice in rapid succession. mousedown, mouseup, click, mousedown, mouseup, click, and dblclick events fires in sequence.
  • mouseenter – It fires when a mouse starts to hover over some element. NO bubble.
  • mouseleave – It fires when a mouse exits while hovering over some element. No bubble.
  • mouseover – It fires when mouse is hovering over some element.
  • mouseout – It fires when mouse leaves from hovering over some element.
  • mousemove – It fires when the mouse moves.
  • contextmenu – It fires when mouse right button is clicked.

Focus Event

  • focus – It fires when an element gains focus, such as selecting a form field. No Bubble
  • blur – It fires when element loses focus, such as moving away from a form field. No Bubble
  • focusin – It fires just as an element is about to gain focus.
  • focusout – It fires just as an element loses focus and just before the blur event.

Key Event

  • keydown – It fires as a key is pressed down.
  • keypress – It fires after a key is pressed down (after keydown). It only works with printable characters.
  • keyup – It fires as the key is released.
Tagged : / / /

HTML: Datalist Tag

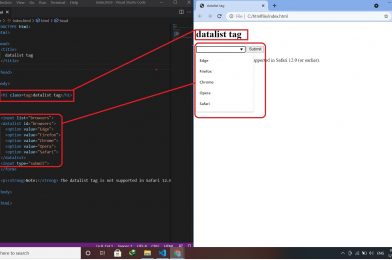
The datalist tag provides an autocomplete feature, which means that it allows you to select an input from the predefined options. The datalist tag is combined with the input tag.

<datalist>
	
	<option>………...</option>
	<option>………...</option>

</datalist>
Tagged : / / / / /