What is javascript

Introduction:-javascript is an object oriented programming language used by several websites for scripting  webpages. It is an interpreated programming language which enables dynamic interactivity on websites.

Features of javascript:-

1.all the websites support javascript, they provide built in execution environment.

2. it is a structured programming, it follows c programming language syntax and structure.

3. it is a case sensitive programming language.

4. it is a light weight interpreated language.

5. it is supportable in several operating system including macOS, windows etc.

Places to put JavaScript code:-

  1. Between head tag.
  2. Between body tag.
  3.  In external file(.js file)

javascriptComment:- it is a meaningful way to deliver messange,warning,suggestion or information about the code .

there are 2 types of javascript comment:

  1. Single-line comment
  2. Multi-line comment
  3. Single line comment:-  single line comment is used by adding forward slashes(//) before the line.
  4. Multi line comment:- it is represented by forward slash with asterisk then asterisk with forward slash.

Example:-/* code is here*/

JavaScript variable:- variable in javascript is a name of storage location.

There are 2 types of variables:-

  1. Local variable
  2. Global variable

Local variable:- Javascript local variable is declared inside the lock or function. It is accessible within the function or block.

Global variable:- It is declared outside the function and accessible from any function.

Javascript datatypes:-Datatypes hold different types of values.

There are two types of data types:-

  1. Primitive data type(string,number,Boolean undefined,null)
  2. Non-primitive data type(object,Array,RegExp)

Javascript operators:-

. javascript operators are the symbol which are used to perform operations on operands

1.Arithmetic Operators

2. Comparison (relational) operators

3. Bitwise Operators

4. logical Operatiors

5. Assignment Operators

6. Special Operators

Javascript if-else:

If else statement is used to execute wheather condition is true or false.

There are three forms of if ststements in javascript:-

  1. If statement
  2. If else statement
  3. If else if statement
Tagged :

HOW TO CREATE API IN LARAVEL

1st step:- open command prompt and go to xampp\htdocs folder and write the code given below in command prompt to create the project

Composer create-project –prefer-dist laravel/laravel admin “5.5.*”

2nd step:-now go to the project folder and make auth. Code is given below

               php artisan make:auth

3rd step:- Now install the passport. Write the code given below in command prompt.

    Composer required laravel/passport

4th step:-open phpmyadmin and make a database.

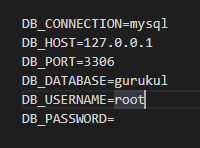
5th step:- open .env file and configure the database.

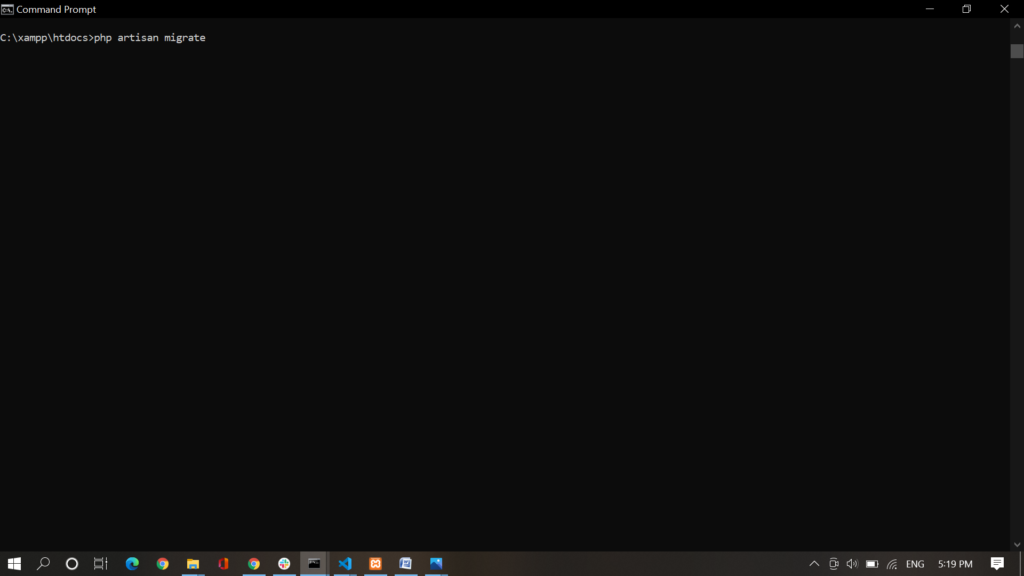
6th step:- Now migrate the database. Write the code given below in the command prompt

     php artisan migrate

7th step:-Add the code given below in user model.

       use Laravel\Passport\HasApiTokens;

8th step:- Add the code given below in auth service proviser(C:\xampp\htdocs\ admin\Providers\AuthorServiceProvider.php)

      use Laravel\Passport\Passport;

9th step:- Now configure auth.php(C:\xampp\htdocs\admin\config\auth.php)

Change the driver and provider as given below in api:-

‘api’=>[

‘driver’=>’passport’,

‘provider’=>’users’

],

10th step:- Add the code given below in kernel.php. (C:\xampp\htdocs\ admin\app\Http\Kernal.php)

Protected $routeMiddleware=[

‘client’_credentials’=>\Laravel\Passport\Http\Middleware\CheckClientcredentials::class,

11th step:-Add the code given below in app.php(config\app.php)

/*

   *Application Service Providers…

  */

 //Passport Service provider

    Laravel\Passport\PassportServiceprovider::class,

];

12th step:- Write the code given below in command prompt.

              php artisan passport:install

      Encryption keys generated successfully.

Tagged : / /

How to upload image in the database and send mail image

1st step:- Open command prompt in C:\xampp\htdocs.

2nd step:- Write the code given below in the opened command prompt to make laravel project.

   composer create-project --prefer-dist laravel/laravel ImageUpload "5.8.*"

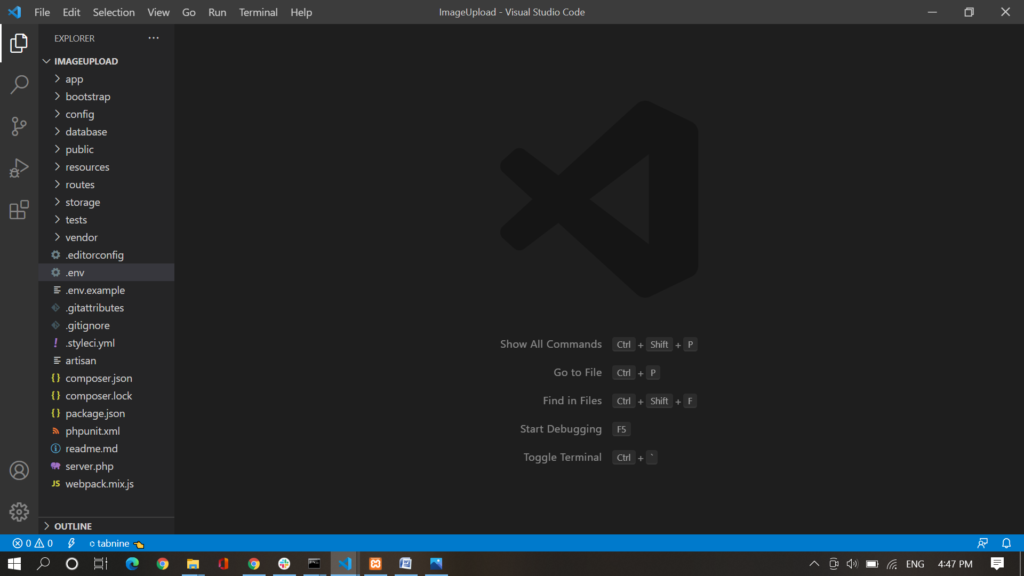
3rd step:- After the project is created, open the folder in any code editor.

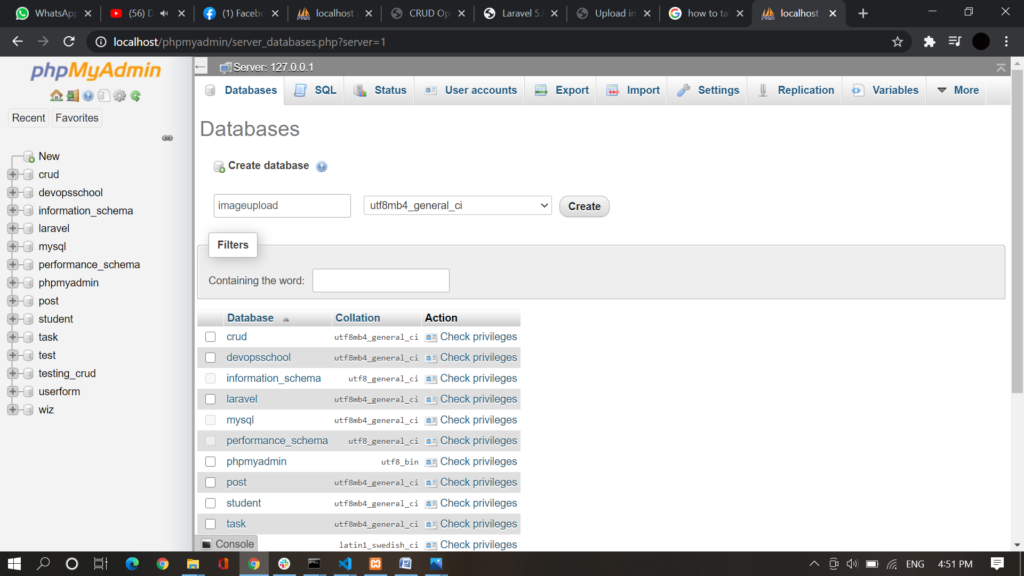
4th step:- Now open xampp. And make a database.

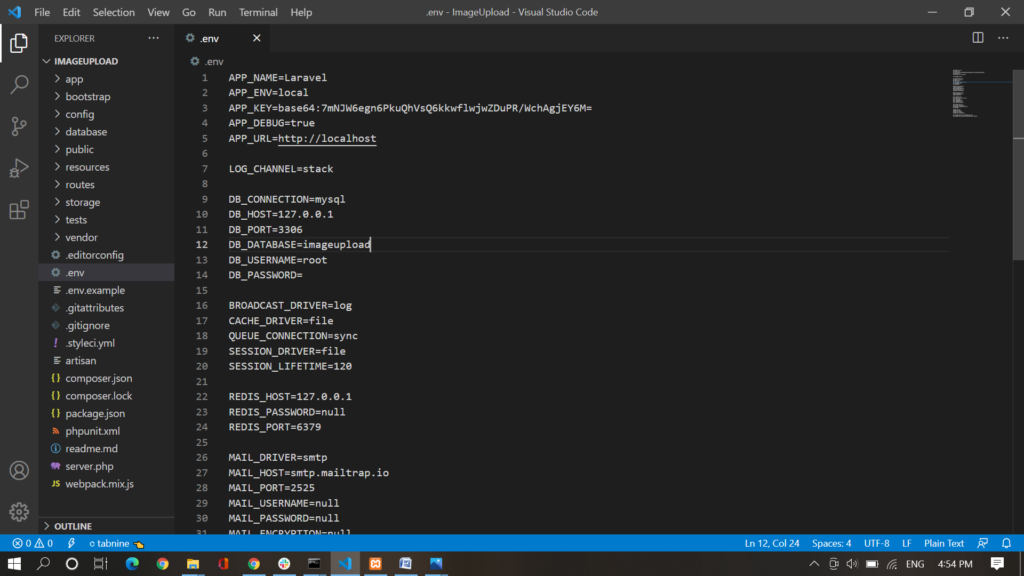
5th step:- Open the .env file of the project and change the name of the database same as defined in phpmyadmin.

6th step:- Write the code given below in command prompt to make controller.

php artisan make:controller ImageUpload

7th step:- Write the code given below in command prompt to make model.

  php artisan make:model ImageUpload –m

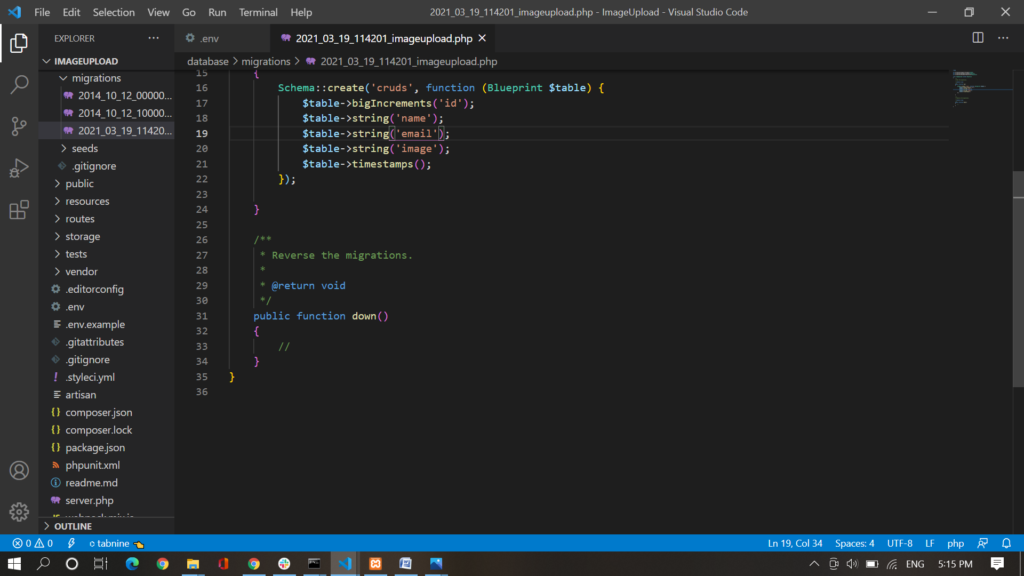
8th step:- write the name of the column of the databse in

database\migrations\2020_10_23_070450_create_ images _ upload _table.php

9th step:- Write the code given below in command prompt to migrate the table to the database.

                  php artisan migrate

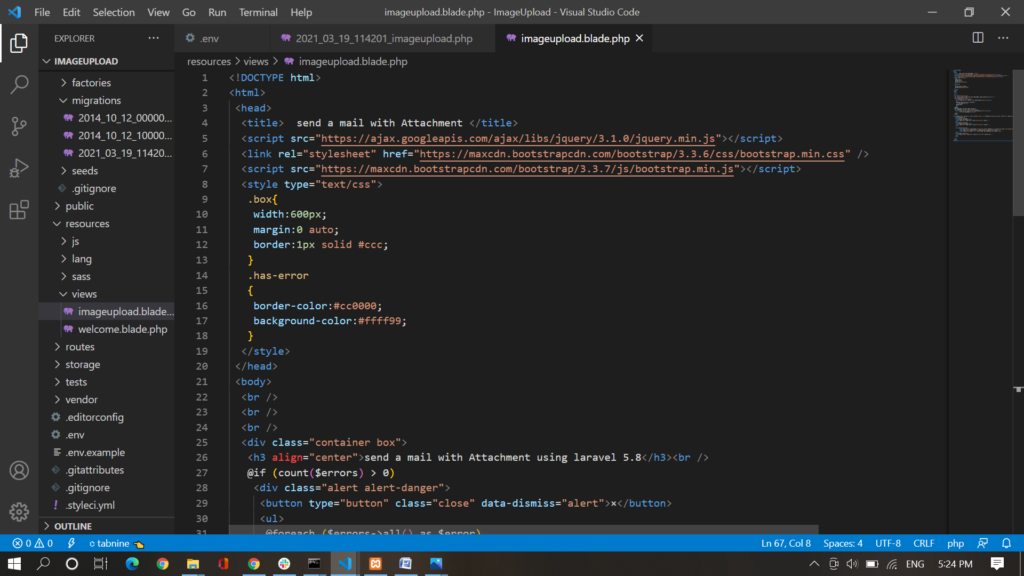
10th step:-Then make view page in resource\views

Code of imageupload.blade.php

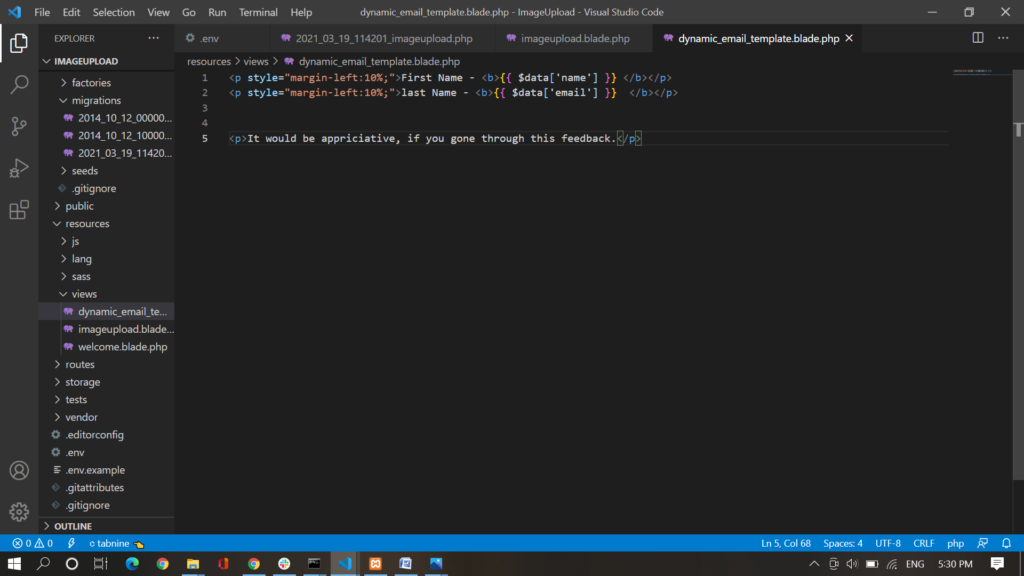
11th step:- Make one blade file resources/view/dynamic_email_template.blade.php

And paste the code given below:-

<p style=”margin-left:10%;”>First Name – <b>{{ $data[‘name’] }} </b></p>

<p style=”margin-left:10%;”>last Name – <b>{{ $data[’email’] }}  </b></p>

<p>It would be appriciative, if you gone through this feedback.</p>

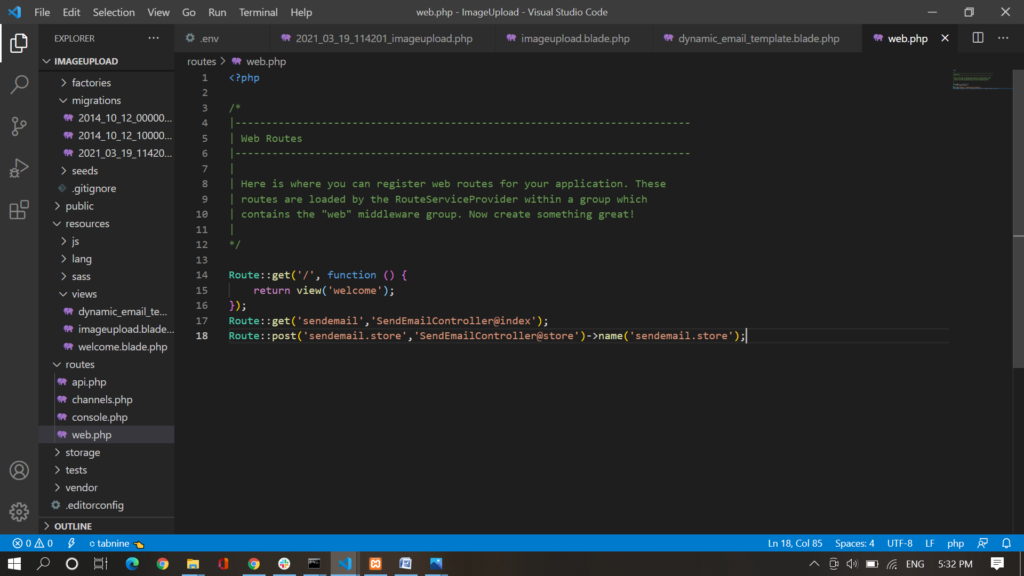
12th step:- Go to web.php and make routes.

The code is given below:-

Route::get(‘sendemail’,’SendEmailController@index’);

Route::post(‘sendemail.store’,’SendEmailController@store’)->name(‘sendemail.store’);

13th step:- Go to controller and call model class

Paste the code given below below

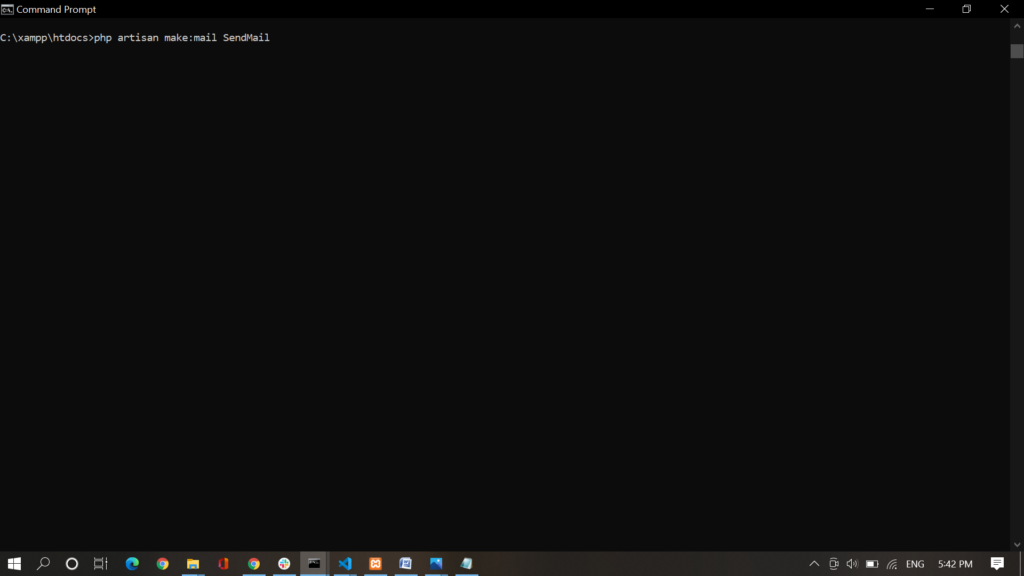
14th step:- Now make the mail. Write the code given below in command prompt:-

php artisan make:mail SendMail

15th step:- Paste the code given below in the file made by the above command:-

16th step:- Make an account in mailtrap. 17th step.

17th step:- copy host, port, Username and password.

18th step:-configure .env file with the details copied by the mailtrap id.

19th step:- Now run the command given below in the terminal.

php artisan c:cache

php artisan serve

Tagged : / /

WHAT IS AJAX?


Introduction:- AJAX stands for Asynchronous Javascript And XML. AJAX is used for fast creating dynamic web pages. It allow web pages to be updated asynchronously by exchanging some amount of data with the server behind the scenes. It is possible to update some parts of a web page without reloading the whole page. There are many web applications that run on ajax example:- gmail,facebook,twitter,google map, youtube etc.

Understanding synchronous and asynchronous:-

Synchronous:- The synchronous request blocks the client until the operation completes.

Asynchronous:-  Asynchronous request doesn’t block the client. At the time when the request is processing, user can perform another operation.

Some AJAX technologies:-

As we know ajax is not a technology but group of inter related technologies.some of the technologies is given below:

1.HTML/XHTML and CSS

2.XML and JSON

3.DOM

4.XMLHttpRequest

5.javascript

  1. HTML/XHTML and CSS:- These are the technologies which are used for developing front end of a websites and styling.
  2. XML and JSON:- It is used for carrying data to and from the server
  3. DOM:- It is used for dynamic display and interaction with the data.
  4. XMLHttpRequest:- It is used for asynchronous communication between client and server .
  5. Javascript:-It is a text based programming language used client side and server side both. Javascript allows to make the web pages imteractive.

HOW AJAX WORKS:-

AJAX communicates with the server using XMLHttpRequest. The user sends the request from the UI and the javascript call goes to XMLHttpRequest object. Then the Http request is send to the server. Then the server interact with the database and data is retrived. The server sends te data to the XMLHttpRequest callback function. And HTML and CSS data is displayed on the browser.

Tagged : / / /

How to Create Multiple Role Based Authentication and Access control in Laravel 5.8


1st step:-open command prompt on xampp\htdocs directory.

2nd step:-Create laravel project with command given below

3rd step:- move to the project directory on command prompt.

4th step:-Write the command given below for user      Authentication

     php artisan make:auth

5th step:- write the given code in  (database/migration/2014_10_12_000000_create_user_table.php)

6th step:- create model and migration. Write the command given below in command prompt.

           php artisan make:model Role -m

7th step:- write the given code in  (database/migration/ 2020_06_10_060108_create_roles_table)

8th step:- In role model create users() function for relationship. Paste the code in Role.php file given below:-

9th step:- In user model create roles() function for relationship.

Paste the code in User.php file given below:-

10th step:- Now create seeder file for user. File name                UserTableSeeder. Write the command given below in command prompt to create UserTableSeeder:-

php artisan make:seed UsersTableSeeder

   11th step:- Now create seeder file for Role. File name                RoleTableSeeder. Write the command given below in command prompt to create RoleTableSeeder:-

        php artisan make:seed RolesTableSeeder

12th step:-Add insert function in RolesTableSeeder.php file(database/seeds/RolesTableSeeder.php)

Add DB file given below:-

use Illuminate\Support\Facades\DB;

Paste the code given below in RolesTableSeeder.php:-

13th step:-Add insert function in RolesTableSeeder.php file(database/seeds/UsersTableSeeder.php).

Add DB file given below:-

use Illuminate\Support\Facades\DB;

Paste the code given below in UsersTableSeeder.php:-

14th step:-Create Database in mysql.(database name=devopsschool)

15th step:- Go to .env file and set database=devopsschool,username=root

Code for .env file is given below:-

16th step:- Migrate the table to the database. Write the command given below in command prompt:-

php artisan migration

17th step:- Define RoletableSeeder and UserTableSeeder class on Database.php file. The code is given below:-

18th step:- insert datas in tables. Write the code given below in command prompt:

   php artisan db:seed

19th step:- create DashboardController for Admin. Write the code given below in command prompt:

php artisan make:controller Admin/DashboardController

20th step:- create DashboardController for Admin. Write the code given below in command prompt:

php artisan make:controller User/DashboardController

21st step:- create Adminmiddleware for Admin. Write the code given below in command prompt.

php artisan make:middleware AdminMiddleware

22nd step:- create Usermiddleware for User. Write the code given below in command prompt.

php artisan make:middleware UserMiddleware

23rd step:- Use Auth class for authentication in AdminMiddleware.php

24th step:- implement condition in handle() function of AdminMiddleware.php. Code of AdminMiddleware.php is given below:

25th step:- Use Auth class for authentication in UserMiddleware.php.

26th step:- :- Implement condition in handle() function of UserMiddleware.php. Code of UserMiddleware.php is given below:

27th step:-   Implement Condition for Admin and User Login in RedirectIfAuthenticated(app/Http/Middleware/RedirectIfAuthenticated.php). code given below:

28th step:- remove =/home from protected $redirectTo = ‘/home’; from (app/Http/Controllers/Auth/LoginController.php).

29th step:- implement condition in _construct() function in (app/Http/Controllers/Auth/LoginController.php).

 code given below:-

30th step:- remove =/home from protected $redirectTo = ‘/home’; from (app/Http/Controllers/Auth/LoginController.php).

31st step:- implement condition in _construct() function in (app/Http/Controllers/Auth/ResetPasswordController.php)

code given below:-

32nd step:- use AdminMiddleware in Kernal.php file

use App\Http\Middleware\AdminMiddleware;

33rd step:-Define AdminMiddleware in routemiddleware in kernel.php file

'admin' => AdminMiddleware::class,

34th step:- use UserMiddleware in Kernal.php file

use App\Http\Middleware\UserMiddleware;

35th step:- define UserMiddleware in routeMiddleware

'user' => UserMiddleware::class,

36th step:- set Admin middleware and Route. In (route/web.php)

37th step:- set user middleware and route. In (route/web.php)

Code of web.php file is given below:-

Tagged : /

LARAVEL CRUD

Laravel crud operation:-(version 5.8)

1st step:-First we have to download laravel (version-5.8).to download laravel we have to go to command prompt, and then go to the folder path in which you want to download laravel. After  this run the composer command.(command givel below):-

composer create-project laravel/laravel=5.8 crud –prefer-dist

2nd step:- After downloading laravel, we have to make MySql database.

3rd step:- now open .env file of the model and configure like the image given below:

4th step:- Make the migration folder by the writing the        command given below on command prompt:

      php artisan make:migration create_crud_table –create=crud

This command make a migration file in database\migration in this file we have to define the required column which we want to create in the database table.

The code for migration:-

                     <?php

use Illuminate\Support\Facades\Schema;

use Illuminate\Database\Schema\Blueprint;

use Illuminate\Database\Migrations\Migration;

class CreateCrudsTable extends Migration

{

    /**

     * Run the migrations.

     *

     * @return void

     */

    public function up()

    {

        Schema::create(‘cruds’, function (Blueprint $table) {

            $table->bigIncrements(‘id’);

            $table->string(‘first_name’);

            $table->string(‘last_name’);

            $table->string(‘image’);

            $table->timestamps();

        });

    }

    /**

     * Reverse the migrations.

     *

     * @return void

     */

    public function down()

    {

        Schema::dropIfExists(‘cruds’);

    }

}

Now we have to migrate the table to the database. The command to migrate the table to tahe database is:-

            Php artisan migrate

Write the above code in command prompt. 

5th step:- Now make a model by using the command

                 Php artisan make:moedel model_name –m

By the above command a new file is created with .php extension in app folder.

6th step:- Paste the code given below in the file created in               5th step

     <?php

namespace App;

use Illuminate\Database\Eloquent\Model;

class crud extends Model

{

  protected $fillable =[

      ‘first_name’, ‘last_name’, ‘image’

  ];

}

7th step:- Now create controller. The code to create controller is given below

   Php artisan make:controller CrudController –resource

Note: crud of CrudController is name of the model.

8th step:- This is the most important step. In this step we set up the route for all the CrudController class  method. Write the below code in route\web.php file.

     <?php

/*

|————————————————————————–

| Web Routes

|————————————————————————–

|

| Here is where you can register web routes for your application. These

| routes are loaded by the RouteServiceProvider within a group which

| contains the “web” middleware group. Now create something great!

|

*/

Route::get(‘/’, function () {

    return view(‘welcome’);

});

Route::resource(‘crud’,’CrudsController’);

9th step:- Now code the view file in resource\views folder. All the html,css and javascript code is written in this file.

We make new file for the view in resource\views\filename.blade.php

Code is given below

<!DOCTYPE html>

<html lang=”en”>

<head>

    <meta charset=”UTF-8″>

    <meta http-equiv=”X-UA-Compatible” content=”IE=edge”>

    <meta name=”viewport” content=”width=device-width, initial-scale=1.0″>

    <title>Document</title>

</head>

<body>

@extends(‘Crud.parent’)

@section(‘main’)

<div align=”right”>

    <a href=”{{route(‘crud.create’)}}”class=”btn btn-success btn-sm”>Add</a>

</div>

@if ($message = Session::get(‘success’))

<div class=”alert alert-success”>

<p>{{$message}}</p>

</div>

@endif

<table class=”table table-bordered table-striped”>

 <tr>

  <th width=”10%”>Image</th>

  <th width=”35%”>First Name</th>

  <th width=”35%”>Last Name</th>

  <th width=”30%”>Action</th>

 </tr>

 @foreach($data as $row)

  <tr>

   <td><img src=”{{ URL::to(‘/’) }}/images/{{ $row->image }}” class=”img-thumbnail” width=”75″ /></td>

   <td>{{ $row->first_name }}</td>

   <td>{{ $row->last_name }}</td>

   <td>

        <a href=”{{route(‘crud.show’, $row->id) }}” class=”btn btn-primary”>Show</a>

        <a href=”{{route(‘crud.edit’, $row->id) }}” class=”btn btn-warning”>Edit</a>

        <form action=”{{route(‘crud.destroy’,$row->id) }}”

        method=”post”>

        @csrf

        @method(‘DELETE’)

        <button type=”submit” class=”btn btn-danger”>Delete</button>

        </form>

   </td>

  </tr>

 @endforeach

</table>

{!! $data->links() !!}

@endsection

</body>

</html>

10th step:- Now code the controller.

 Code for the controller

<?php

namespace App\Http\Controllers;

use Illuminate\Http\Request;

use App\Crud;

class CrudsController extends Controller

{

    /**

     * Display a listing of the resource.

     *

     * @return \Illuminate\Http\Response

     */

    public function index()

    {

        $data = Crud::latest()->paginate(5);

        return view(‘Crud.index’, compact(‘data’))

                ->with(‘i’, (request()->input(‘page’, 1) – 1) * 5);

    }

    /**

     * Show the form for creating a new resource.

     *

     * @return \Illuminate\Http\Response

     */

    public function create()

    {

        return view(‘Crud.create’);

    }

    /**

     * Store a newly created resource in storage.

     *

     * @param  \Illuminate\Http\Request  $request

     * @return \Illuminate\Http\Response

     */

    public function store(Request $request)

    {

        $request->validate([

            ‘first_name’    =>  ‘required’,

            ‘last_name’     =>  ‘required’,

            ‘image’         =>  ‘required|image|max:2048’

        ]);

        $image = $request->file(‘image’);

        $new_name = rand() . ‘.’ . $image->getClientOriginalExtension();

        $image->move(public_path(‘images’), $new_name);

        $form_data = array(

            ‘first_name’       =>   $request->first_name,

            ‘last_name’        =>   $request->last_name,

            ‘image’            =>   $new_name

        );

        Crud::create($form_data);

        return redirect(‘crud’)->with(‘success’, ‘Data Added successfully.’);

    }

    /**

     * Display the specified resource.

     *

     * @param  int  $id

     * @return \Illuminate\Http\Response

     */

    public function show($id)

    {

        $data = Crud::findOrFail($id);

        return view(‘Crud.view’, compact(‘data’));

    }

    /**

     * Show the form for editing the specified resource.

     *

     * @param  int  $id

     * @return \Illuminate\Http\Response

     */

    public function edit($id)

    {

        $data = Crud::findOrFail($id);

        return view(‘Crud.edit’, compact(‘data’));

    }

    /**

     * Update the specified resource in storage.

     *

     * @param  \Illuminate\Http\Request  $request

     * @param  int  $id

     * @return \Illuminate\Http\Response

     */

    public function update(Request $request, $id)

    {

         $image_name = $request->hidden_image;

        $image = $request->file(‘image’);

        if($image != ”)

        {

            $request->validate([

                ‘first_name’    =>  ‘required’,

                ‘last_name’     =>  ‘required’,

                ‘image’         =>  ‘image|max:2048’

            ]);

            $image_name = rand() . ‘.’ . $image->getClientOriginalExtension();

            $image->move(public_path(‘images’), $image_name);

        }

        else

        {

            $request->validate([

                ‘first_name’    =>  ‘required’,

                ‘last_name’     =>  ‘required’

            ]);

        }

        $form_data = array(

            ‘first_name’       =>   $request->first_name,

            ‘last_name’        =>   $request->last_name,

            ‘image’            =>   $image_name

        );

        Crud::whereId($id)->update($form_data);

        return redirect(‘crud’)->with(‘success’, ‘Data is successfully updated’);

    }

    /**

     * Remove the specified resource from storage.

     *

     * @param  int  $id

     * @return \Illuminate\Http\Response

     */

    public function destroy($id)

    {

        $data = Crud::findOrFail($id);

        $data->delete();

        return redirect(‘crud’)->with(‘success’, ‘Data is successfully deleted’);

    }

}

Code for index file

resources/views/index.blade.php

<!DOCTYPE html>

<html lang=”en”>

<head>

    <meta charset=”UTF-8″>

    <meta http-equiv=”X-UA-Compatible” content=”IE=edge”>

    <meta name=”viewport” content=”width=device-width, initial-scale=1.0″>

    <title>Document</title>

</head>

<body>

@extends(‘Crud.parent’)

@section(‘main’)

<div align=”right”>

    <a href=”{{route(‘crud.create’)}}”class=”btn btn-success btn-sm”>Add</a>

</div>

@if ($message = Session::get(‘success’))

<div class=”alert alert-success”>

<p>{{$message}}</p>

</div>

@endif

<table class=”table table-bordered table-striped”>

 <tr>

  <th width=”10%”>Image</th>

  <th width=”35%”>First Name</th>

  <th width=”35%”>Last Name</th>

  <th width=”30%”>Action</th>

 </tr>

 @foreach($data as $row)

  <tr>

   <td><img src=”{{ URL::to(‘/’) }}/images/{{ $row->image }}” class=”img-thumbnail” width=”75″ /></td>

   <td>{{ $row->first_name }}</td>

   <td>{{ $row->last_name }}</td>

   <td>

        <a href=”{{route(‘crud.show’, $row->id) }}” class=”btn btn-primary”>Show</a>

        <a href=”{{route(‘crud.edit’, $row->id) }}” class=”btn btn-warning”>Edit</a>

        <form action=”{{route(‘crud.destroy’,$row->id) }}”

        method=”post”>

        @csrf

        @method(‘DELETE’)

        <button type=”submit” class=”btn btn-danger”>Delete</button>

        </form>

   </td>

  </tr>

 @endforeach

</table>

{!! $data->links() !!}

@endsection

</body>

</html>

Code for create file

resources/views/create.blade.php

   <!DOCTYPE html>

<html lang=”en”>

<head>

    <meta charset=”UTF-8″>

    <meta http-equiv=”X-UA-Compatible” content=”IE=edge”>

    <meta name=”viewport” content=”width=device-width, initial-scale=1.0″>

    <title>Document</title>

</head>

<body>

@extends(‘Crud.parent’)

@section(‘main’)

@if($errors->any())

<div class=”alert alert-danger”>

 <ul>

  @foreach($errors->all() as $error)

  <li>{{ $error }}</li>

  @endforeach

 </ul>

</div>

@endif

<div align=”right”>

 <a href=”{{ route(‘crud.index’) }}” class=”btn btn-default”>Back</a>

</div>

<form method=”post” action=”{{ route(‘crud.store’) }}” enctype=”multipart/form-data”>

 @csrf

 <div class=”form-group”>

  <label class=”col-md-4 text-right”>Enter First Name</label>

  <div class=”col-md-8″>

   <input type=”text” name=”first_name” class=”form-control input-lg” />

  </div>

 </div>

 <br />

 <br />

 <br />

 <div class=”form-group”>

  <label class=”col-md-4 text-right”>Enter Last Name</label>

  <div class=”col-md-8″>

   <input type=”text” name=”last_name” class=”form-control input-lg” />

  </div>

 </div>

 <br />

 <br />

 <br />

 <div class=”form-group”>

  <label class=”col-md-4 text-right”>Select Profile Image</label>

  <div class=”col-md-8″>

   <input type=”file” name=”image” />

  </div>

 </div>

 <br /><br /><br />

 <div class=”form-group text-center”>

  <input type=”submit” name=”add” class=”btn btn-primary input-lg” value=”Add” />

 </div>

</form>

@endsection

</body>

</html>

Code for view file

resources/views/view.blade.php

<!DOCTYPE html>

<html lang=”en”>

<head>

    <meta charset=”UTF-8″>

    <meta http-equiv=”X-UA-Compatible” content=”IE=edge”>

    <meta name=”viewport” content=”width=device-width, initial-scale=1.0″>

    <title>Document</title>

</head>

<body>

@extends(‘parent’)

@section(‘main’)

<div class=”jumbotron text-center”>

 <div allign=”right”>

  <a href=”{{ route(‘crud.index’) }}” class=”btn btn-default”>Back</a>

 </div>

 <br />

 <img src=”{{ URL::to(‘/’) }}/images/{{ $data->image }}” class=”img-thumbnail” />

 <h3>First Name – {{ $data->first_name }} </h3>

 <h3>Last Name – {{ $data->last_name }}</h3>

</div>

@endsection

</body>

</html>

  Code for edit file

resources/views/edit.blade.php

      <!DOCTYPE html>

<html lang=”en”>

<head>

    <meta charset=”UTF-8″>

    <meta http-equiv=”X-UA-Compatible” content=”IE=edge”>

    <meta name=”viewport” content=”width=device-width, initial-scale=1.0″>

    <title>Document</title>

</head>

<body>

@extends(‘parent’)

@section(‘main’)

            @if ($errors->any())

                <div class=”alert alert-danger”>

                    <ul>

                        @foreach ($errors->all() as $error)

                            <li>{{ $error }}</li>

                        @endforeach

                    </ul>

                </div>

            @endif

            <div align=”right”>

                <a href=”{{ route(‘crud.index’) }}” class=”btn btn-default”>Back</a>

            </div>

            <br />

     <form method=”post” action=”{{ route(‘crud.update’, $data->id) }}” enctype=”multipart/form-data”>

                @csrf

                @method(‘PATCH’)

      <div class=”form-group”>

       <label class=”col-md-4 text-right”>Enter First Name</label>

       <div class=”col-md-8″>

        <input type=”text” name=”first_name” value=”{{ $data->first_name }}” class=”form-control input-lg” />

       </div>

      </div>

      <br />

      <br />

      <br />

      <div class=”form-group”>

       <label class=”col-md-4 text-right”>Enter Last Name</label>

       <div class=”col-md-8″>

        <input type=”text” name=”last_name” value=”{{ $data->last_name }}” class=”form-control input-lg” />

       </div>

      </div>

      <br />

      <br />

      <br />

      <div class=”form-group”>

       <label class=”col-md-4 text-right”>Select Profile Image</label>

       <div class=”col-md-8″>

        <input type=”file” name=”image” />

              <img src=”{{ URL::to(‘/’) }}/images/{{ $data->image }}” class=”img-thumbnail” width=”100″ />

                        <input type=”hidden” name=”hidden_image” value=”{{ $data->image }}” />

       </div>

      </div>

      <br /><br /><br />

      <div class=”form-group text-center”>

       <input type=”submit” name=”edit” class=”btn btn-primary input-lg” value=”Edit”/>

      </div>

     </form>

@endsection

</body>

</html>
Bootstrap Tutorial

INTRODUCTION:-

Bootstrap is framework of HTML,CSS and JavaScript for developing responsive websites. It is free to use and download. It is front end framework which makes web development faster and easier. It have many HTML and CSS based templates for  forms,buttons,tables etc.

HISTORY:-

Bootstrap was developed by Mark Otto and Jacob Thorton. It was first released as an open source in August 2011.

ADVANTAGES:-

  1. Bootstrap is very easy to use.
  2. Anyone who have basic knowledge of HTML and CSS can use it very easily.
  3. It help users to develop responsive websites very easily.
  4. Bootstrap is compatible on most of the browser.

BOOTSTRAP CONTAINER:-

The container class is used to create boxed content.

Example:-

  1.         <html>  
  2.  <body>  
  3.   <div class=“container”>  
  4.    <div class=“row”>  
  5.      <div class=“col-md-xx”></div>  
  6.        …  
  7.    </div>  
  8.    <div class=“row”>  
  9.      <div class=“col-md-xx”></div>  
  10.        …  
  11.    </div>  
  12.   </div>  
  13.  </body>  
  14. </html>  

BOOTSTRAP JUMBTRON:-

The jumptron is used to specify big box for getting extra attention. It is a box with rounded corner. It is used in <div>.

Example:-

  1. <!DOCTYPE html>  
  2. <html lang=“en”>  
  3. <head>  
  4.   <title>Bootstrap Example</title>  
  5.   <meta charset=“utf-8”>  
  6.   <meta name=“viewport” content=“width=device-width, initial-scale=1”>  
  7.   <link rel=“stylesheet” href=“https://maxcdn.bootstrapcdn.com/bootstrap/3.3.6/css/bootstrap.min.css”>  
  8. </head>  
  9. <body>  
  10.   
  11. <div class=“container”>  
  12.   <div class=“jumbotron”>  
  13.     <h1>This is Jumbotron inside container!</h1>        
  14.     <p>Jumbotron specifies a big box for getting extra attention to some special content or information.</p>  
  15.   </div>  
  16.   <p>This is some text.</p>        
  17.   <p>This is another text.</p>        
  18. </div>  
  19.   
  20.   <script src=“https://ajax.googleapis.com/ajax/libs/jquery/1.12.0/jquery.min.js”></script>  
  21.   <script src=“https://maxcdn.bootstrapcdn.com/bootstrap/3.3.6/js/bootstrap.min.js”></script>  
  22. </body>  
  23. </html>

BOOTSTRAP BUTTONS:-

There are 7 buttons present in boot strap:

  1. .btn-primary
  2. .btn-default
  3. .btn-info
  4. .btn-danger
  5. .btn-link
  6. .btn-warning
  7. .success  

Example:-

  1. <!DOCTYPE html>  
  2. <html lang=“en”>  
  3.   <head>  
  4.      <title>Job</title>  
  5.      <link rel=“stylesheet” href=“https://maxcdn.bootstrapcdn.com/bootstrap/3.3.6/css/bootstrap.min.css”/>  
  6.   </head>  
  7.   <body>  
  8.     <h1>Button Example!</h1>  
  9.   
  10. <button class=“btn btn-default”>default</button>  
  11. <button class=“btn btn-primary”>primary</button>  
  12. <button class=“btn btn-danger”>danger</button>  
  13. <button class=“btn btn-success”>success</button>  
  14. <button class=“btn btn-info”>info</button>  
  15. <button class=“btn btn-warning”>warning</button>  
  16. <button class=“btn btn-link”>Link</button>  
  17.   
  18. <script src=“https://ajax.googleapis.com/ajax/libs/jquery/1.11.3/jquery.min.js”></script>
  19.   <script src=“https://maxcdn.bootstrapcdn.com/bootstrap/3.3.5/js/bootstrap.min.js”></script>  
  20.   </body>  
  21. </html>  

Classes for button size:-

  1. .btn-lg
  2. .btn-md
  3. .btn-sm
  4. .btn-xs

BOOTSTRAP TABLES:-

We can use bootstrap to design different types or table.

Example:-

  1. <!DOCTYPE html>  
  2. <html lang=“en”>  
  3.   <head>  
  4.      <title>Job</title>  
  5.      <link rel=“stylesheet” href=“https://maxcdn.bootstrapcdn.com/bootstrap/3.3.6/css/bootstrap.min.css”/>  
  6.   </head>  
  7.   <body>  
  8.   
  9. <div class=“container”>  
  10.   <h1>Basic Table Example</h1>  
  11.   
  12. <table class=“table”>  
  13.   <tr><th>Id</th><th>Name</th><th>Age</th></tr>  
  14.   <tr><td>101</td><td>Rahul</td><td>23</td></tr>  
  15.   <tr><td>102</td><td>Umesh</td><td>22</td></tr>  
  16.   <tr><td>103</td><td>Max</td><td>29</td></tr>  
  17.   <tr><td>104</td><td>Ajeet</td><td>21</td></tr>  
  18. </table>  
  19.   
  20. </div>  
  21.   
  22. <script src=“https://ajax.googleapis.com/ajax/libs/jquery/1.11.3/jquery.min.js”></script>  
  23.   <script src=“https://maxcdn.bootstrapcdn.com/bootstrap/3.3.5/js/bootstrap.min.js”></script>  
  24.   </body>  
  25. </html>  
  • <tr> is used for table row.
  • <td> is used for table data.
  • <th> is used for table heading.

BOOTSTRAP FORMS:-

There are three types of forms in bootstrap.

  1. Horizontal form
  2. Vertical form
  3. Inline form

Example 1( vertical form):-

  1. <!DOCTYPE html>  
  2. <html lang=“en”>  
  3.   <head>  
  4.      <title>Bootstrap example</title>  
  5.      <link rel=“stylesheet” href=“https://maxcdn.bootstrapcdn.com/bootstrap/3.3.6/css/bootstrap.min.css”/>  
  6.   </head>  
  7.   <body>  
  8.   
  9. <div class=“container”>  
  10.   <h1>Vertical Form Example</h1>  
  11.   
  12. <form style=“width:300px”>  
  13.   <div class=“form-group”>  
  14.     <label for=“exampleInputEmail1”>Email address</label>  
  15.     <input type=“email” class=“form-control” id=“exampleInputEmail1” placeholder=“Email”>  
  16.   </div>  
  17.   <div class=“form-group”>  
  18.     <label for=“exampleInputPassword1”>Password</label>  
  19.     <input type=“password” class=“form-control” id=“exampleInputPassword1” placeholder=“Password”>  
  20.   </div>  
  21.     
  22.   <button type=“submit” class=“btn btn-default”>Login</button>  
  23. </form>  
  24.   
  25. </div>  
  26.   
  27. <script src=“https://ajax.googleapis.com/ajax/libs/jquery/1.11.3/jquery.min.js”></script>  
  28.   <script src=“https://maxcdn.bootstrapcdn.com/bootstrap/3.3.5/js/bootstrap.min.js”></script>  
  29.   </body>  
  30. </html>  

Horizontal form:-

  1. <!DOCTYPE html>  
  2. <html lang=“en”>  
  3. <head>  
  4.   <title>Bootstrap Example</title>  
  5.   <meta charset=“utf-8”>  
  6.   <meta name=“viewport” content=“width=device-width, initial-scale=1”>  
  7.   <link rel=“stylesheet” href=“https://maxcdn.bootstrapcdn.com/bootstrap/3.3.6/css/bootstrap.min.css”>  
  8.     
  9. </head>  
  10. <body>  
  11.   
  12. <div class=“container”>  
  13.   <h2>Horizontal form Example</h2>  
  14.   <form class=“form-horizontal” role=“form”>  
  15.     <form style=“width:300px”>  
  16.   <div class=“form-group”>  
  17.       <label class=“control-label col-sm-2” for=“email”>Email:</label>  
  18.       <div class=“col-sm-10”>  
  19.         <input type=“email” class=“form-control” id=“email” placeholder=“Enter email”>  
  20.       </div>  
  21.     </div>  
  22.     <div class=“form-group”>  
  23.       <label class=“control-label col-sm-2” for=“pwd”>Password:</label>  
  24.       <div class=“col-sm-10”>            
  25.         <input type=“password” class=“form-control” id=“pwd” placeholder=“Enter password”>  
  26.       </div>  
  27.     </div>  
  28.     
  29.   <div class=“form-group”>          
  30.       <div class=“col-sm-offset-2 col-sm-10”>  
  31.         <button type=“submit” class=“btn btn-default”>Submit</button>  
  32.       </div>  
  33.     </div>  
  34.   </form>  
  35. </div>  
  36. <script src=“https://ajax.googleapis.com/ajax/libs/jquery/1.12.0/jquery.min.js”></script>  
  37. <script src=“https://maxcdn.bootstrapcdn.com/bootstrap/3.3.6/js/bootstrap.min.js”></script>  
  38.   
  39. </body>  
  40. </html>  

Inline form:-

  1. <!DOCTYPE html>  
  2. <html lang=“en”>  
  3. <head>  
  4.   <title>Bootstrap Example</title>  
  5.   <meta charset=“utf-8”>  
  6.   <meta name=“viewport” content=“width=device-width, initial-scale=1”>  
  7.   <link rel=“stylesheet” href=“https://maxcdn.bootstrapcdn.com/bootstrap/3.3.6/css/bootstrap.min.css”>  
  8.     
  9. </head>  
  10. <body>  
  11.   
  12. <div class=“container”>  
  13.   <h2>Inline form Example</h2>  
  14.   <form class=“form-inline” role=“form”>  
  15.     <form style=“width:300px”>  
  16.   <div class=“form-group”>  
  17.     <label for=“exampleInputEmail1”>Email address</label>  
  18.     <input type=“email” class=“form-control” id=“exampleInputEmail1” placeholder=“Email”>  
  19.   </div>  
  20.   <div class=“form-group”>  
  21.     <label for=“exampleInputPassword1”>Password</label>  
  22.     <input type=“password” class=“form-control” id=“exampleInputPassword1” placeholder=“Password”>  
  23.   </div>  
  24.     
  25.   <button type=“submit” class=“btn btn-default”>Login</button>  
  26. </form>  
  27.   
  28. </div>  
  29. <script src=“https://ajax.googleapis.com/ajax/libs/jquery/1.12.0/jquery.min.js”></script>  
  30.   <script src=“https://maxcdn.bootstrapcdn.com/bootstrap/3.3.6/js/bootstrap.min.js”></script>  
  31.   
  32. </body>  
  33. </html>  

BASICS OF ROBOTS

Variations of Models and Characteristics of Robots

Let’s briefly discusses about the characteristics of robots and various models. The robots are generally assumed as points. The point robots are dimensionless and they occupy no physical space on the plane. While in many problems, the robots are assumed to be three dimensional, are called as fat robots. These fat robots occupy physical space on the plane due to which they can hamper the visibility and movement of other robots.

Depending on the type of problem, robots can have different characteristics. Different settings evolve from different assumptions that are made on the robots capabilities. In particular, visibility of the robots, their orientation and directions, ability to store the past information, the computational cycle, etc. During its life, each robot executes four states look, compute, wait and move, this sequence is called computational cycle.

We have discussed some simple interactions that can occur between the robots such as aggregation, collision avoidance, dispersion, following and homing. These simple interactions can be used to solve complex task assigned to the robots.

2.1 The Properties of Robots

Each robot is assumed to occupy a point on a two dimensional plane. These robots are equipped with sensorial capability that allows them to sense their surroundings. A robot then computes a destination point according to the data it sensed. Finally, robot moves to the destination point it just computed. Moreover, the robots can have the following properties depending upon the type of model it follows:

  1. Homogeneity: Robots may be homogeneous or heterogeneous in terms of their hardware and software. Robots are said to be homogeneous if they are identical in terms of shape and size, visibility, computational power, memory, etc. In most of the cases robots are assumed to be homogeneous. However, there are some cases where robots are assumed to be heterogeneous also [25].
  • Autonomous: Robots are said to be autonomous if they do not depend on any central coordination system. But, in many cases system has been found to be centralized also.
  • Mobility: The ability of a robot to move on plane is called mobility of the robot. Motorial capability of robot allows them to move on a plane.
  • Anonymity: The robots are said to be anonymous if they do not have any identification that they can use during the computation. However, in some cases robots may not be anonymous.
  • Memoryless: Some robots have the capability to store and use the past information, while some robots do not have this capability called oblivious.
  • Communication: Robots cannot communicate explicitly with each other. It happens by means of observing the positions of other robots in the plane.

Brief Description about Laravel App directory

Laravel App Directory

The app directory has the base code for the application. The app directory contains variety of  directories like console,Http,providers etc. These directories are created by the make artisan command which we use to generate classes.

The directories inside app directory are:-

1.Broadcasting Directory

2.Console Directory

3.Events Directory

4.Exception Directory

5.Http Directory

6.Jobs Directory

7.Listners Directory

8.Mail Directory

9.Notification Directory

10.Policies Directory

11.Providers Directory

12.Rules Directory

1.Broadcasting Directory:- All the broadcasting channels are stored in broadcasting Director. These channels are generated by make:model command. This directory doesn’t exist by default. It will be created when we create our first channel.

2.Console Directory:- The console directory contains all of the project artisian commands for the application. These commands are generated by using make:command command. This directory is also house for krenal.php where custom artisian commands are registered and tasks are defined.

3.Events Directory:-The event directory holds the events files that the laravel application may pop up. This directory doesn’t exist by default, but will be created by event:generate and make:event Artisian commands.

4.Exception Directory:-This directory holds all the exception handling files. The exception thrown by the application is stored in this directory. We can customize how the exceptions are logged or rendered by modifying the handler class in the directory.

5.Http directory:- This directory contains controllers,middlewares, and form requests. All of the logic to handle requests entering your application will be placed in this directory.

6.Jobs Directory:- This directory doesn’t exist by default. It will created by make:job Artisan command. The job directory holds all lineup jobs in this directory.

 7.Listners Directory:- This directory doesn’t exist by default. It will created by event:generate or make:listeners Artisan command. This directory contains the classes that handle your events.

8.Mail Directory:- :- This directory doesn’t exist by default. It will created by make:mail Artisan command.This directory holds all the emails send by th e laravel project.

9.Notification Directory:- This directory doesn’t exist by default. It will created by make:notification Artisian command.This directory conatins all of the transactional notification that are sent by your application.

10.Policies Directory:- This directory doesn’t exist by default. It will created by make:policy Artisian command. This directory holds the different policies of your laravel project.

11.Providers Directory:- This directory is used for containing containing different service providers.

12.Rules Directory:- This directory doesn’t exist by default. It will created by make:rule Artisian command. The rules directory contains the custom validation rule objects for your application. Rules are used to encapsulate complicated validation logic in a simple object.

Introduction to Laravel

What is Laravel?

Laravel is PHP framework, which is easy to understand and robust and open source also. It also offer the rich set of functionalities that incorporates the basic features of PHP framework such as Codelgniter, yii, and other programming languages like Ruby on Rails. It is a PHP framework that uses the MVC architecture.

MVC vs NON-MVC:

Let’s first understand the MVC architecture.

MVC stands for Model-View Controller. It is a software design pattern by which creation of huge applications becomes easy. It does not belong to specific programming language or framework, but it is a concept that you can use creating any kind of application or software in any programming language.

Advantages:

Easy to update the application.

Easy for the developers to collaborate and wor together.

East to debug because of multilevel properly written application.

Development becomes fast.

Disadvantages:

MVC architecture is little bit difficult to understand.

Setting up laravel project:

How to set up a Laravel Project

Setting up laravel project is very easy task.

First we need to install composer and xampp in our system. The open command prompt in xampp\htdocs  file.

Install laravel there. The command to install laravel is – composer global require “laravel/installer=~1.1” (NOTE= 1.1 is a larvael version)

After installation of laravel we need to create a project. The command to a  create project is- composer create-project—prefer-dist laravel/laravel blog”5.8.*” (NOTE: blog is name of the project, so we can give any name.)

Understanding the folder structure:

After the laravel project is created, different types of files and folders are created. All the files and folder help us in writing codes

List of folders created:

1.App

2. Bootstrap

3. Config

4.Database

5. Public

6.Resources

7.Routes

8. Storage

9. Tests

10. vendor

1. APP:- The app directory contains the base code of the application.

2. Bootstrap:- The bootstrap directory containd all the app.php files and bootstrapping scripts uded for the application. In this directory there is cache directory which contains framework generated files for performance optimization such as the route and services cache files.

3.Config:- As the name implies, this directory contains all the configuration files.

4. Database:- Database directory contains all the Database files.

5. Public:- In public directory contains the index.php file, which is the entry point for all request entering the application and configures the autoloading. This directory maintains all the other important files like  Javascript, CSS and images. 

6.Resources:- Resources directory contains the views and  un-compiled assets like CSS and JavaScript. It also contains language files, sas files and templetes(if any).

7.Routes:-In routes directory all the laravel routes are defined in routes file. It contain the definition files for routing such as api.php, wed.php etc.

8. Storage:- The storage directory contains file based sessions, file caches, compiled blade templates and many other files which are created by the framework. This is segregated into framework, app and logs directories.

9. Tests:- Test directories holds all the test cases.

10. Vendor:- The vendor directory holds all composer dependency files.

A Quick intro to the Artisian Command line Interface

 Artisian is a command line interface which is  frequently used in laravel and it have set of helpful commands for developing a web application.

Few commands of Artisian:-

  1. php artisian server (To start Laravel project)
  2. php artisian route:cache (To enable caching mechanism)
  3. php artisian list (To view the lit of available commands supported by Artisian)
  4. php artisian help serve (to view help about any command and view the available options and arguments)