
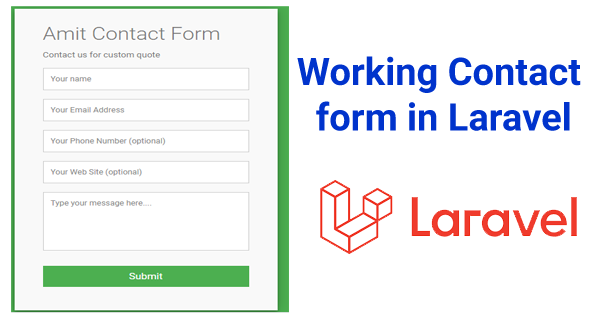
In this tutorial I’m going to create contact form in laravel and store in database please follow some easy steps mentioned below.
1 step you have to download project copy to below code and paste in command.
composer create-project — prefer-dist laravel/laravel contact “5.8.*”
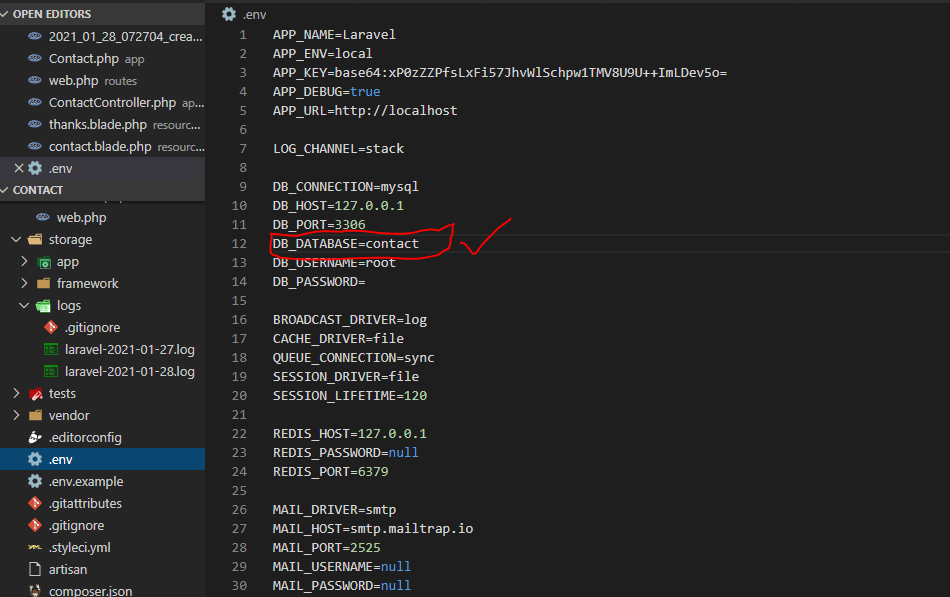
2nd go to .env folder and put database name as :- contact
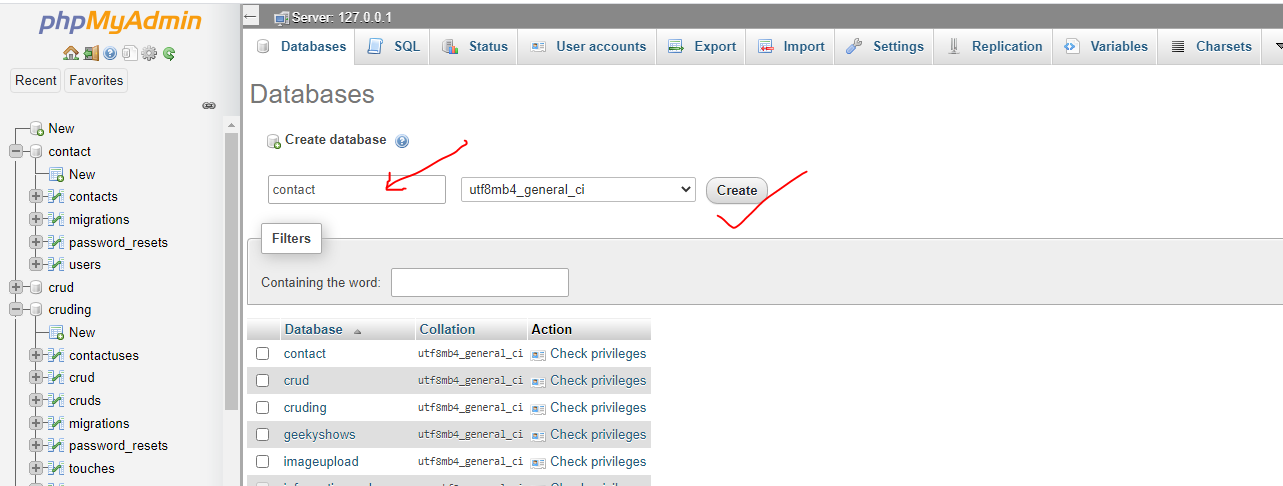
Next go to http://localhost/phpmyadmin and put database name contact and click on create
Next step create model and migration copy below code and simply paste
php artisan make:model contact -m
Go to migration folder create_contacts_table and paste this code 👇
create_contacts_table
<?php

use Illuminate\Support\Facades\Schema;
use Illuminate\Database\Schema\Blueprint;
use Illuminate\Database\Migrations\Migration;

class CreateContactsTable extends Migration
{
    /**
     * Run the migrations.
     *
     * @return void
     */
    public function up()
    {
        Schema::create('contacts', function (Blueprint $table) {
            $table->bigIncrements('id');
            $table->string('name');
            $table->string('email');
            $table->string('phone');
            $table->string('url');
            $table->string('message');
            $table->timestamps();
        });
    }

    /**
     * Reverse the migrations.
     *
     * @return void
     */
    public function down()
    {
        Schema::dropIfExists('contacts');
    }
}
Next run this command
php artisan: migrate
Next go to contact model Contact.php and paste this code 👇
Contact.php
<?php

namespace App;

use Illuminate\Database\Eloquent\Model;

class Contact extends Model
{
    protected $fillable = [
        'name',
        'email',
        'phone',
        'url',
        'message'

    ];
}
Next create controller
Php artisan make:controller ContactController -r
Go to ContactController and paste below code in ContactController.php
ContactController.php
<?php

namespace App\Http\Controllers;

use Illuminate\Http\Request;
use App\Contact;

class ContactController extends Controller
{
    /**
     * Display a listing of the resource.
     *
     * @return \Illuminate\Http\Response
     */
    public function index()
    {
        return view('contact');
    }

    public function thanks()
    {
        return view('thanks');
    }

    /**
     * Show the form for creating a new resource.
     *
     * @return \Illuminate\Http\Response
     */
    public function create()
    {
        //
    }

    /**
     * Store a newly created resource in storage.
     *
     * @param  \Illuminate\Http\Request  $request
     * @return \Illuminate\Http\Response
     */
    public function store(Request $request)
    {

        $request->validate([
            'name' => 'required',
            'email' => 'required',
            'phone' => 'required',
            'url'   =>  'required',
            'message' => 'required'

        ]);


        $form_data = array(
            'name'   => $request->name,
            'email'  => $request->email,
            'phone'  => $request->phone,
            'url'    => $request->url,
            'message' => $request->message
        );

        Contact::create($form_data);
            return redirect('thanks')->with('success','Data Added successfully');

    }

    /**
     * Display the specified resource.
     *
     * @param  int  $id
     * @return \Illuminate\Http\Response
     */
    public function show($id)
    {
        //
    }

    /**
     * Show the form for editing the specified resource.
     *
     * @param  int  $id
     * @return \Illuminate\Http\Response
     */
    public function edit($id)
    {
        //
    }

    /**
     * Update the specified resource in storage.
     *
     * @param  \Illuminate\Http\Request  $request
     * @param  int  $id
     * @return \Illuminate\Http\Response
     */
    public function update(Request $request, $id)
    {
        //
    }

    /**
     * Remove the specified resource from storage.
     *
     * @param  int  $id
     * @return \Illuminate\Http\Response
     */
    public function destroy($id)
    {
        //
    }
}
Next go to web.php and simply paste
web.php
<?php

/*
|--------------------------------------------------------------------------
| Web Routes
|--------------------------------------------------------------------------
|
| Here is where you can register web routes for your application. These
| routes are loaded by the RouteServiceProvider within a group which
| contains the "web" middleware group. Now create something great!
|
*/

Route::get('/', function () {
    return view('welcome');
});

Route::get('contact','ContactController@index');
Route::post('contact','ContactController@store')->name('store');
Route::get('thanks','ContactController@thanks');
Next go to resources/view and create file contact.blade.php and simply paste this code
contact.blade.php
<!doctype html>
<html lang="en">
  <head>
    <!-- Required meta tags -->
    <meta charset="utf-8">
    <meta name="viewport" content="width=device-width, initial-scale=1, shrink-to-fit=no">

    <!-- Bootstrap CSS -->
    <link rel="stylesheet" href="https://maxcdn.bootstrapcdn.com/bootstrap/4.0.0/css/bootstrap.min.css" integrity="sha384-Gn5384xqQ1aoWXA+058RXPxPg6fy4IWvTNh0E263XmFcJlSAwiGgFAW/dAiS6JXm" crossorigin="anonymous">

    <style>
@import url(https://fonts.googleapis.com/css?family=Roboto:400,300,600,400italic);
* {
  margin: 0;
  padding: 0;
  box-sizing: border-box;
  -webkit-box-sizing: border-box;
  -moz-box-sizing: border-box;
  -webkit-font-smoothing: antialiased;
  -moz-font-smoothing: antialiased;
  -o-font-smoothing: antialiased;
  font-smoothing: antialiased;
  text-rendering: optimizeLegibility;
}

body {
  font-family: "Roboto", Helvetica, Arial, sans-serif;
  font-weight: 100;
  font-size: 12px;
  line-height: 30px;
  color: #777;
  background: #4CAF50;
}

.container {
  max-width: 400px;
  width: 100%;
  margin: 0 auto;
  position: relative;
}

#contact input[type="text"],
#contact input[type="email"],
#contact input[type="tel"],
#contact input[type="url"],
#contact textarea,
#contact button[type="submit"] {
  font: 400 12px/16px "Roboto", Helvetica, Arial, sans-serif;
}

#contact {
  background: #F9F9F9;
  padding: 25px;
  margin: 150px 0;
  box-shadow: 0 0 20px 0 rgba(0, 0, 0, 0.2), 0 5px 5px 0 rgba(0, 0, 0, 0.24);
}

#contact h3 {
  display: block;
  font-size: 30px;
  font-weight: 300;
  margin-bottom: 10px;
}

#contact h4 {
  margin: 5px 0 15px;
  display: block;
  font-size: 13px;
  font-weight: 400;
}

fieldset {
  border: medium none !important;
  margin: 0 0 10px;
  min-width: 100%;
  padding: 0;
  width: 100%;
}

#contact input[type="text"],
#contact input[type="email"],
#contact input[type="tel"],
#contact input[type="url"],
#contact textarea {
  width: 100%;
  border: 1px solid #ccc;
  background: #FFF;
  margin: 0 0 5px;
  padding: 10px;
}

#contact input[type="text"]:hover,
#contact input[type="email"]:hover,
#contact input[type="tel"]:hover,
#contact input[type="url"]:hover,
#contact textarea:hover {
  -webkit-transition: border-color 0.3s ease-in-out;
  -moz-transition: border-color 0.3s ease-in-out;
  transition: border-color 0.3s ease-in-out;
  border: 1px solid #aaa;
}

#contact textarea {
  height: 100px;
  max-width: 100%;
  resize: none;
}

#contact button[type="submit"] {
  cursor: pointer;
  width: 100%;
  border: none;
  background: #4CAF50;
  color: #FFF;
  margin: 0 0 5px;
  padding: 10px;
  font-size: 15px;
}

#contact button[type="submit"]:hover {
  background: #43A047;
  -webkit-transition: background 0.3s ease-in-out;
  -moz-transition: background 0.3s ease-in-out;
  transition: background-color 0.3s ease-in-out;
}

#contact button[type="submit"]:active {
  box-shadow: inset 0 1px 3px rgba(0, 0, 0, 0.5);
}

.copyright {
  text-align: center;
}

#contact input:focus,
#contact textarea:focus {
  outline: 0;
  border: 1px solid #aaa;
}

::-webkit-input-placeholder {
  color: #888;
}

:-moz-placeholder {
  color: #888;
}

::-moz-placeholder {
  color: #888;
}

:-ms-input-placeholder {
  color: #888;
}
    </style>

<div class="container">
  <form id="contact" action="{{route('store')}}" method="post">
    @csrf
    <div class="container">
  <form id="contact" action="{{route('store')}}" method="post">
    @csrf
    <h3>Amit Contact Form</h3>
    <h4>Contact us for custom quote</h4>
    <fieldset>
      <input placeholder="Your name" type="text" tabindex="1" name="name" required autofocus>
    </fieldset>
    <fieldset>
      <input placeholder="Your Email Address" type="email" name="email" tabindex="2" required>
    </fieldset>
    <fieldset>
      <input placeholder="Your Phone Number (optional)" type="tel" name="phone" tabindex="3" required>
    </fieldset>
    <fieldset>
      <input placeholder="Your Web Site (optional)" type="url" name="url" tabindex="4" required>
    </fieldset>
    <fieldset>
      <textarea placeholder="Type your message here...." tabindex="5" name="message" required></textarea>
    </fieldset>
    <fieldset>
      <button name="submit" type="submit" id="contact-submit" data-submit="...Sending">Submit</button>
    </fieldset>
  </form>
</div>>

    <!-- Optional JavaScript -->
    <!-- jQuery first, then Popper.js, then Bootstrap JS -->
    <script src="https://code.jquery.com/jquery-3.2.1.slim.min.js" integrity="sha384-KJ3o2DKtIkvYIK3UENzmM7KCkRr/rE9/Qpg6aAZGJwFDMVNA/GpGFF93hXpG5KkN" crossorigin="anonymous"></script>
    <script src="https://cdnjs.cloudflare.com/ajax/libs/popper.js/1.12.9/umd/popper.min.js" integrity="sha384-ApNbgh9B+Y1QKtv3Rn7W3mgPxhU9K/ScQsAP7hUibX39j7fakFPskvXusvfa0b4Q" crossorigin="anonymous"></script>
    <script src="https://maxcdn.bootstrapcdn.com/bootstrap/4.0.0/js/bootstrap.min.js" integrity="sha384-JZR6Spejh4U02d8jOt6vLEHfe/JQGiRRSQQxSfFWpi1MquVdAyjUar5+76PVCmYl" crossorigin="anonymous"></script>
  </body>
</html>
And next go to resources/view and create new file thanks.blade.php and paste below code
thanks.blade.php
<!doctype html>
<html lang="en">
<head>
<!-- Required meta tags -->
<meta charset="utf-8">
<meta name="viewport" content="width=device-width, initial-scale=1, shrink-to-fit=no">
<!-- Bootstrap CSS -->
<link rel="stylesheet" href="https://maxcdn.bootstrapcdn.com/bootstrap/4.0.0/css/bootstrap.min.css" integrity="sha384-Gn5384xqQ1aoWXA+058RXPxPg6fy4IWvTNh0E263XmFcJlSAwiGgFAW/dAiS6JXm" crossorigin="anonymous">
<title>Hello, world!</title>
</head>
<body>
<!-- <h1>Thanks for contacting us</h1> -->
<!-- Modal -->
<div class="modal fade" id="exampleModalCenter" tabindex="-1" role="dialog" aria-labelledby="exampleModalCenterTitle" aria-hidden="true">
<div class="modal-dialog modal-dialog-centered" role="document">
<div class="modal-content" style="background-color: white; background-image:
url(https://subtlepatterns.com/patterns/purty_wood.png);
background-position: center top;
background-repeat: repeat;">
<div class="modal-header">
<h5 class="modal-title text-danger" id="exampleModalLongTitle">Message</h5>
<button type="button" class="close" data-dismiss="modal" aria-label="Close">
<span aria-hidden="true">×</span>
</button>
</div>
<div class="modal-body">
<span>
Thanks for contacting us
</span>
</div>
<div class="modal-footer">
<button type="button" class="btn btn-secondary" data-dismiss="modal">Close</button>
</div>
</div>
</div>
</div>
<!-- model close -->
<!-- Optional JavaScript -->
<!-- jQuery first, then Popper.js, then Bootstrap JS -->
<script src="https://code.jquery.com/jquery-3.2.1.slim.min.js" integrity="sha384-KJ3o2DKtIkvYIK3UENzmM7KCkRr/rE9/Qpg6aAZGJwFDMVNA/GpGFF93hXpG5KkN" crossorigin="anonymous"></script>
<script src="https://cdnjs.cloudflare.com/ajax/libs/popper.js/1.12.9/umd/popper.min.js" integrity="sha384-ApNbgh9B+Y1QKtv3Rn7W3mgPxhU9K/ScQsAP7hUibX39j7fakFPskvXusvfa0b4Q" crossorigin="anonymous"></script>
<script src="https://maxcdn.bootstrapcdn.com/bootstrap/4.0.0/js/bootstrap.min.js" integrity="sha384-JZR6Spejh4U02d8jOt6vLEHfe/JQGiRRSQQxSfFWpi1MquVdAyjUar5+76PVCmYl" crossorigin="anonymous"></script>
<script>
$(document).ready(function(){
$("#exampleModalCenter").modal('show');
});
</script>
</body>
</html>
php artisan serve
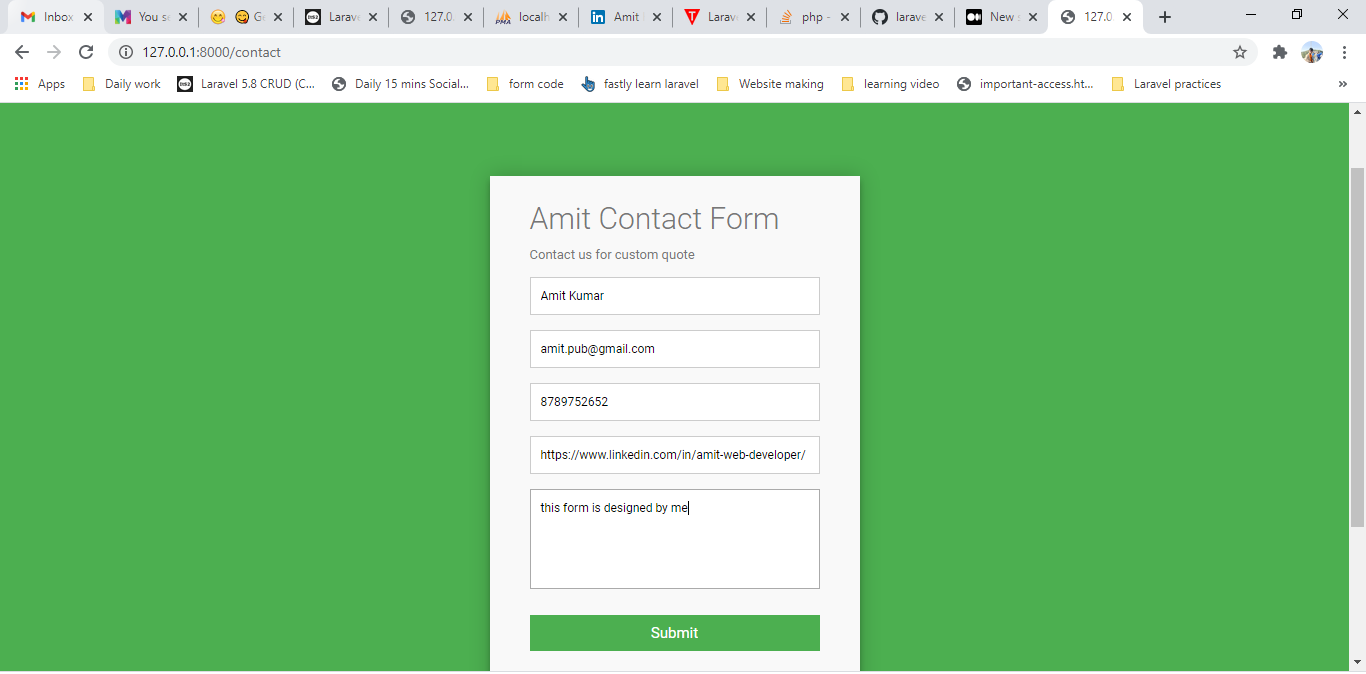
Now you can see your project is run like this
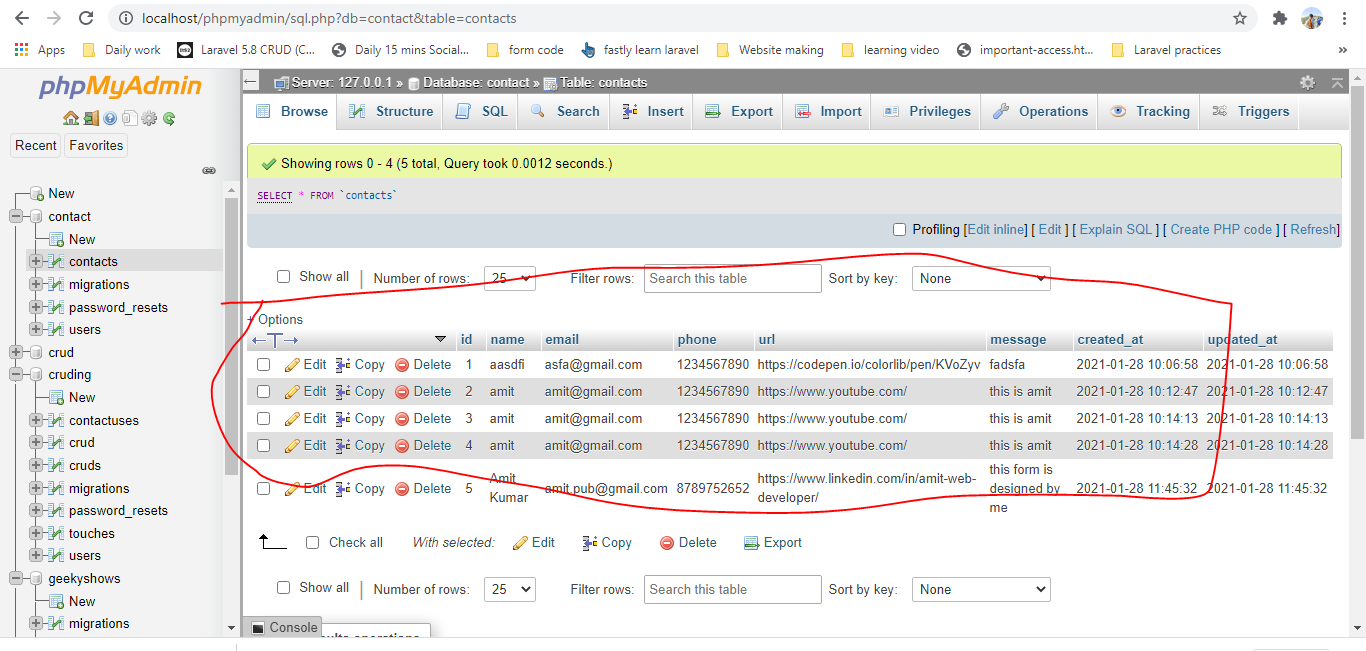
Now you can see your data has bee saved in database
Hope this code will work 100% successfully for you 🙏🙏