Variables in JavaScript

Variables are simply the name of the storage location. There are two ways we define variables more precisely they are known as the scope of the variable. Scope determines the accessibility (visibility) of these variables. they are:- local variable and global variable.

When variables are defined inside a function then they cannot be used outside of it, these types of variables are called local variables, and when variables are declared outside the function then we can use them anywhere these are global variables.

Tagged : / / /

A brief description of JAVASCRIPT

javascript is a scripting language used to make web pages interactive.

Tagged : / / / / / / / / /

AJAX Setup/ Installation

Ajax is a web development technique designed to create highly responsive/ interactive websites. To have a better understanding of AJAX we need to have knowledge of javascript and somewhat XML.

The easiest way of implementing AJAX, is by using jQuery.

To add jQuery

We can use the downloaded version from (jquery.com/download/) and we need to include the file location of the file in the script under the header tag, or we can use the CDN in the head of HTML as

<head>

<script src="https://ajax.googleapis.com/ajax/libs/jquery/3.5.1/jquery.min.js"></script>

</head>

After we are good to go with the operations we need to perform. If we wanna test that the CDN works fine we can use the function below in the body of the HTML script

<script>
$(document).ready(function(){
    alert("jQuery Works")
});
</script>

If we see the jQuery works alert, That mean we can congratulate ourselves on our success.

For knowing what is AJAX and its procedure https://www.scmgalaxy.com/tutorials/a-brief-description-of-ajax/

Tagged : / / /

A Brief Description of AJAX

AJAX stands for Asynchronous JavaScript And XML.

It is a web development technique that helps to create a highly responsive website. by the use of AJAX, we get desktop-like software experience on the web browser. It is used in the web pages to be updated asynchronously by changing data with a web server behind the scene (in the background). This makes it possible to update parts of a web page, without reloading the whole page. It is the use of the XMLHttpRequest object to communicate with server-side scripts.

The easiest way of implementing AJAX, especially if we’re planning on communicating with servers is by using jQuery.

Most people get confused with the concept that ajax is a programming language. So, let’s be very clear that

Ajax is not a programming language, it is a web development technique designed to create highly responsive/ interactive websites. To have a better understanding of AJAX we need to have knowledge of javascript and somewhat XML.

Javascript is a scripting language that helps to make web pages interactive, CSS (Cascading style sheet) style sheet to the makeup of the webpage and XML (extensible markup language ) is a markup language that defines a set of rules for encoding documents in a format that is both human-readable and machine-readable. here javascript and CSS are essentials and XML is less essential for the beginners

Why use AJAX

  1. A whole page reload is not required on each request made.
  2. Sends and receives data in the background.
  3. Improves speed and performance.
  4. Provides a better user experience.

How AJAX works

Ajax uses XMLHttpRequest object (also called XHR objects) to achieve this

  1. When the user sends a request from the interface then the javascript directs to the XMLHttpRequest object.
  2. Then the HTTP Request is made to the server by XMLHttpRequest object.
  3. Then the server interacts with the database using the JSP, PHP, Servlet, ASP.net, etc.
  4. When there is a match for the request then the Data is retrieved from the database.
  5. Then the Server sends XML data or JSON data to the XMLHttpRequest callback function.
  6. Finally, when all the things are good to go then the web-page made (with HTML and CSS) is displayed on the browser.
How AJAX works

For knowing the installation/setup procedure link is given below https://www.scmgalaxy.com/tutorials/ajax-setup-installation/

Tagged : / /

How Control flow in Laravel

Route::get(‘task’,’TaskController@index’)->name(‘task’); Explanation:- name(‘task‘) is given in the URL as http://127.0.0.1:8000/task. Control flow:- As the URL is hit the control will go the route(web.php), there it will get Route::get(‘task’,’TaskController@index’)->name(‘task’); Here, there will be a name match from the URL and if there is match then there will be a function call named index and route will redirect to TaskController.php where it will find the function index and operate according to the instructions given inside it.

After the create operation we need to store the data in the database for this we used <form action=”{{route(‘store’)}}” method=”POST”> which will call store function. The store function be like

The in store function we create object $var of Task class make variables as $var->task which is assigned $request->task; (gets value from 1st field) & $var->detail which is assigned $request->detail; (gets value from 2nd field) and $var->save(); function will save it to the database.

Tagged : / / /

Registration Form Validation Using Javascript

There are two methods for validating a form

  1. Using a keyword “validate” inside the input tag (<input type=”text” name=”userid” placeholder= “User-Id” size=”20″ required />).

This Will present output as:-

This will present error output as “! Please fill out the field

Complete code for the above form is shared below :-

Presented output for the above operation :-

2. Using function call we need to define a function that will validate the field data and return corresponding errors.

We need to write the html code for input field in the form

<form><label><b> User-Id</b>  </label>   <input type=”text” name=”userid” placeholder= “User-Id” size=”20″ id=”userId” /> <p id=”error1″></p></form>

First we need to call the function on submit of form as (<form name=”myForm”  onsubmit=”return validateForm()” methord=”post”>) Then we need to define the function

This would produce output as

Complete code for the above function is shared below :-

Conclusion:- Validating a form in javascript is easy and is done with the function call and displays an error with respect to the type of input in the field.

Tagged : / / / / / /

CRUD Operation Detailed Explaination with Example.

Before performing CRUD operations we need to do some of the basic tasks. These includes:- 1. Installing Laravel 2. Creating Laravel Project 3. Making Model 4. Migrating After that we are good to go for the operation.

Explanation for the above operations is given in link below https://www.scmgalaxy.com/tutorials/crud-operation-prerequisites/

5. Create Operation

Create a folder Under resource =>view => Task =>File_name (say create.blade.php) and code the Html part in it.

We will now move to route(web.php) and create a route for the view . We will use Route::get(‘create’,’TaskController@index’)->name(‘create’);

We will now move to route(web.php) and create a route for the view to display. name(‘task‘) is given in the URL as http://127.0.0.1:8000/task. Control flow:- As the URL is hit the control will go the route(web.php), there we will write Route::get(‘create‘,’TaskController@create’)->name(‘create‘); Here, there will be a name match from the URL and if there is a match then there will be a function call named create and route will redirect to TaskController.php where it will find the function create and operate according to the instructions given in it. }

The TaskController.php will get to the create function definition Here this function will return a view create.blade.php, which has html codes, Output displayed on the browser.

After the create operation we need to store the data in the database for this we used <form action=”{{route(‘store’)}}” method=”POST”> which will call store function. for that, we need to call the store function when the user clicks submit after entering the data on the above page. The store function be like

In the store function we create object $var of Task make variables as $var->task which is assigned $request->task; (gets value from 1st field) & $var->detail which is assigned $request->detail; (gets value from 2nd field) and $var->save(); function will save it to the database.

Soon after the data is created and stored in the database, we can view it by performing Read operation.

6. Read operation

Create a file in resource =>view => Task (say, task.blade.php). and code the Html part in it.

We will now move to route(web.php) and create a route for the view to display. We will write the name(‘task‘) is given in the URL as http://127.0.0.1:8000/task. Control flow:- As the URL is hit the control will go the route(web.php), there it will write Route::get(‘task’,’TaskController@index’)->name(‘task’); Here, there will be a name match from the URL and if there is a match then there will be a function call named index and route will redirect to TaskController.php where it will find the function index and operate according to the instructions given in it. }

Here this function will return a view taskIndex.blade.php, which has HTML codes, which is to display on the browser with all the things compact.

7. Update operation

Create a file in resource =>view => Task => File_name (say, edit.blade.php). and code the Html part in it.

For update we need to give an edit button which calls the update function when clicked. for this we used <a href=”{{route(‘notes.edit’,[‘id’ => $note->id])}}”  type=”button” class=”btn btn-primary”>Edit</a> This will redirect to route (web.php) where we will write Route::get(‘edit’,’TaskController@edit’)->name(‘edit’); Here, there will be a name match from the URL and if there is match then there will be a function call named edit and route will redirect to TaskController.php where it will find the function edit and operate according to the instructions given in it. This will call edit function

This will find the corresponding id and return the edit page view with the details prefilled in it.

On click of submitting after changing the details which were prefilled, This will redirect to route (web.php) where we will write Route::post(‘update/{id}’,’TaskController@update’)->name(‘update’); Here, there will be a name match from the URL and if there is a match then there will be a function call named update and route will redirect to TaskController.php where it will find the function update and operate according to the instructions given in it. The update function will run.

In the Update function we create object $var1 of Task which finds and matches id and make variables as $var1->task which is assigned  $request->task; (gets value from 1st field) & $var1->detail which is assigned $request->detail; (gets value from 2nd field) and $var1->save(); function will save it to the database. and return redirect() will redirect the route to task.

7. Delete Operation

Implementing delete operation is easy and we need to Just provide a delete button in the html view which will help call the destroy function.

On click of Delete button This will redirect to route (web.php) where we will write Route::post(‘delete/{id}’,’TaskController@delete’)->name(‘delete’); Here, there will be a name match from the URL and if there is a match then there will be a function call named delete and route will redirect to TaskController.php where it will find the function delete and operate according to the instructions given in it. The update function will run.

In the Update function we create object $var2 of Task which finds and matches id and $var1->delete(); function will delete it from the database. and return redirect() will redirect the route to task.

Tagged : / / / / / / /

CRUD Operation Prerequisites.

Before performing CRUD operations we need to do some of the basic tasks. These includes:- 1. Installing Laravel 2. Creating Laravel Project 3. Making Model 4. Migrating After that we are good to go for performing the operation.

Laravel the most popular PHP-based framework for creating database-driven apps is based on the MVC (Model-View-Controller) architecture and can be used for easily creating apps for making CRUD (Create, Retrieve, Update, Delete) operations in the database.

1. Installing Laravel The first and foremost thing we need to have Laravel and composer installed in our system. the command for installation is
composer global require “laravel/installer=~1.1”
if this does not works then we could just write
composer global require “laravel/installer”
and it would install the file.
2. Creating Laravel Project Then we need to create a project and for this, we need to type
composer create-project –prefer-dist laravel/laravel project_name “5.8.*”
If this does not works then we could just write
composer create-project –prefer-dist laravel/laravel project_name
it would create a Laravel project named blog (with the latest version).

3. Making Model and Migrating After the project is created we need to create the Model. For this we use command.

$ php artisan make:model Model_name -mcr or $ php artisan make:model Model_name -a

(Note:- Model name should begin with a capital letter) Here mcr is (migration controller resources) we can use m/c/r separately but for better convenience, we use a which can equivalently be used in place of “mcr”.

After the model is created we need to create the database and attach it. We can instruct for the database creation through codes or we can go to PHPMyAdmin, and there we can create the database and provide the name of the database in the .env file

After database creation, we need to migrate. Migrations allow to add or drop fields in the database without deleting the records already present. for this we use $ php artisan migrate We could also refresh migration using $ php artisan migrate:refresh

All the prerequisites to perform CRUD operations are completed and are ready to go. Now we can move to views to create the Html page and perform desired CRUD operations.

For CRUD Operation Detailed Explanation with Example. https://www.scmgalaxy.com/tutorials/crud-operation-detailed-explaination-with-example/

Tagged : / / / / / /

Setup a Laravel Project and Understand the Folder Structure

Setting up a Laravel project is an easy task.


We need to have the composer installed in our system. Then we need to download the Laravel installer, the command for installation is
composer global require “laravel/installer=~1.1”
if this does not works then we could just write
composer global require “laravel/installer”
and it would install the file.
Then we need to create a project and for this, we need to type
composer create-project –prefer-dist laravel/laravel blog “5.8”
if this does not works then we could just write
composer create-project –prefer-dist laravel/laravel blog
it would create a Laravel project named blog.

Soon after the project is created we now have to

Understanding the Folder structure

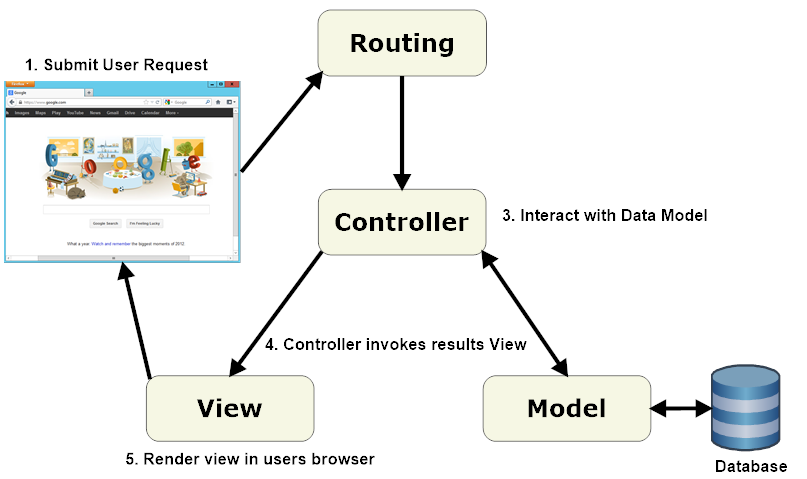
The most important thing in the Laravel project is understanding the structure of files and folders. Understanding the files and folder structure’s main purpose is to understand where we need to write codes for Html, Model, Controller, Routing, Filestore, Config, and Database.
The time after the Laravel project is created we see different folders and files. All the files and folder build while building the project have their use and gives it easy access while writing codes.
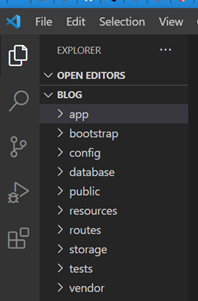
The main folder in the project consists of

Let’s take a brief look at the different folders created and the files in them.


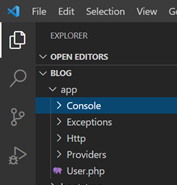
The first one App mainly includes codes for HTML, Model, and Controller which are in folders shown below.


In the console directory, there is a kernel.php file that has codes for the custom command.
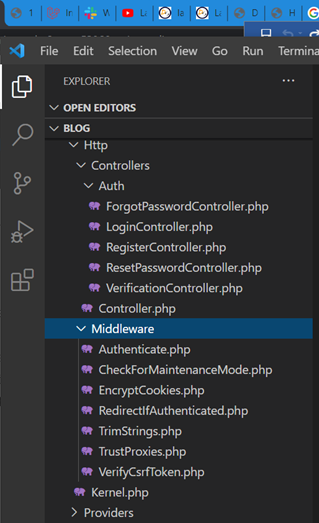
Exception folders have handler.php that includes all the codes for different exceptions.
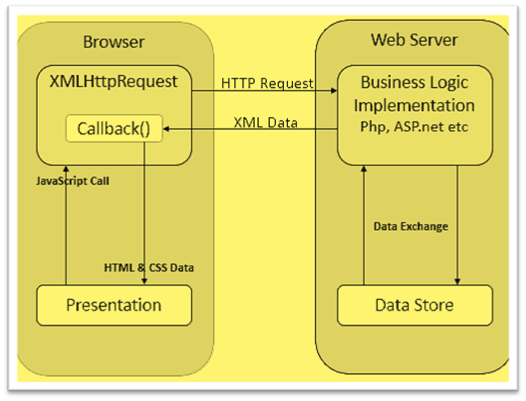
The HTTP folder has 2 sub-folders namely controllers and middleware.

Controllers and Middleware mainly include files acting as a bridge between database and webpage. These include files for authentication login validation, registering ids, resetting the password, etc.

Cookies that are used to store some data of the user are also managed here. Controllers act as an interface between database and web-page and Middleware filters out the request.

The Model directory contains all of your model classes. It provides a beautiful, simple ActiveRecord implementation for working with your database. Each database table has a corresponding “Model” which is used to interact with that table. Models allow you to query for data in your tables, as well as insert new records into the table.

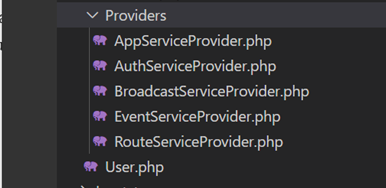
Then we have a Provider directory.

where we write different kinds of services like authentication services, routing services, and more.

Then we have Bootstrap directory that has an app.php file that helps in bootstrapping the application i.e loading the application on the browser.

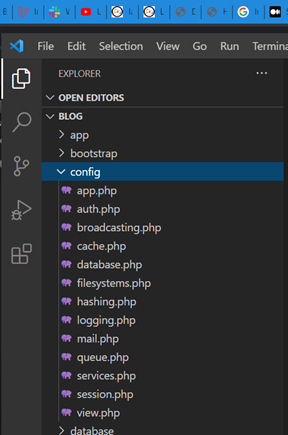
Then we have a config directory that contains all the configuration files like database configurations, email configurations, session configurations, login configurations, catch configurations, and many more.

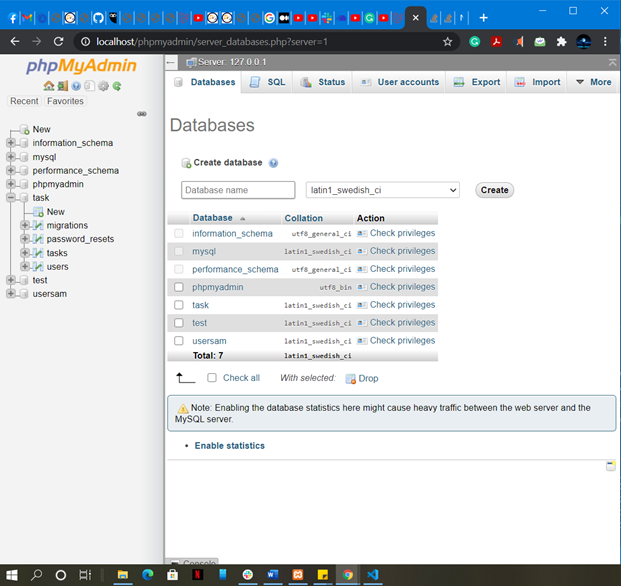
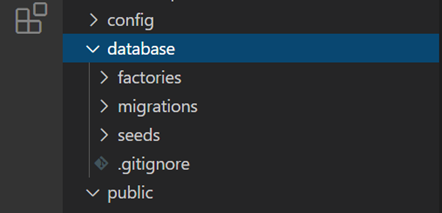
The database directory mainly includes three folders i.e factories, migrations, and seed.

Factories provide a convenient way to generate new model instances for  testing/seeding the application’s database. In Migrations, one database is shared with another database and also between developers. Seeding simply means putting the fake/dummy data in the database.

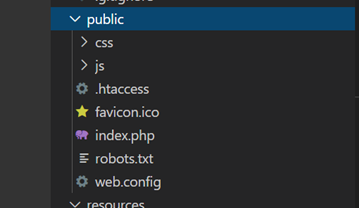
The public directory

has CSS, js, and more files that have predefined JavaScript and CSS of the project and most importantly index.php file. This is the first file that is loaded in the browser when our server (local server) is hosted.

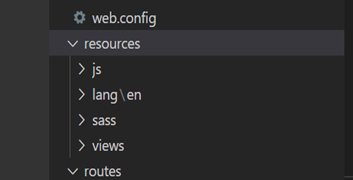
The resource directory

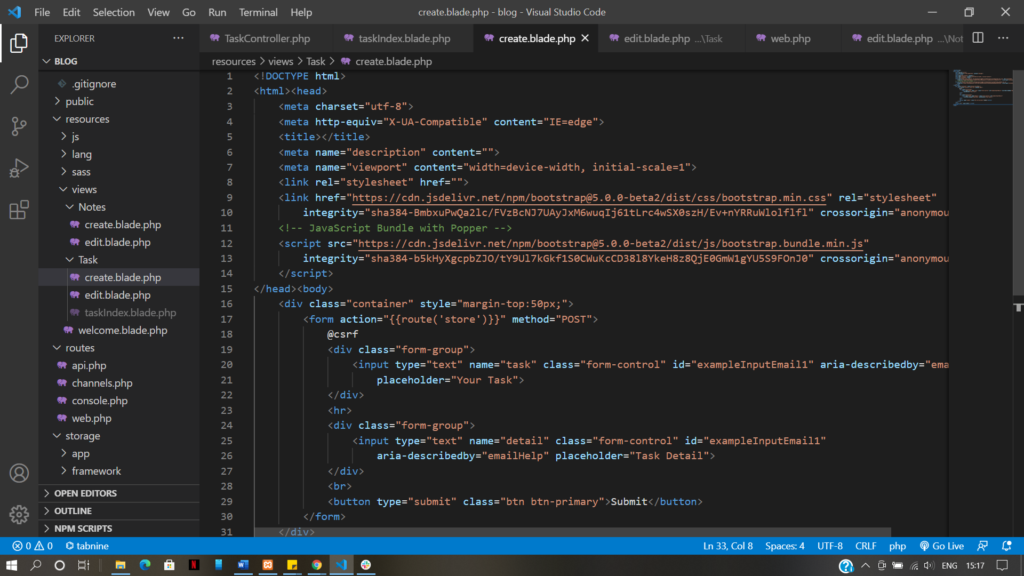
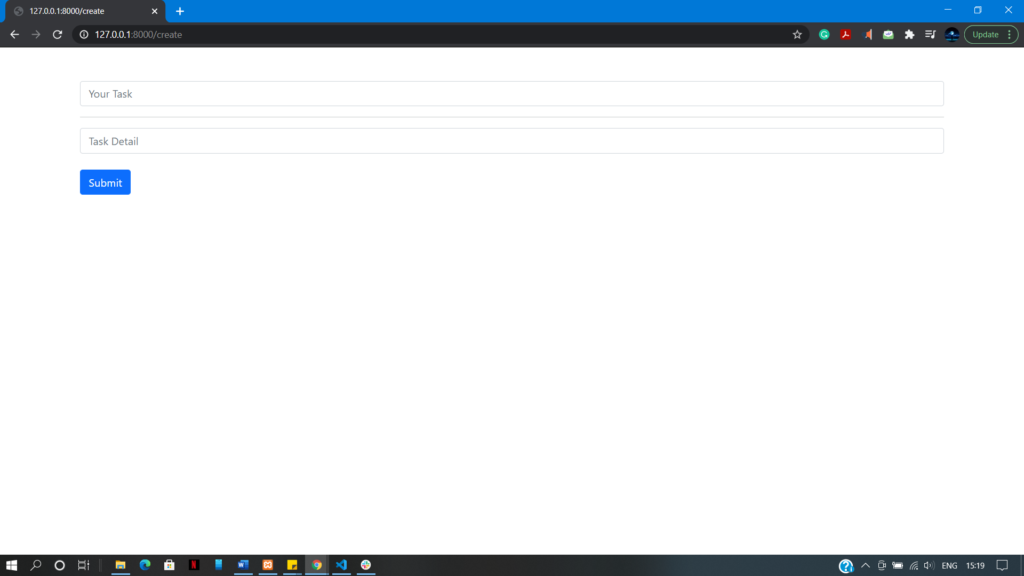
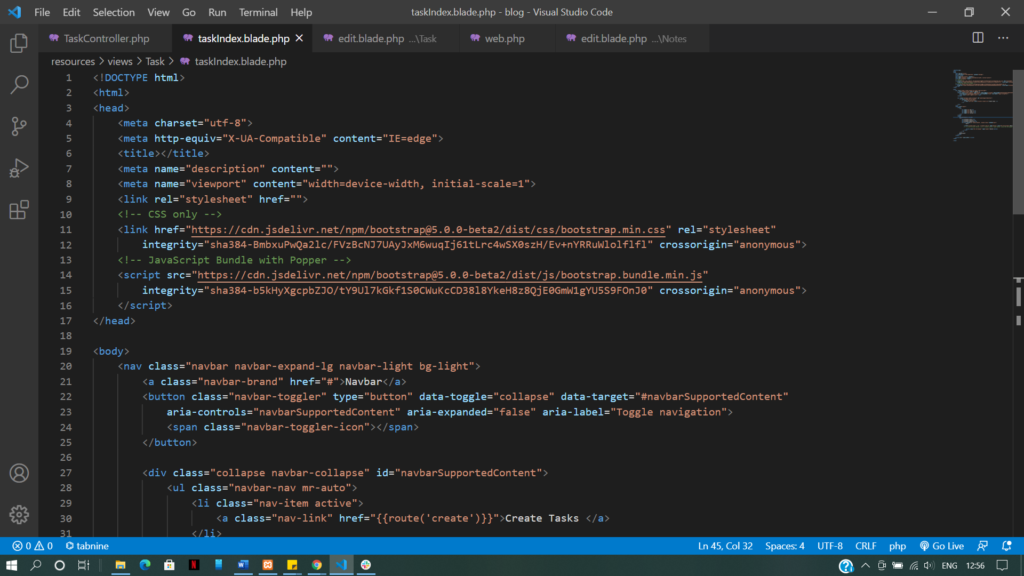
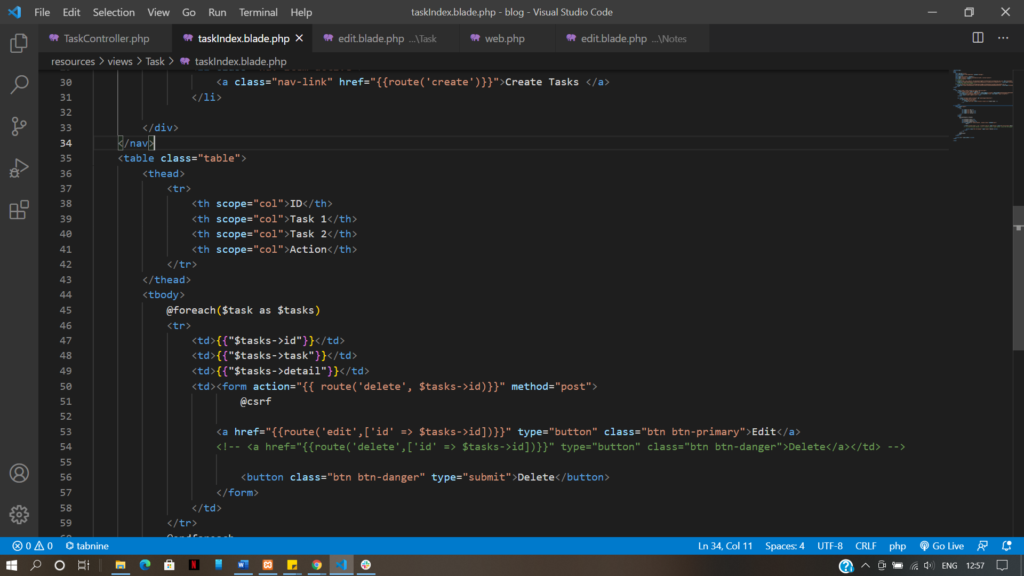
is the important part where all the public files of HTML, CSS, js files are coded and sometimes local files. This directory most importantly includes views where we write the complete HTML. All the HTML pages that we want to display shall be placed here. These files can be placed directly or can placed inside the folder in views.

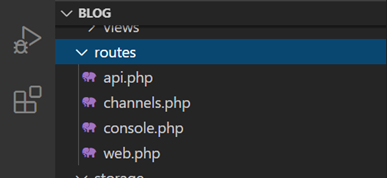
The route directory’s main purpose is placing the codes for URLs for the web as well as API.

The storage directory contains the app, framework, and log directory. The storage directory is used to store framework-generated files and caches. They also contain compiled Blade templates, file-based sessions, file caches, and other files generated by the framework and the log directory contains your application’s log files.

The test directory contains automated tests. We may run tests using the phpunit or php vendor/bin/phpunit commands.

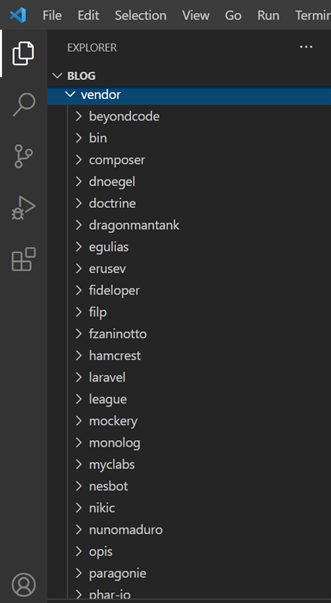
Vendor directory stores all the package files which are installed by the composers.

In simple terms, the vendor directory acts as a store-keeper for all the package files for the project in laravel.

We have few more files that are necessary like environment file (env.php), composer file (composer.json), package file (package.json).

We use webpack.mix.js for integration of CSS and js files from different developers for effective use. It also serves as a better security for CSS and js files in the project so that it cannot be publicly accessed.

Tagged : / / / / / /

A brief description on Laravel

Laravel is a backend web application framework for PHP. It is a robust framework that provides easy development with many essential features. It provides utilities for application deployment and maintenance. It is a great platform for beginners who wants to implement their PHP skills with greater ease as it has a lot of libraries included. The best part is that it is open source and freely available on the net.
Laravel’s 1st version “Laravel 5.1” was released in June 2015. And long term support (LTS) versions are planned to release every two years. Laravel’s latest version is version 8 which was released on Sept 8, 2020.

The best part is that Laravel works on MVC architecture

MVC stands for Model-View-Controller. It is an architectural pattern that separates an application into three main logical components Model, View, and Controller. Each architectural component is built to handle specific development aspects of an application easily.

The control flows in MVC (How MVC works)

Whenever a user requests to view something on the browser, the request is made to the controller. The controller then requests the model to return all the data which is asked for.

If there is a match the model returns the data to the controller and then the controller will instruct the view to display the data.

If there no match or error then the model returns the error to the controller and then the controller will instruct the view to display the error accordingly.

Why Laravel could be the best choice for developers.

Modularity in Laravel helps users with 20 built-in libraries and modules for enhancement of the application and maintaining the code as per the requirements.

Schema Builder is used for maintaining the database schema and related code of PHP. Track of changes is maintained with respect to database migrations.

The blade template engine is used for designing layouts with predefined blocks and hierarchical blocks that include dynamic content. As it is a lightweight template language.

Authentication feature in Laravel eases designing as it includes features such as register, send password reminders, reset forgot password.

E-mail and Queues A mail class in Laravel helps in sending mail with rich content and attachments and also includes features for queuing when users are in large numbers.

Query Builder helps in querying databases using various simple chain methods. It provides ORM (Object Relational Mapper) and ActiveRecord implementation called Eloquent.

Testing is easy in Laravel. It includes features and helpers which help in testing through various test cases. To a better part parallel testing is also possible in Laravel.

Routing helps in scaling and maintaining the code as per the requirements with the help of features and helpers.

The big question in mind Who should work with Laravel?

Laravel provides a great platform to handle PHP codes and maintaining them so, it’s a great platform for beginners to work on.  It’s very fluent, user-friendly, and easy to learn and understand which adds to its advantage making it a better choice for beginners to initiate their work.

Tagged : / / / /