Step by step procedures to Install Nagios XI Server in Centos 7

step-by-step-procedures-to-install-nagios-xi-server-in-centos-7
Step by step procedures to Install Nagios XI Server in Centos 7
#Update your centos os
> yum install update
> yum install wget
# to install network utility e.g. ping. (Optional)
> yum install net-tools
> cd /tmp
> mkdir software
> cd /tmp/software
# Download the Nagios latest package
> wget https://assets.nagios.com/downloads/nagiosxi/5/xi-5.4.3.tar.gz
> tar -zxvf xi-5.4.3.tar.gz
> cd /tmp/software/
> cd nagiosxi/
# Fire the script for intallation and wait for completion message.
> ./fullinstall
Tagged : / / / / / / / / / / /

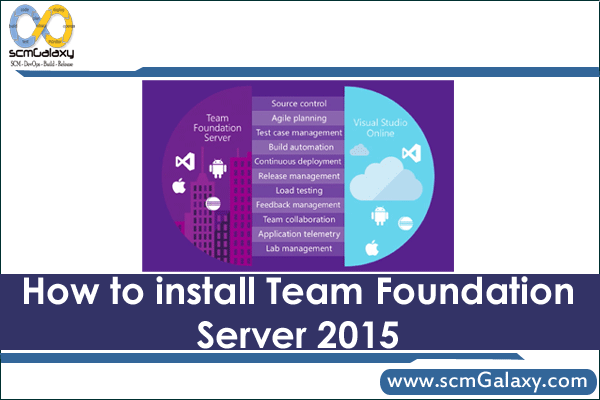
How to Install Team Foundation Server 2015 | TFS Installation Guide

team-foundation-server-2015-installation
How to install Team Foundation Server 2015
We need to start installating few things….
1. Install MS SQL SERVER EXPRESS 2016
Download the SQL Server 2016 Express installer (SQLServer2016-SSEI-Expr) on this page that, when executed, will present options to perform an installation or download media only.
2. Install TFS 2015
Choose one of these installation options:
Install over the Internet:
On this page, choose the Download button.
Select the .exe option and then choose the Next button.
1. To install now, choose the Run button.
2. To download an installer that you can run later, choose the Save button. (When you install, the computer must be connected to the Internet.)
3. To create a local copy to install offline, choose the Save button, open a command prompt at that location and run the .exe with the /layout switch
To download an image to burn on a DVD:
On this page, choose the Download button.
Select the .iso option and then choose the Next button.
Choose the Save button to download a DVD5 ISO image so that you can burn a DVD later.
3. Install Team Foundation Server 2015 Update 3
Team Foundation Server 2015 Update 3 provides a set of collaboration tools that work with your existing IDE or editor, so your team can work effectively on software projects of all shapes and sizes. Application Lifecycle Management (ALM), continuous integration, and DevOps tools help your team accomplish more, faster. Automate the software delivery process to seamlessly track work and project artifacts, including requirements, tasks, bugs, source code, and build and test results.
For Step by Step on How to Install Team Foundation Server 2015, please refer the below videos.
Tagged : / / / / / / /

How to Install Jenkins using Docker | Step by step guide | scmGalaxy

Step 1: Installing Docker
$ apt-get install docker (Ubuntu)
$ yum install docker  (RHEL/CENTOS)
Step 2:  First, pull the official jenkins image from Docker repository.
$ docker pull jenkins 

Step 3: Next, run a container using this image and map data directory from the container to the host; e.g in the example below /var/jenkins_home from the container is mapped to jenkins/ directory from the current path on the host. Jenkins 8080 port is also exposed to the host as 49001.

Mapping port 8080 on the host to the container (the web ui), port 50000 to port 50000 (for build agents). Run with `-p 50000:50000` so you can connect JNLP slaves. For port 50000. This is to handle connections from JNLP based build slaves. This will store the workspace in /var/jenkins_home. All Jenkins data lives in there including plugins and configuration.

$ docker run -d -p 8080:8080 -p 50000:50000 jenkins 
This will store the jenkins data in /your/home on the host. Ensure that /your/home is accessible by the jenkins user in container (jenkins user – uid 1000) or use -u some_other_user parameter with docker run.
$ docker run -d -p 8080:8080 -p 50000:50000 -u root -v $PWD/jenkins:/var/jenkins_home jenkins 
 Other Example:
docker run -d -p 49001:8080 -v $PWD/jenkins:/var/jenkins_home -t jenkins -u root 
This will store the jenkins data in /your/home on the host. Ensure that /your/home is accessible by the jenkins user in container (jenkins user – uid 1000) or use -u some_other_user parameter with docker run. This information is also found in the Dockerfile. So all you need to do is to ensure that the directory $PWD/jenkins is own by UID 1000:
$ mkdir jenkins
$ chown 1000 jenkins
$ docker run -d -p 49001:8080 -v $PWD/jenkins:/var/jenkins_home -t jenkins
How to see the Jenkins log?
$ docker exec name tail -f /var/log/jenkins/jenkins.log
Where name = --name 
Step 3:  Access to j=Jenkins
As we have successfully run Jenkins Container, we can browse Jenkins Web Interface using our Web Browser by pointint to http://ip-address:49001 or http://localhost:49001 according to the configuration.
Tagged : / / / / / / / / / / / / /

How to Install Docker in Linux?

install-docker-in-linux
How to Install Docker in Linux?
Note – You should install Docker using root or with sudo access.
Install Docker on Ubantu 
# apt-get update
# apt-get install -y docker.io
# service docker.io start
Install Docker on Redhar / Centos
# yum update
# yum install -y docker.io
# systemctl start docker.service
How to verify the version of docker?
# docker -v
# docker version
How to know docker running?
# service docker.io status (Ubantu)
# systemctl status docker.service (Redhat)
How to check details of Docker clients, deamon, containers, images, drivers, etc
# docker info
How to update Docker version?
==============================================
# wget -q0- https://get.docker.com/gpg | apt-key add –
# echo deb http://get.docker.com/ubantu docker main > /etc/apt/sources.list.d/docker.list
# apt-get update
# apt-get install lxc-docker
# docker version
Configuration post docker installation:
Adding Users to the Docker Group for non-root user
==============================================
# docker run -it ubuntu /bin/bash (as a non-root)
[ permission denied]
# cat /etc/group
# sudo gpasswd -a username docker
# cat /etc/group
# docker run -it ubuntu /bin/bash (as a non-root)
# logout
# login username
Tagged : / / / / / / / / / /

How to install Atlassian Jira using Docker?

install-atlassian-jira-using-docker
Install Atlassian Jira using Docker
Download and Run the jira latest:
docker run –detach –publish 8080:8080 cptactionhank/atlassian-jira:latest
Then simply navigate your preferred browser to http://[dockerhost]:8080 and finish the configuration.
Notes:
JIRA Home location: /var/atlassian/jira
JIRA Installation location: /opt/atlassian/jira
Reference:
Tagged : / / / / / / / / / /

Sonatype Nexus installation using Docker

sonatype-nexus-installation-using-docker

Sonatype Nexus Repository Manager 2

Install a Docker Engine
Installation Instructions can be found here – http://www.devopsschool.com/tutorial/docker/docker-install-and-configuration.html

Download a Sonatype Nexus Image
> docker pull sonatype/nexus

For Sonatype Nexus Repository Manager 2 OSS, To run (if port 8081 is open on your host):
> docker run -d -p 8081:8081 –name nexus sonatype/nexus:oss

For Sonatype Nexus Repository Manager 2 PRO, To run (if port 8081 is open on your host):
> docker run -d -p 8081:8081 –name nexus sonatype/nexus:pro

To determine the port that the container is listening on:
> docker ps -l

To Test
> curl http://localhost:8081/nexus/service/local/status

Browse Following URL
http://localhost:8081/nexus/

It can take some time (2-3 minutes) for the service to launch in a new container. You can tail the log to determine once Nexus is ready:
> docker logs -f nexus

Note
Default credentials are: admin / admin123
Installation of Nexus is to /opt/sonatype/nexus
Notably: /opt/sonatype/nexus/conf/nexus.properties is the properties file.
Parameters (nexus-work and nexus-webapp-context-path) defined
here are overridden in the JVM invocation.

Sonatype Nexus Repository Manager 3

Install a Docker Engine
Installation Instructions can be found here – http://www.devopsschool.com/tutorial/docker/docker-install-and-configuration.html

Clone the Repostory from Gihub
> git clone https://github.com/sonatype/docker-nexus3
> cd docker-nexus3

Build a Image for Sonatype Nexus Repository Manager 3 OSS
> docker build –rm –tag sonatype/nexus oss/

Build a Image for Sonatype Nexus Repository Manager 3 PRO
> docker build –rm –tag sonatype/nexus:pro pro/

For Sonatype Nexus Repository Manager 2 OSS, To run (if port 8081 is open on your host):
> docker run -d -p 8081:8081 –name nexus sonatype/nexus:oss

For Sonatype Nexus Repository Manager 2 PRO, To run (if port 8081 is open on your host):
> docker run -d -p 8081:8081 –name nexus sonatype/nexus:pro

To determine the port that the container is listening on:
> docker ps -l

To Test
> curl http://localhost:8081/nexus/service/local/status

Browse Following URL
http://localhost:8081/nexus/

It can take some time (2-3 minutes) for the service to launch in a new container. You can tail the log to determine once Nexus is ready:
> docker logs -f nexus

Note
Default credentials are: admin / admin123
Installation of Nexus is to /opt/sonatype/nexus
Notably: /opt/sonatype/nexus/conf/nexus.properties is the properties file.
Parameters (nexus-work and nexus-webapp-context-path) defined
here are overridden in the JVM invocation.

Reference
https://hub.docker.com/r/sonatype/nexus/

Tagged : / / / / / / / / / / / /

How to Install and Configure Gerrit2 in CentOs and Ubantu ?

gerrit2-installation-configuration
Step 1:  Update System
> yum update
> apt-get update
Step 2: Install git
Step 3: Install screen
Step 4: Install screen
Step 5: Install Java
Step 6: MySQL
Step 7: Install Gerrit
1. Create a Database
2. Initialize the site
3. Download Gerrit
wget https://gerrit-releases.storage.googleapis.com/gerrit-2.9.1.war
4. Start Gerrit Setup
5. Restart / Stop / Start gerrit
5. Access Gerrit
Step 8: Install Apache
Step 9: Configure Apache Proxy to Gerrit
Step 10: Verify
Some important Tools
Screen
Reference
https://gerrit.googlecode.com/svn/documentation/2.0/install.html
http://dachary.org/?p=1716
https://www.rosehosting.com/blog/how-to-install-gerrit2-on-a-centos-7-linux-vps/
https://www.digitalocean.com/community/tutorials/how-to-install-gerrit-on-an-ubuntu-cloud-server
Tagged : / / / / / / / / / / / / / / /

How to Install and Configure Jira in Linux | Jira Tutorial

jira-installation-and-configuration-in-linux

Download JIRA package from 

https://www.atlassian.com/software/jira/download?b=j

Linux Installation:

wget https://www.atlassian.com/software/jira/downloads/binary/atlassian-jira-6.4.12-x64.bin

chmod atlassian-jira-6.4.12-x64.bin

Execute the ‘.bin’ file to start the console wizard

stop iptables

service jira start/stop

http://uvo1kievugg76unbcj9.vm.cld.sr:8080/

& follow the instructions

Reference

https://confluence.atlassian.com/jira/installing-jira-on-linux-191501165.html

Tagged : / / / / / / / / / / / / /

How to Install and Configure Nagios Server and Clients | Nagios Tutorial

install-and-configure-nagios-server-and-clients
Install and Configure Nagios Server and Clients
Download the Nagios Server Source copy from https://www.nagios.com/products/nagios-xi/
You can also use the direct download links as below;
> wget https://assets.nagios.com/downloads/nagiosxi/5/xi-5.2.0.tar.gz
Extract the xi-5.2.0.tar.gz using
> tar -zxvf xi-5.2.0.tar.gz
Run the following commands to install it.
> ./fullinstall
At the end of installation, you will get the url address  using you can access the Nagios server.
e.g http://10.160.34.98/nagiosxi/
Open the url http://10.160.34.98/nagiosxi/
and enter and save following info.
Administrator Name:
Administrator Email Address:
Administrator Username:
Administrator Password:
and presss “Install”
Once you get “Installation Complete” message that means you have Nagios Server install completed.
Tagged : / / / / / / / / / / /

Install SonaType SonaType Community Version

sonatype-nexus-community-version
Download & Install JDK 1.8
64 bit
# cd /opt/</div>
<div># wget --no-cookies --no-check-certificate --header "Cookie: gpw_e24=http%3A%2F%2Fwww.oracle.com%2F; oraclelicense=accept-securebackup-cookie" "http://download.oracle.com/otn-pub/java/jdk/8u66-b17/jdk-8u66-linux-x64.tar.gz"</div>
<div># tar xzf jdk-8u66-linux-x64.tar.gz
32 bit
# cd /opt/</div>
<div># wget --no-cookies --no-check-certificate --header "Cookie: gpw_e24=http%3A%2F%2Fwww.oracle.com%2F; oraclelicense=accept-securebackup-cookie" "http://download.oracle.com/otn-pub/java/jdk/8u66-b17/jdk-8u66-linux-i586.tar.gz"</div>
<div># tar xzf jdk-8u66-linux-i586.tar.gz


Install SonaType Nexus Community Version

Download the Latest Package from http://www.sonatype.org/nexus/go/
TGZ – http://download.sonatype.com/nexus/3/latest-unix.tar.gz
ZIP – http://download.sonatype.com/nexus/oss/nexus-latest-bundle.zip

Install
https://support.sonatype.com/entries/20673251-Installing-Nexus-OSS

$ yum install wget
$ cd /opt/
$ wget http://download.sonatype.com/nexus/3/latest-unix.tar.gz
$ tar -zxvf latest-unix.tar.gz
$ mv nexus-3.12.1-01 nexus
$ cd nexus/bin
$ ./nexus start
$ ./nexus status

http://13.127.30.125:8081/
admin
admin123

Upgrade
https://support.sonatype.com/entries/23031188-How-do-I-upgrade-Nexus-OSS

Starting Nexus from the command line
https://support.sonatype.com/entries/20673271-Starting-Nexus-from-the-Command-Line

Execute ./bin/nexus ( ./bin/nexus.bat on Windows ) without any parameters to get the supported commands for controlling Nexus.

Open the Installation as – http://localhost:8081/nexus
Log In Dialog (default login/password is admin/admin123)”.

More
https://books.sonatype.com/nexus-book/reference/installing.html

Tagged : / / / / / /