When you are using To Laravel Project with Connect to Api. Then pagination and search filter (laravel default) will not work in this process. So, you can use DataTable or Manual. So in this blog I am using manual.
This is a Search Input filter
This is Pagination
This is Js in script tag
This is First Laravel Project Controller Function for sending requests for pagination and Search Filter.
This is Second Project Controller Function for pagination and search filter.
Laravel is a web framework built on PHP. That is the code that has been done by PHP. You can use it to create high-end web applications. That is, you can create a very beautiful web application using variables. The Model View Controller architectural pattern follows the design of Laravel. It is created by Tyler Otwell.
Advance of Laravel
Open Source
Collection of Tool
Save time
Improve productivity
Robust And Easy
Security of the application
Authentication
Routing
Templating
Do You Know?
HTML
CSS
JavaScript
SQL
PHP OPP
MVC
Composer
Laravel Requirements
PHP 7.2.0 or Higher
XAMPP (Apache + MariaDB + PHP + Perl)
WAMP/LAMP/MAMP
Composer
Text/code Editor – Notepad++, vs code, ATOM, Brakets
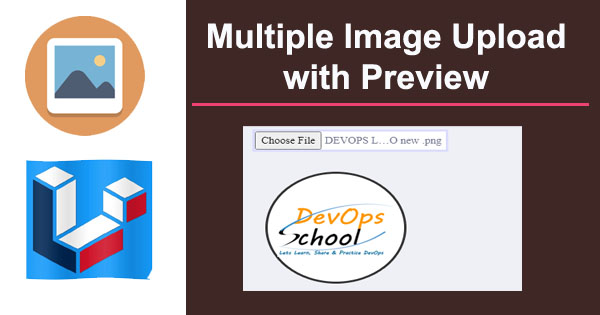
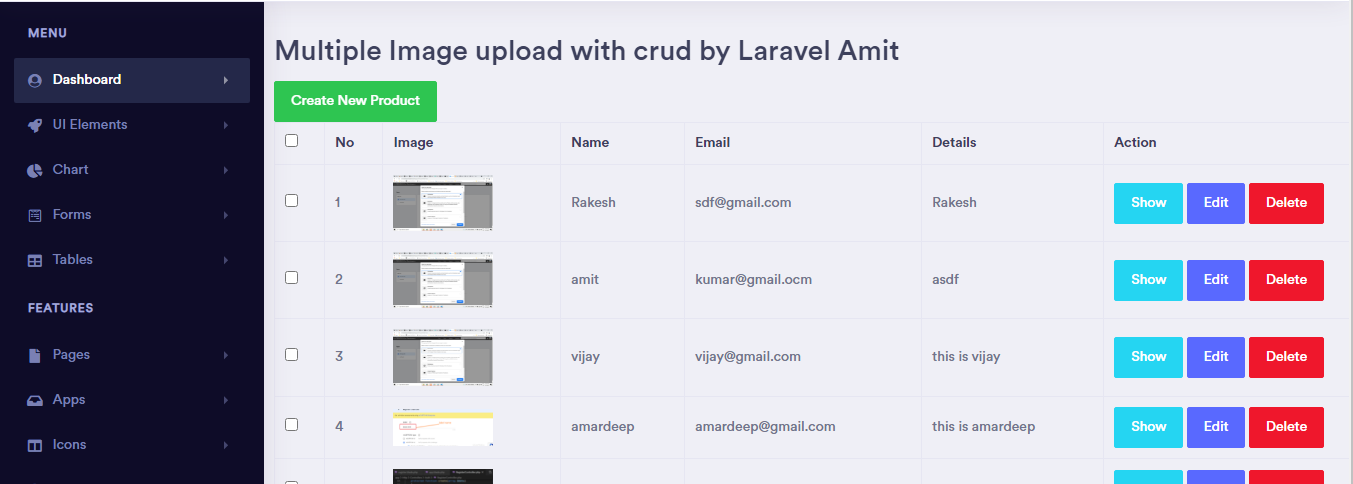
In this tutorial i’m going to describe how to upload multiple image with crud operation edit, update delete in laravel. Image upload is necessary of every project. In this project i’m going to learn how to upload with validation like images, mimes, max file upload and etc, with image preview when uploading image and adding features checklist delete.
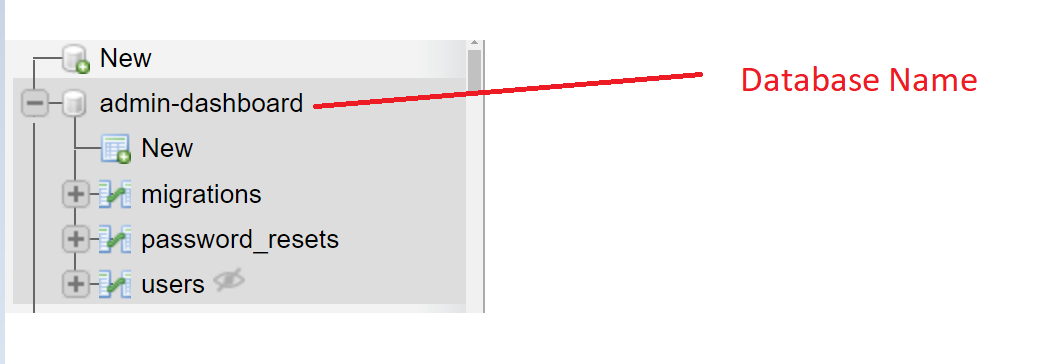
After Installation setup database So go to the .env file and add the database credentials. lets go to .env folder and put database name and connect to database.
Next step: Add Resource Route Go to your route and paste below code 👇👇
use App\Http\Controllers\ProductController;
Route::resource('products', ProductController::class);
Now lets go to create controller, model and migration file go to your terminal and paste below code
php artisan make:model ProductController -mcr
Lets go to your migration file productstable and paste below code. 👇
<?phpuse Illuminate\Support\Facades\Schema;
use Illuminate\Database\Schema\Blueprint;
use Illuminate\Database\Migrations\Migration;class CreateProductsTable extends Migration
{
    /**
     * Run the migrations.
     *
     * @return void
     */
    public function up()
    {
        Schema::create('products', function (Blueprint $table) {
            $table->bigIncrements('id');
            $table->string('name');
            $table->string('detail');
            $table->string('image');
            $table->timestamps();
        });
    }    /**
     * Reverse the migrations.
     *
     * @return void
     */
    public function down()
    {
        Schema::dropIfExists('products');
    }
}
Now migrate the table 👇👇
php artisan migrate
Next go to Your ProductController file and paste below code 👇👇
<?php
namespace App\Http\Controllers;
use App\Product; use Illuminate\Http\Request;
class ProductController extends Controller { /** * Display a listing of the resource. * * @return \Illuminate\Http\Response */ public function index() { $products = Product::latest()->paginate(5);
return redirect()->route('products.index') ->with('success','Product created successfully.'); }
/** * Display the specified resource. * * @param \App\Product $product * @return \Illuminate\Http\Response */ public function show(Product $product) { return view('products.show',compact('product')); }
/** * Show the form for editing the specified resource. * * @param \App\Product $product * @return \Illuminate\Http\Response */ public function edit(Product $product) { return view('products.edit',compact('product')); }
/** * Update the specified resource in storage. * * @param \Illuminate\Http\Request $request * @param \App\Product $product * @return \Illuminate\Http\Response */ public function update(Request $request, Product $product) { $request->validate([ 'name' => 'required', 'detail' => 'required' ]);
@if ($errors->any()) <div class="alert alert-danger"> <strong>Whoops!</strong> There were some problems with your input.<br><br> <ul> @foreach ($errors->all() as $error) <li>{{ $error }}</li> @endforeach </ul> </div> @endif
If you want to Compare datetime between two table while selecting record then,
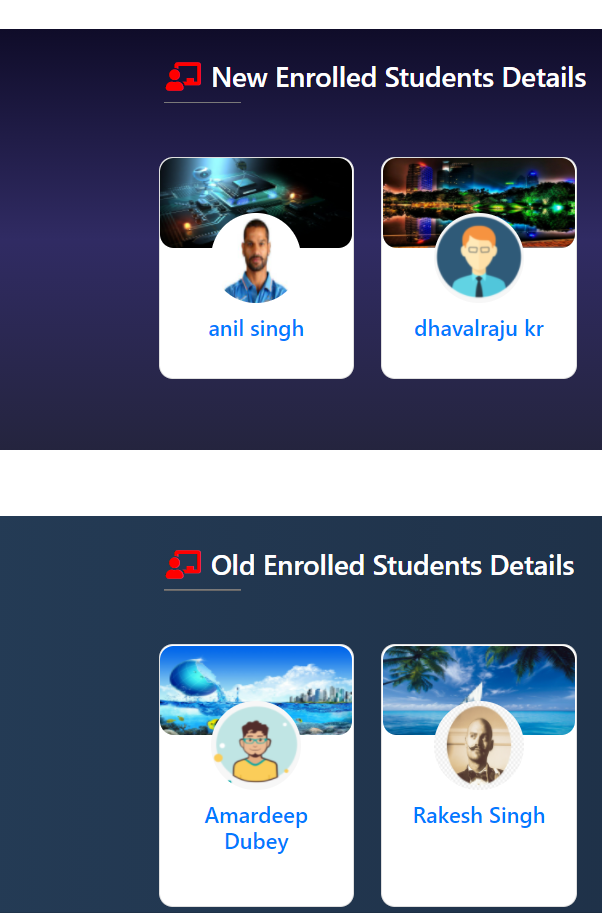
In this function I am using two table First table using from Controller “AllClassController” in this controller, I am taking all data from $slug, and $id. After that I am taking trainer_email and update_at, after that when get value then Other table using Model “Payment” and using where function and taking “$payments_new” and using foreach function and taking which value who required. Same process for Other “$payments_old”.
This is Output “New Enrolled Students Details” and “Old Enrolled Students Details”.
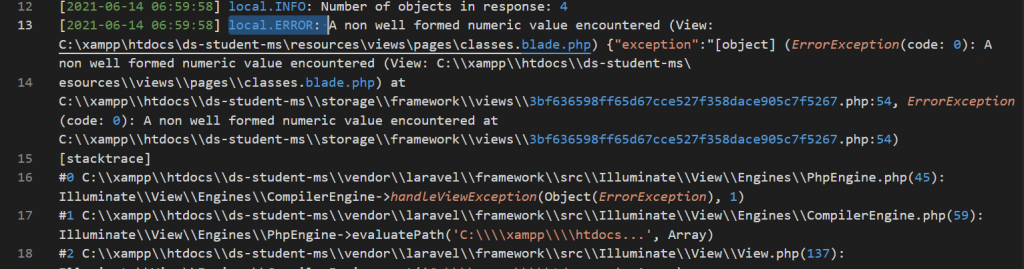
When you using @foreach value in a variable in your blade file and put any value and using any Mathematics function in your value for showing your document this type of error.
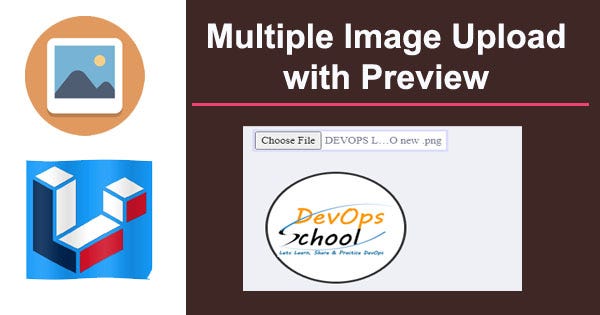
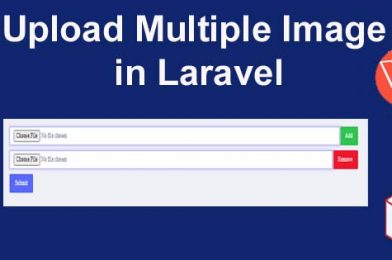
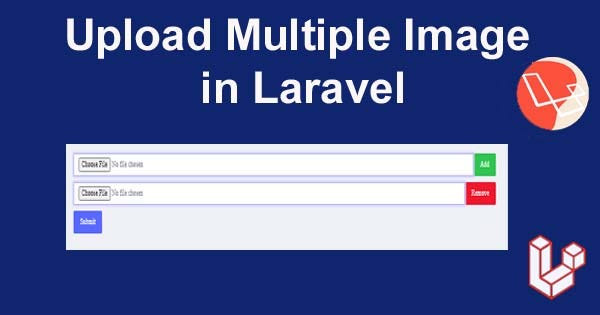
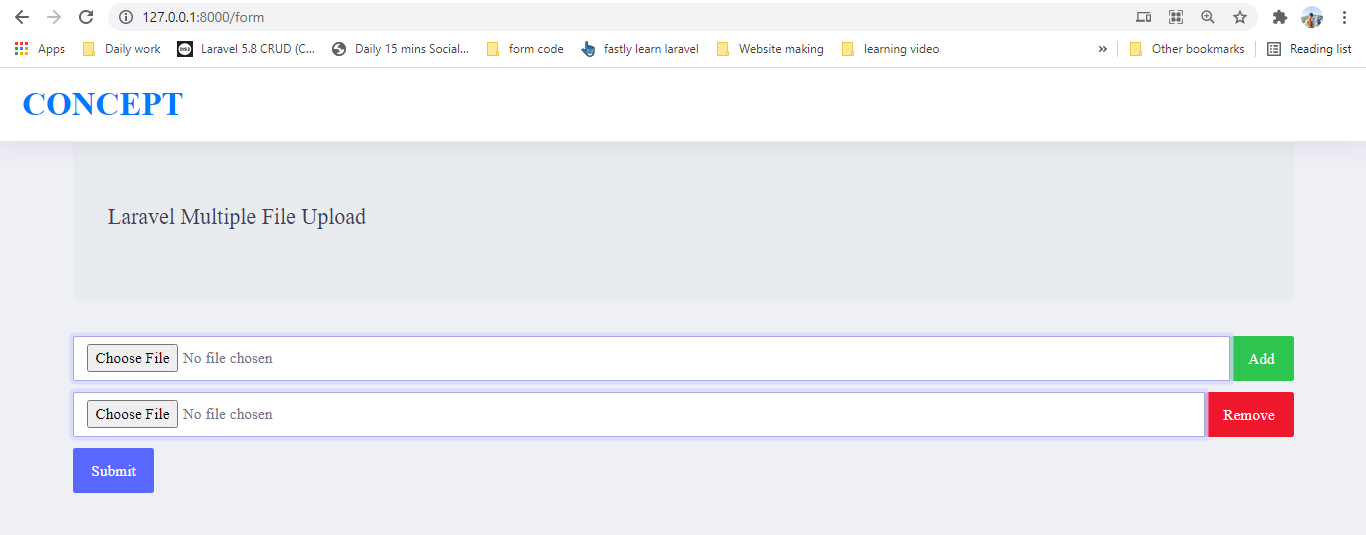
In this turoial im going to learn how to upload multiple image in laravel and store in database. Image upload is necessary of every project. In this project i’m going to learn how to upload with validation like images, mimes, max file upload and etc.
So let’s go to download project and configure with database. so copy below code and paste in your terminal.
After Installation setup database So go to the .env file and add the database credentials. lets go to .env folder and put database name and connect to database.
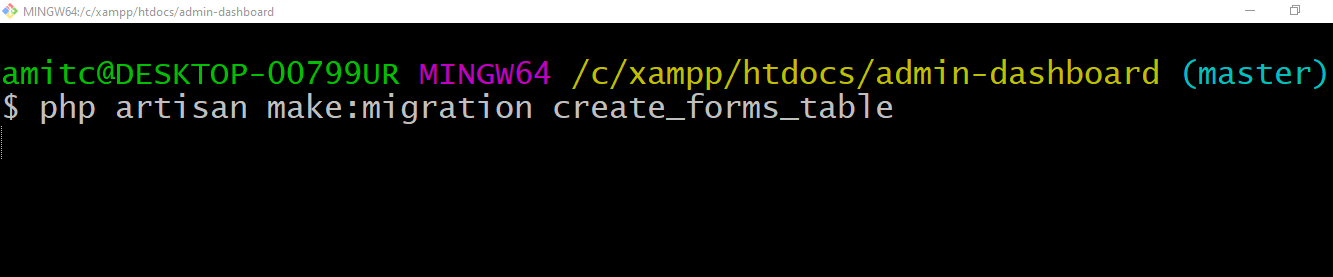
Lets go to create migration file to store the image name go to your terminal and paste below code.
php artisan make:migration create_forms_table
Let’ go to migration table and add file name.
<?php
use Illuminate\Support\Facades\Schema; use Illuminate\Database\Schema\Blueprint; use Illuminate\Database\Migrations\Migration;
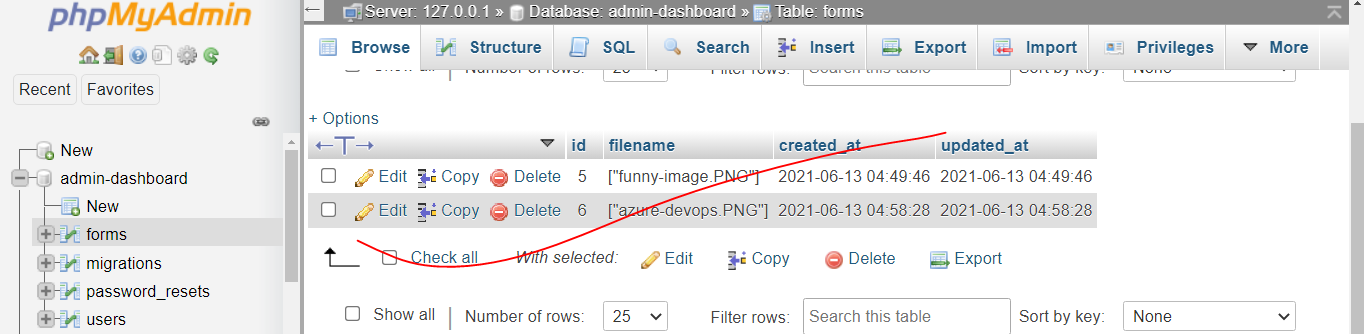
class CreateFormsTable extends Migration { /** * Run the migrations. * * @return void */ public function up() { Schema::create('forms', function (Blueprint $table) { $table->bigIncrements('id'); $table->string('filename'); $table->timestamps(); }); }
/** * Reverse the migrations. * * @return void */ public function down() { Schema::dropIfExists('forms'); } }
The next step will be to migrate this schema and make a table in the database.
php artisan migrate
Next go to create the controller and model file for this project copy below code and paste in your command. 👇👇
php artisan make:model Form

php artisan make:controller FormController
lets got to setup the model and controller file for our project.
Step 2: Define routes in the web.php file.
copy below code and paste in your route/web.php file 👇
<?php
/* |-------------------------------------------------------------------------- | Web Routes |-------------------------------------------------------------------------- | | Here is where you can register web routes for your application. These | routes are loaded by the RouteServiceProvider within a group which | contains the "web" middleware group. Now create something great! | */
Route::get('/', function () { return view('welcome'); });
$form= new Form(); $form->filename=json_encode($data);
$form->save();
return back()->with('success', 'image has been successfully updated'); }
}
Now, let us make a create.blade.php file inside the Resources/views folder.
@extends('layouts.app') @section('content')
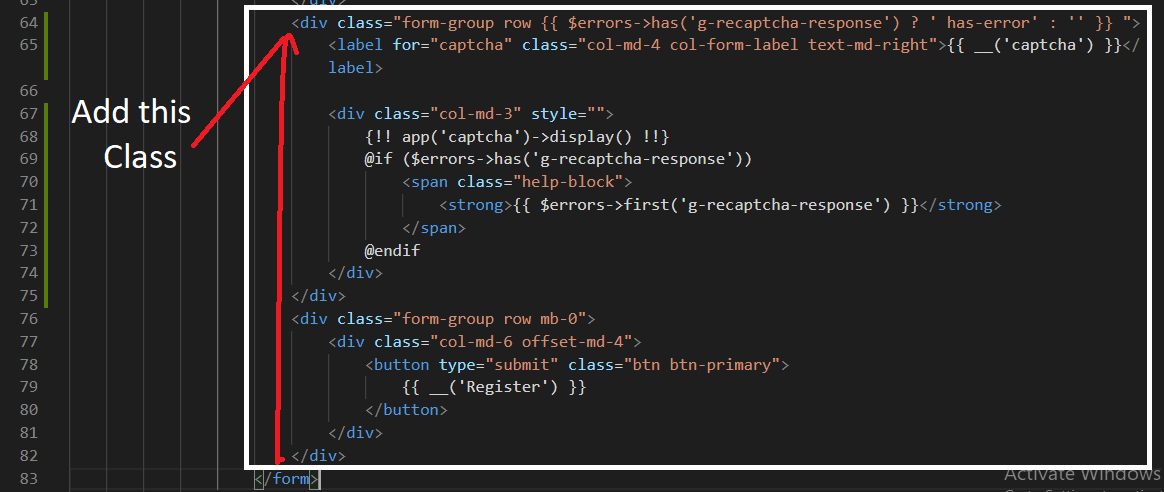
<div class="container"> @if (count($errors) > 0) <div class="alert alert-danger"> <strong>Whoops!</strong> There were some problems with your input.<br><br> <ul> @foreach ($errors->all() as $error) <li>{{ $error }}</li> @endforeach </ul> </div> @endif
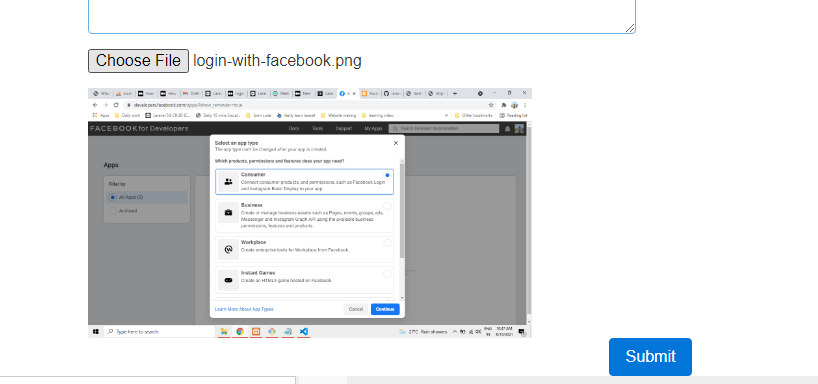
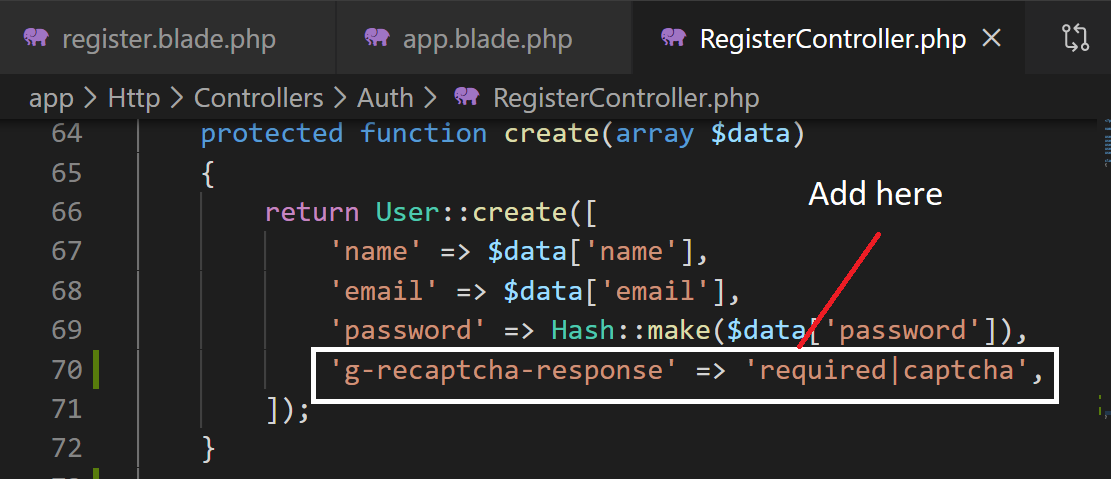
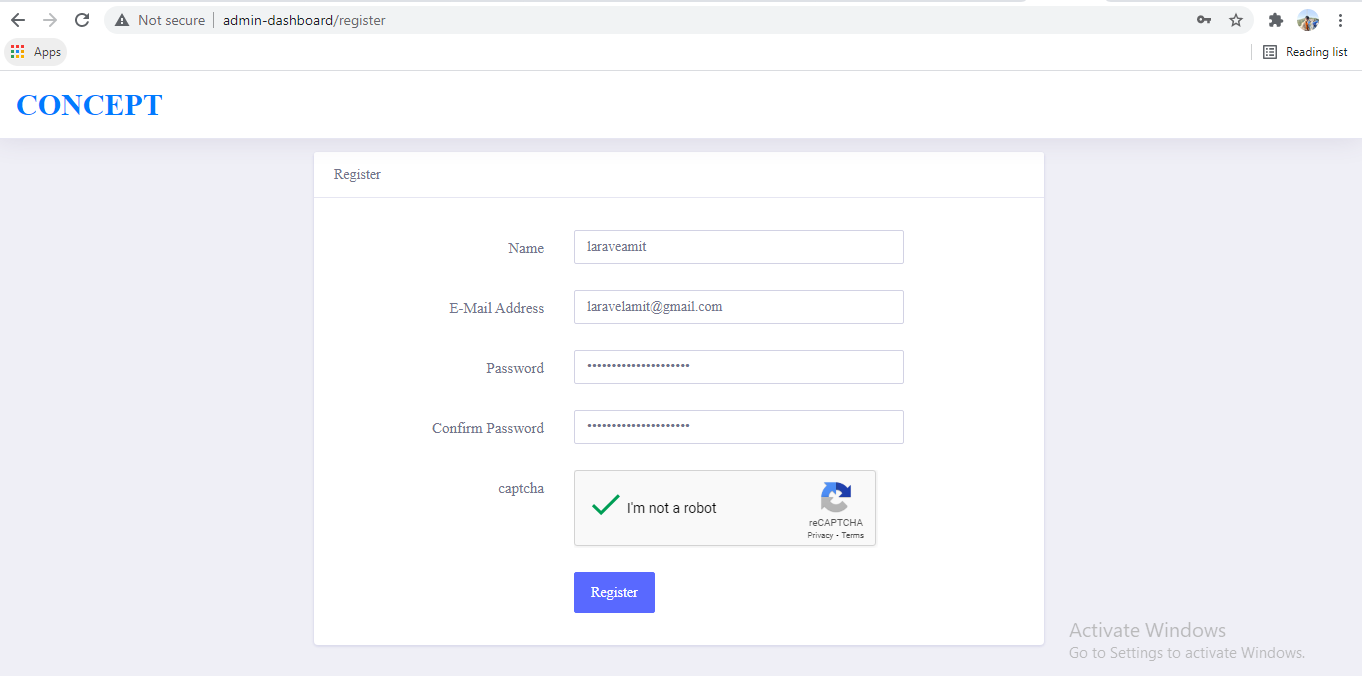
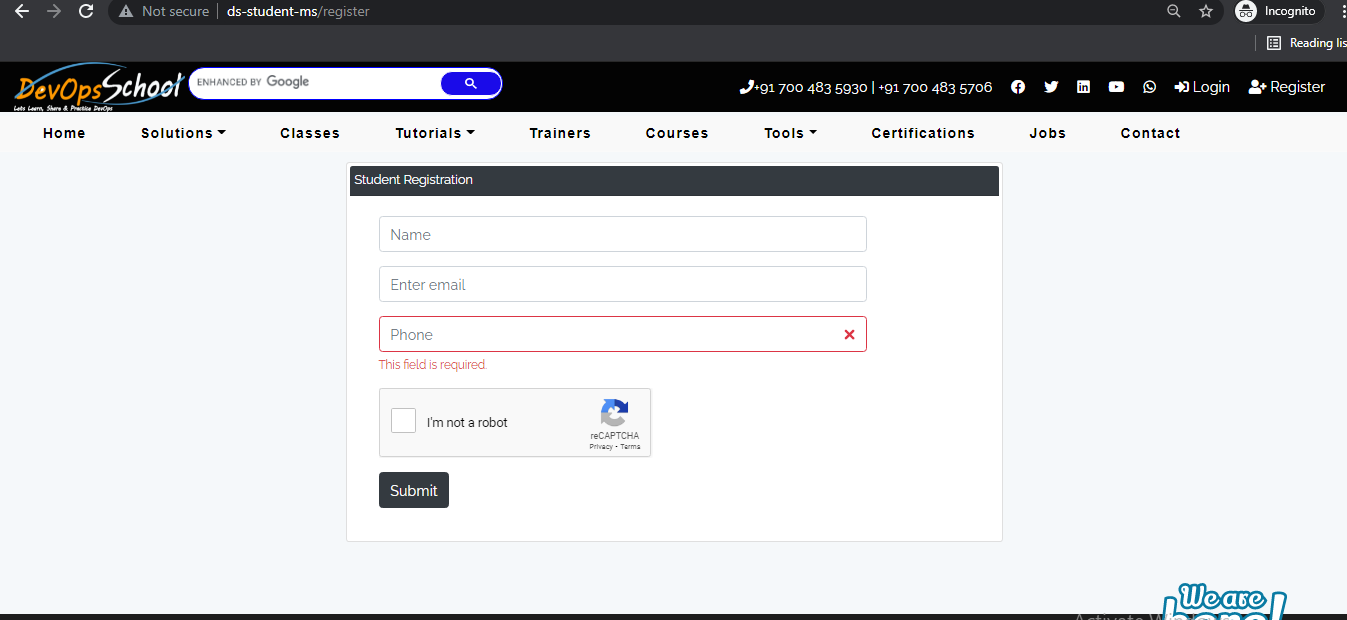
In this tutorial I’m going to learn how to add captcha features in on register blade and login page. Nowadays captcha is very useful because its very important for security reason.
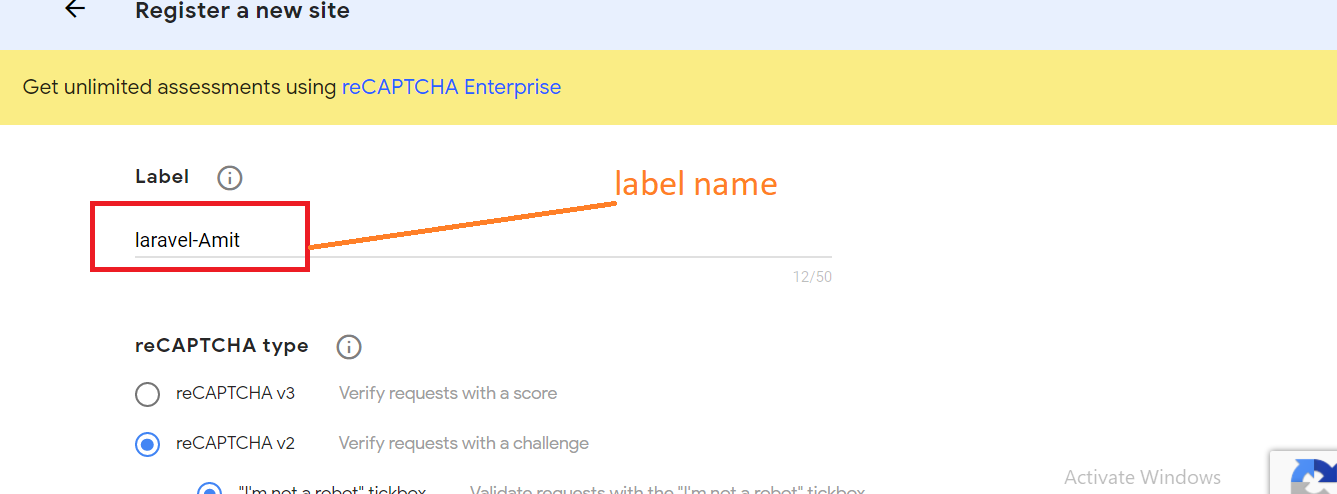
There are several library to generate captcha image in Laravel. In this example I’m going to use Google reCaptcha for generate captcha using anhskohbo/no-captcha package. anhskohbo/no-captcha is very popular package.
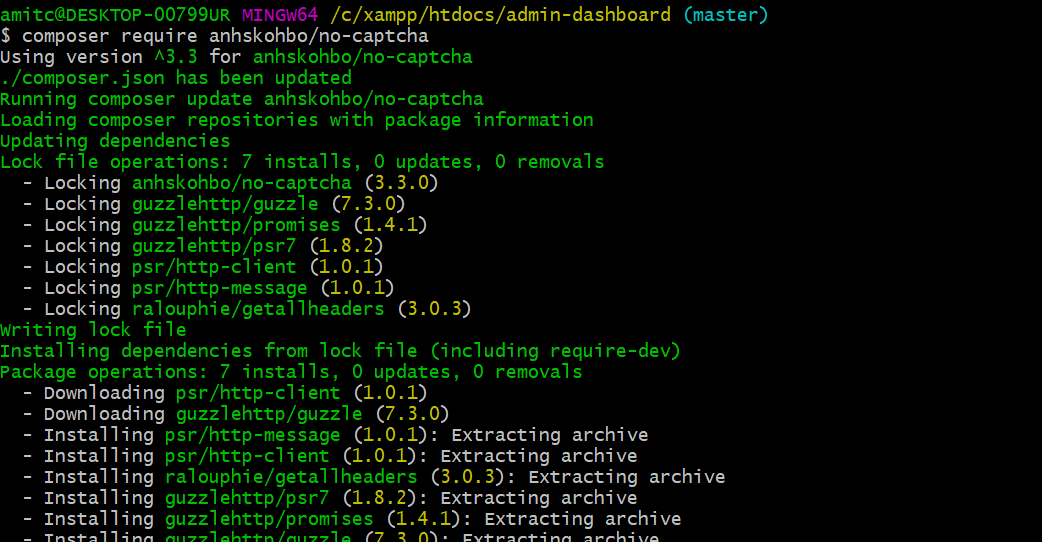
Next step we have to install anhskohbo/no-captcha package for Google reCaptcha code, after install these package we able to generate captcha code in our register and login page. copy below code and paste in your terminal
composer require anhskohbo/no-captcha
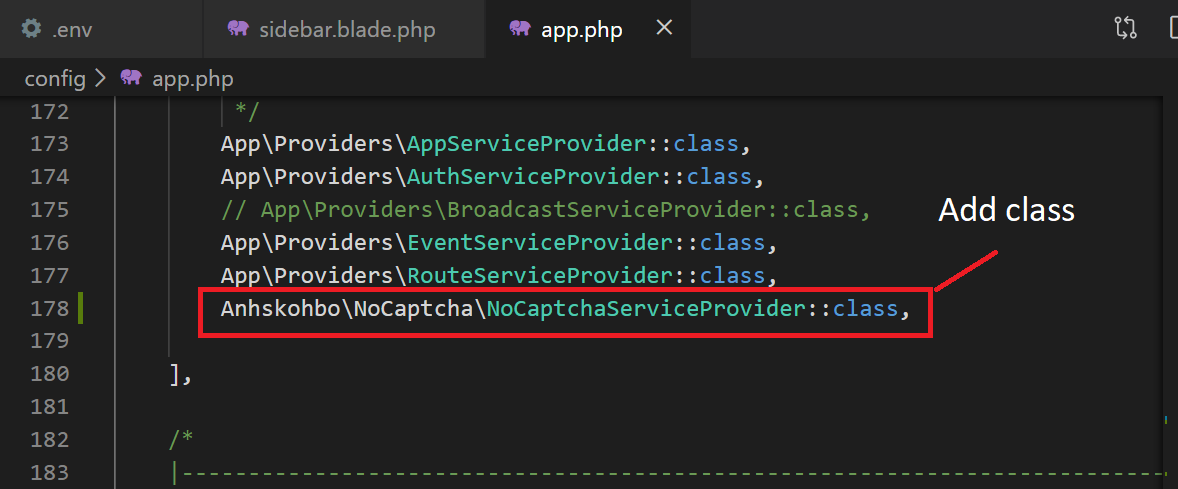
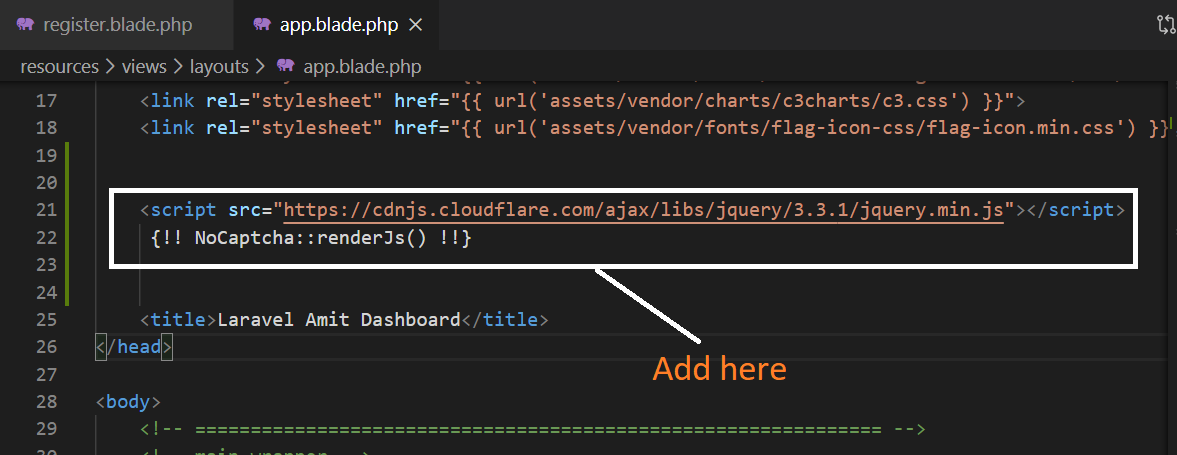
Next add below code in provider path in config/app.php path
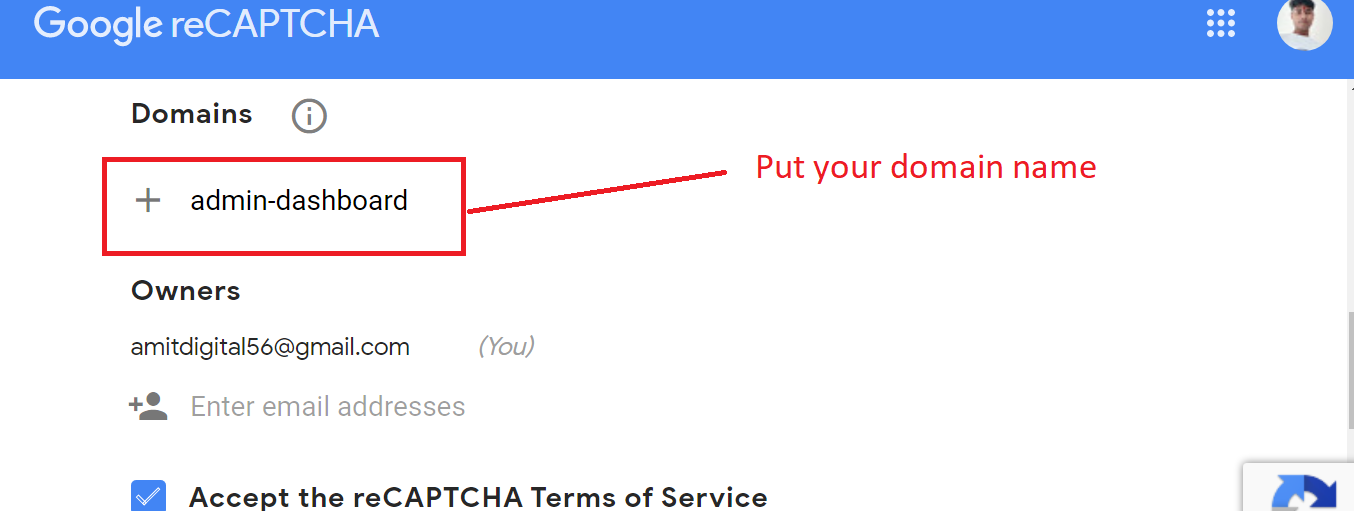
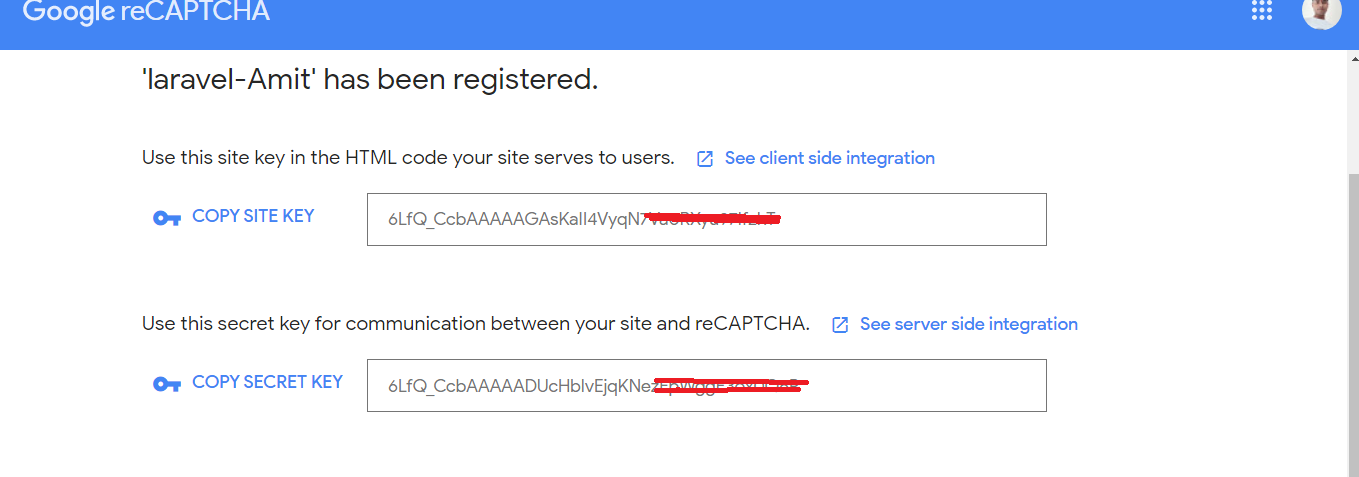
After submit this form you’ll get site key and secret key
Now go to .env file and add this two variable
.env
#########Google Recaptcha
 NOCAPTCHA_SITEKEY=your site key
 NOCAPTCHA_SECRET=your secret key
Next go to Route/web.php and add Auth::routes();
Auth::routes();
Go to Route/web.php
<?php
/* |-------------------------------------------------------------------------- | Web Routes |-------------------------------------------------------------------------- | | Here is where you can register web routes for your application. These | routes are loaded by the RouteServiceProvider within a group which | contains the "web" middleware group. Now create something great! | */
Route::get('/', function () { return view('welcome'); });