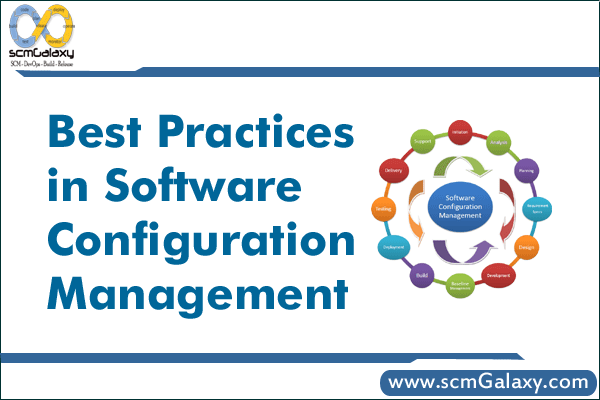
Best Practices in Software Configuration Management
Abstract
When deploying new SCM (software configuration management) tools,
implementers sometimes focus on perfecting fine-grained activities, while
unwittingly carrying forward poor, large-scale practices from their previous jobs or
previous tools. The result is a well-executed blunder. This paper promotes some
high-level best practices that reflect the authors’ experiences in deploying SCM.
1. Introduction
“A tool is only as good as you use it,” the saying goes. As providers of software configuration management (SCM) tools and consultants to software companies, we
are often asked for sound advice on SCM best practices – that is, how to deploy SCM software to the maximum advantage. In answering these requests we have a bounty of direct and indirect SCM experience from which to draw. The direct experience comes from having been developers and codeline managers ourselves; the indirect experience comes from customer reports of successes and failures with our product (Perforce) and other SCM tools.
The table below lists six general areas of SCM deployment, and some coarse-grained best practices within each of those areas. The following chapters explain each item.
Workspaces, where
developers build, test, and
debug. |
· Don’t share workspaces.
· Don’t work outside of managed workspaces.
· Don’t use jello views.
· Stay in sync with the codeline.
· Check in often. |
Codelines, the canonical sets
of source files. |
· Give each codeline a policy.
· Give each codeline an owner.
· Have a mainline. |
Branches, variants of the
codeline. |
· Branch only when necessary.
· Don’t copy when you mean to branch.
· Branch on incompatible policy.
· Branch late.
· Branch, instead of freeze. |
Change propagation, getting
changes from one codeline to
another. |
· Make original changes in the branch that has
evolved the least since branching.
· Propagate early and often.
· Get the right person to do the merge. |
Builds, turning source files
into products. |
· Source + tools = product.
· Check in all original source.
· Segregate built objects from original source.
· Use common build tools.
· Build often.
· Keep build logs and build output. |
Process, the rules for all of
the above. |
· Track change packages.
· Track change package propagations.
· Distinguish change requests from change
packages.
· Give everything and owner.
· Use living documents. |
2. The Workspace
The workspace is where engineers edit source files, build the software components they’re working on, and test and debug what they’ve built. Most SCM systems have some notion of a workspace; sometimes they are called “sandboxes”, as in Source Integrity, or “views”, as in ClearCase and Perforce. Changes to managed SCM repository files begin as changes to files in a workspace. The best practices for workspaces include:· Don’t share workspaces. A workspace should have a single purpose, such as an edit/build/test area for a single developer, or a build/test/release area for a product release. Sharing workspaces confuses people, just as sharing a desk does. Furthermore, sharing workspaces compromises the SCM system’s ability to track activity by user or task. Workspaces and the disk space they occupy are cheap; don’t waste time trying to conserve them.· Don’t work outside of managed workspaces. Your SCM system can only track work in progress when it takes place within managed workspaces. Users working outside of workspaces are beached; there’s a river of information flowing past and they’re not part of it. For instance, SCM systems generally use workspaces to facilitate some of the communication among developers working on related tasks. You can see what is happening in others’ workspaces, and they can see what’s going on in yours. If you need to take an emergency vacation, your properly managed workspace may be all you can leave behind. Use proper workspaces.
· Don’t use jello views. A file in your workspace should not change unless youexplicitly cause the change. A “jello view” is a workspace where file changes are
caused by external events beyond your control. A typical example of a jello view is a workspace built upon a tree of symbolic links to files in another workspace –
when the underlying files are updated, your workspace files change. Jello views are a source of chaos in software development. Debug symbols in executables
don’t match the source files, mysterious recompilations occur in supposedly trivial rebuilds, and debugging cycles never converge – these are just some of the
problems. Keep your workspaces firm and stable by setting them up so that users have control over when their files change.· Stay in sync with the codeline. As a developer, the quality of your work depends on how well it meshes with other peoples’ work. In other words, as changes are checked into the codeline, you should update your workspace and integrate those changes with yours. As an SCM engineer, it behooves you to make sure this workspace update operation is straightforward and unencumbered with tricky or time-consuming procedures. If developers find it fairly painless to update their workspaces, they’ll do it more frequently and integration problems won’t pile up at project deadlines.
· Check in often. Integrating your development work with other peoples’ work also requires you to check in your changes as soon as they are ready. Once you’ve
finished a development task, check in your changed files so that your work is available to others. Again, as the SCM engineer, you should set up procedures that encourage frequent check-ins. Don’t implement unduly arduous validation procedures, and don’t freeze codelines (see Branching, below). Short freezes are bearable, but long freezes compromise productivity. Much productivity can be wasted waiting for the right day (or week, or month) to submit changes.
3. The Codeline
In this context, the codeline is the canonical set of source files required to produce your software. Typically codelines are branched, and the branches evolve into variant
codelines embodying different releases. The best practices with regard to codelines are:
· Give each codeline a policy. A codeline policy specifies the fair use and permissible check-ins for the codeline, and is the essential user’s manual for
codeline SCM. For example, the policy of a development codeline should state that it isn’t for release; likewise, the policy of a release codeline should limit
changes to approved bug fixes.1 The policy can also describe how to document changes being checked in, what review is needed, what testing is required, and
the expectations of codeline stability after check-ins. A policy is a critical component for a documented, enforceable software development process, and a
codeline without a policy, from an SCM point of view, is out of control.· Give each codeline an owner. Having defined a policy for a codeline, you’ll soon
encounter special cases where the policy is inapplicable or ambiguous. Developers facing these ambiguities will turn to the person in charge of the
codeline for workarounds. When no one is in charge, developers tend to enact their own workarounds without documenting them. Or they simply procrastinate
because they don’t have enough information about the codeline to come up with a reasonable workaround. You can avoid this morass by appointing someone to
own the codeline, and to shepherd it through its useful life. With this broader objective, the codeline owner can smooth the ride over rough spots in software
development by advising developers on policy exceptions and documenting them.
· Have a mainline. A “mainline,” or “trunk,” is the branch of a codeline that evolves forever. A mainline provides an ultimate destination for almost all
changes – both maintenance fixes and new features – and represents the primary, linear evolution of a software product. Release codelines and development
codelines are branched from the mainline, and work that occurs in branches is propagated back to the mainline.
IMAGE – 1
Figure 1 shows a mainline (called “main”), from which several release lines (“ver1”, “ver2” and “ver3”) and feature development lines (“projA”, “projb”, and
“projC”) have been branched. Developers work in the mainline or in a feature development line. The release lines are reserved for testing and critical fixes, and
are insulated from the hubbub of development. Eventually all changes submitted to the release lines and the feature development lines get merged into the
mainline. The adverse approach is to “promote” codelines; for example, to promote a development codeline to a release codeline, and branch off a new development
codeline. For example, Figure 2 shows a development codeline promoted to a release codeline (“ver1”) and branched into another development codeline
(“projA”). Each release codeline starts out as a development codeline, and development moves from codeline to codeline.
IMAGE – 2
The promotion scheme suffers from two crippling drawbacks: (1) it requires the policy of a codeline to change, which is never easy to communicate to everyone;
(2) it requires developers to relocate their work from one codeline to another, which is error-prone and time-consuming. 90% of SCM “process” is enforcing
codeline promotion to compensate for the lack of a mainline. Process is streamlined and simplified when you use a mainline model. With a
mainline, contributors’ workspaces and environments are stable for the duration of their tasks at hand, and no additional administrative overhead is incurred as
software products move forward to maturity.
4. Branching
Branching, the creation of variant codelines from other codelines, is the most problematic area of SCM. Different SCM tools support branching in markedly
different ways, and different policies require that branching be used in still more different ways. We found the following guidelines helpful when branching (and
sometimes when avoiding branching):·
Branch only when necessary. Every branch is more work – more builds, more changes to be propagated among codelines, more source file merges. If you keep this in mind every time you consider making a branch you may avoid sprouting unnecessary branches.
· Don’t copy when you mean to branch. An alternative to using your SCM tool’s branching mechanism is to copy a set of source files from one codeline and
check them in to another as new files. Don’t think that you can avoid the costs of branching by simply copying. Copying incurs all the headaches of branching –
additional entities and increased complexity – but without the benefit of your SCM system’s branching support. Don’t be fooled: even “read-only” copies
shipped off to another development group “for reference only” often return with changes made. Use your SCM system to make branches when you spin off parts
or all of a codeline.
· Branch on incompatible policy. There is one simple rule to determine if a codeline should be branched: it should be branched when its users need different
check-in policies. For example, a product release group may need a check-in policy that enforces rigorous testing, whereas a development team may need a
policy that allows frequent check-ins of partially tested changes. This policy divergence calls for a codeline branch. When one development group doesn’t
wish to see another development group’s changes, that is also a form of incompatible policy: each group should have its own branch.
· Branch late. To minimize the number of changes that need to be propagated from one branch to another, put off creating a branch as long as possible. For
example, if the mainline branch contains all the new features ready for a release, do as much testing and bug fixing in it as you can before creating a release
branch. Every bug fixed in the mainline before the release branch is created is one less change needing propagation between branches.
· Branch instead of freeze. On the other hand, if testing requires freezing a codeline, developers who have pending changes will have to sit on their changes
until the testing is complete. If this is the case, branch the codeline early enough so that developers can check in and get on with their work.
5. Change Propagation
Once you have branched codelines, you face the chore of propagating file changes across branches. This is rarely a trivial task, but there are some things you can do to
keep it manageable.
· Make original changes in the branch that has evolved the least since branching. It is much easier to merge a change from a file that is close to the common
ancestor than it is to merge a change from a file that has diverged considerably. This is because the change in the file that has diverged may be built upon
changes that are not being propagated, and those unwanted changes can confound the merge process. You can minimize the merge complexity by making
original changes in the branch that is the most stable. For example, if a release codeline is branched from a mainline, make a bug fix first in the release line and
then merge it into the mainline. If you make the bug fix in the mainline first, subsequently merging it into a release codeline may require you to back out
other, incompatible changes that aren’t meant to go into the release codeline.
· Propagate early and often. When it’s feasible to propagate a change from one branch to another (that is, if the change wouldn’t violate the target branch’s
policy), do it sooner rather than later. Postponed and batched change propagations can result in stunningly complex file merges.
· Get the right person to do the merge. The burden of change propagation can be lightened by assigning the responsibility to the engineer best prepared to resolve
file conflicts. Changes can be propagated by (a) the owner of the target files, (b) the person who make the original changes, or (c) someone else. Either (a) or (b)
will do a better job than (c).
6. Builds
A build is the business of constructing usable software from original source files. Builds are more manageable and less prone to problems when a few key practices are
observed:
· Source + tools = product. The only ingredients in a build should be source files and the tools to which they are input. Memorized procedures and yellow stickies
have no place in this equation. Given the same source files and build tools, the resulting product should always be the same. If you have rote setup procedures,
automate them in scripts. If you have manual setup steps, document them in build instructions. And document all tool specifications, including OS, compilers, include files, link libraries, make programs, and executable paths.
· Check in all original source. When software can’t be reliably reproduced from the same ingredients, chances are the ingredient list is incomplete. Frequently
overlooked ingredients are makefiles, setup scripts, build scripts, build instructions, and tool specifications. All of these are the source you build with.
Remember: source + tools = product.
· Segregate built objects from original source. Organize your builds so that the directories containing original source files are not polluted by built objects.
Original source files are those you create “from an original thought process” with a text editor, an application generator, or any other interactive tool. Built objects
are all the files that get created during your build process, including generated source files. Built objects should not go into your source code directories.
Instead, build them into a directory tree of their own. This segregation allows you to limit the scope of SCM-managed directories to those that contain only
source. It also corrals the files that tend to be large and/or expendable into one location, and simplifies disk space management for builds.
· Use common build tools. Developers, test engineers, and release engineers should all use the same build tools. Much time is wasted when a developer
cannot reproduce a problem found in testing, or when the released product varies from what was tested. Remember: source + tools = product.
· Build often. Frequent, end-to-end builds with regression testing (“sanity” builds) have two benefits: (1) they reveal integration problems introduced by check-ins,
and (2) they produce link libraries and other built objects that can be used by developers. In an ideal world, sanity builds would occur after every check-in, but
in an active codeline it’s more practical to do them at intervals, typically nightly. Every codeline branch should be subject to regular, frequent, and complete builds
and regression testing, even when product release is in the distant future.
· Keep build logs and build outputs. For any built object you produce, you should be able to look up the exact operations (e.g., complete compiler flag and link
command text) that produced the last known good version of it. Archive build outputs and logs, including source file versions (e.g., a label), tool and OS
version info, compiler outputs, intermediate files, built objects, and test results, for future reference. As large software projects evolve, components are handed
off from one group to another, and the receiving group may not be in a position to begin builds of new components immediately. When they do begin to build
new components, they will need access to previous build logs in order to diagnose the integration problems they encounter.
7. Process
It would take an entire paper, or several papers, to explore the full scope of SCM process design and implementation, and many such papers have already been written. Furthermore, your shop has specific objectives and requirements that will be reflected in the process you implement, and we do not presume to know what those are. In our experience, however, some process concepts are key to any SCM implementation:
· Track change packages. Even though each file in a codeline has its revision history, each revision in its history is only useful in the context of a set of related
files. The question “What other source files were changed along with this particular change to foo.c?” can’t be answered unless you track change
packages, or sets of files related by a logical change. Change packages, not individual file changes, are the visible manifestation of software development.
Some SCM systems track change packages for you; if yours doesn’t, write an interface that does.
· Track change package propagations. One clear benefit of tracking change packages is that it becomes very easy propagate logical changes (e.g., bug fixes)
from one codeline branch to another. However, it’s not enough to simply propagate change packages across branches; you must keep track of which
change packages have been propagated, which propagations are pending, and which codeline branches are likely donors or recipients of propagations.
Otherwise you’ll never be able to answer the question “Is the fix for bug X in the release Y codeline?” Again, some SCM systems track change package
propagations for you, whereas with others you’ll have to write your own interface to do it. Ultimately, you should never have to resort to “diffing” files to
figure out if a change package has been propagated between codelines.
· Distinguish change requests from change packages. “What to do” and “what was done” are different data entities. For example, a bug report is a “what to do”
entity and a bug fix is a “what was done” entity. Your SCM process should distinguish between the two, because in fact there can be a one-to-many
relationship between change requests and change packages.
· Give everything an owner. Every process, policy, document, product, component, codeline, branch, and task in your SCM system should have an
owner. Owners give life to these entities by representing them; an entity with an owner can grow and mature. Ownerless entities are like obstacles in an ant trail
– the ants simply march around them as if they weren’t there.
· Use living documents. The policies and procedures you implement should be described in living documents; that is, your process documentation should be as
readily available and as subject to update as your managed source code. Documents that aren’t accessible are useless; documents that aren’t updateable
are nearly so. Process documents should be accessible from all of your development environments: at your own workstation, at someone else’s
workstation, and from your machine at home. And process documents should be easily updateable, and updates should be immediately available.
8. Conclusion
Best practices in SCM, like best practices anywhere, always seem obvious once you’ve used them. The practices discussed in this paper have worked well for us, but
we recognize that no single, short document can contain them all. So we have presented the practices that offer the greatest return and yet seem to be violated more
often than not. We welcome the opportunity to improve this document, and solicit both challenges to the above practices as well as the additions of new ones.
10. References
Berczuk, Steve. “Configuration Management Patterns”, 1997. Available at
http://www.bell-labs.com/cgi-user/OrgPatterns/OrgPatterns?ConfigurationManagementPatterns.
Compton, Stephen B, Configuration Management for Software, VNR Computer
Library, Van Nostrand Reinhold, 1993.
Continuus Software Corp., “Work Area Management”, Continuus/CM: Change
Management for Software Development. Available at
http://www.continuus.com/developers/developersACE.html.
Dart, Susan, “Spectrum of Functionality in Configuration Management Systems”,
Software Engineering Institute, 1990. Available at
http://www.sei.cmu.edu/technology/case/scm/tech_rep/TR11_90/TOC_TR11_90.html
Jameson, Kevin, Multi Platform Code Management, O’Reilly & Associates, 1994
Linenbach, Terris, “Programmers’ Canvas: A pattern for source code management”
1996. Available at http://www.rahul.net/terris/ProgrammersCanvas.htm.
Lyon, David D, Practical CM, Raven Publishing, 1997
McConnell, Steve, “Best Practices: Daily Build and Smoke Test”,
IEEE Software, Vol. 13, No. 4, July 1996
van der Hoek, Andre, Hall, Richard S., Heimbigner, Dennis, and Wolf, Alexander L.,
“Software Release Management”, Proceedings of the 6th European Software
Engineering Conference, Zurich, Switzerland, 1997.
10. Author
Laura Wingerd
Perforce Software, Inc.
wingerd@perforce.com
Christopher Seiwald
Perforce Software, Inc.
seiwald@perforce.com
Tagged : Best / Best Practices / Best practices in SCM / Configuration / Configuration Management / Good / Good Practices / Guide / Ideal / list / Management / Practices / Recomended / Right / SCM best practices / SCM best practices Guide / SCM best practices Techniques / SCM Best Practices Tips / SCM best practices Tutorial / SCM Good Practices / software / Software Configuration Management / Software Configuration Management Best Practices / Software Development / Techniques / Tutorial / What

